If you have ever typed “how to make an eCourse” into Google at midnight, you already know the feeling. You have knowledge worth sharing, a rough idea of who wants it, and no clear picture of what happens between “I have an idea” and “students are enrolled and paying.” That gap is exactly what this guide closes.
The online learning market is not a niche side hustle anymore. The global eLearning market was valued at roughly $353 billion in 2025 and continues to grow at a double-digit annual rate as more professionals turn to online courses for skills they cannot get from a college syllabus (Grand View Research, 2025). That growth is good news for you: there is room for a well-built course, even in a crowded topic, as long as you build it around a real problem instead of a vague outline.
Below is a complete walkthrough covering the steps to creating an online course, the tools and platforms that make production easier, how to launch and price your first digital course, and the online course building strategies that separate courses people finish from courses people abandon after lesson two.
What is an eCourse and why it is worth building
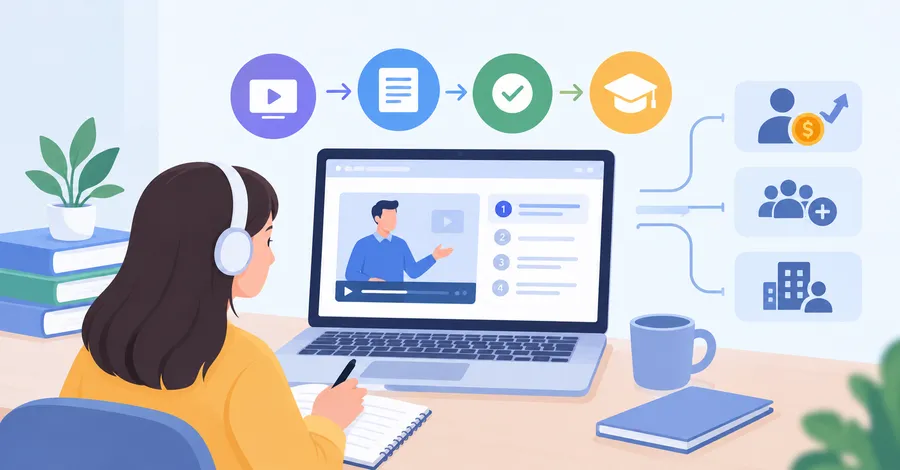
An eCourse is a structured set of lessons, delivered online, that walks a student from a starting skill level to a specific outcome. It can be a self-paced video series, a cohort-based program with live calls, or a hybrid of downloadable worksheets and short video lessons. What separates a real eCourse from a pile of PDFs is structure: a clear learning path, checkpoints along the way, and some method for measuring whether the student actually absorbed the material.
Course creators build eCourses for three main reasons. Some want to turn years of hands-on expertise into a scalable income stream that does not depend on trading hours for dollars. Others use a lower-priced course as an entry point that leads into higher-ticket coaching or consulting. A growing number build internal or customer-facing eCourses to train a team or user base at scale without repeating the same onboarding call every week. Whatever your reason, the underlying process stays roughly the same, and skipping steps almost always shows up later as low completion rates or a launch that falls flat.
It also helps to be honest about what an eCourse is not. It is not a way to get rich from a single weekend of recording, and it is not a substitute for actually solving a problem your audience cares about. Courses that succeed tend to treat the content as a product with real quality standards, not a side project squeezed in between other work.
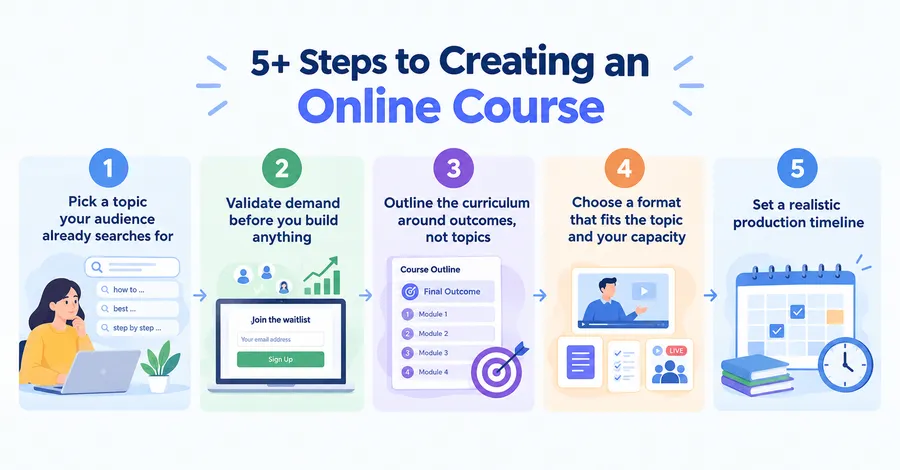
5+ Steps to creating an online course
Before you touch a camera or open a course builder, you need a plan. Skipping this stage is the single biggest reason courses stall out at twenty percent complete and never get finished. These are the steps to creating an online course that has a real chance of both finishing and selling.
Pick a topic your audience already searches for
Start with a problem, not a subject. “Photography” is a subject. “How to shoot in manual mode on a budget mirrorless camera” is a problem. Search Google autocomplete, Reddit threads, and Facebook groups in your niche for the exact phrases people use when they are stuck. If you already have an email list or social following, ask directly what they are struggling with this month rather than guessing from your own assumptions. The more specific the promise, the easier the course is to describe, market, and price later, and the easier it is for a potential student to decide it is exactly what they need.
Validate demand before you build anything
Do not build the full course first. Instead, open a simple waitlist page describing the exact transformation the course delivers, and drive a small amount of traffic to it through an email, a social post, or a short test campaign. If people will not give you an email address for a free description, they are unlikely to pay for the finished product later. Some creators go a step further and pre-sell a “beta” version at a discount before recording a single lesson, which both validates demand and funds production costs like better audio equipment or paid editing help.
Outline the curriculum around outcomes, not topics
Write down the single outcome a student should reach by the end of the course. Then work backward: what does the student need to know or practice at each stage to get there? Group related lessons into modules, and keep each lesson focused on one teachable idea rather than three loosely related ones. A curriculum built around outcomes naturally avoids the trap of dumping everything you know into one course, which is one of the most common reasons completion rates drop off after the first couple of modules.
Choose a format that fits the topic and your production capacity
Some topics work best as short video demonstrations, especially anything involving a visual skill or a piece of software. Others work better as text-based lessons with templates and checklists, or live workshops with recordings attached for people who cannot make it live. Match the format to what actually teaches the skill, not to what looks most impressive on a sales page. A simple screen-recorded tutorial with clear audio will consistently outperform a polished but shallow video, because students came for the outcome, not the production value.
Set a realistic production timeline
Block out specific weeks for outlining, recording, editing, and building the course inside your chosen platform, and treat those blocks the same way you would treat a client deadline. Creators who leave the timeline open-ended are far more likely to let the project drift for months, adding “just one more module” instead of shipping a smaller, complete version and improving it later based on real feedback.
Online course building strategies that actually work
Once the outline exists, production is where most first-time creators lose momentum. These online course building strategies keep the process moving without sacrificing quality along the way.
Batch record instead of building lesson by lesson
Record all the lessons for one module in a single sitting rather than switching between scripting, filming, and editing for each lesson individually. Batching cuts down on setup time for lighting, audio, and screen recording software, and it keeps your energy and tone consistent across lessons, which matters more than most first-time creators expect when a student watches five lessons back to back in one sitting.
Choose your course platform based on what you already have
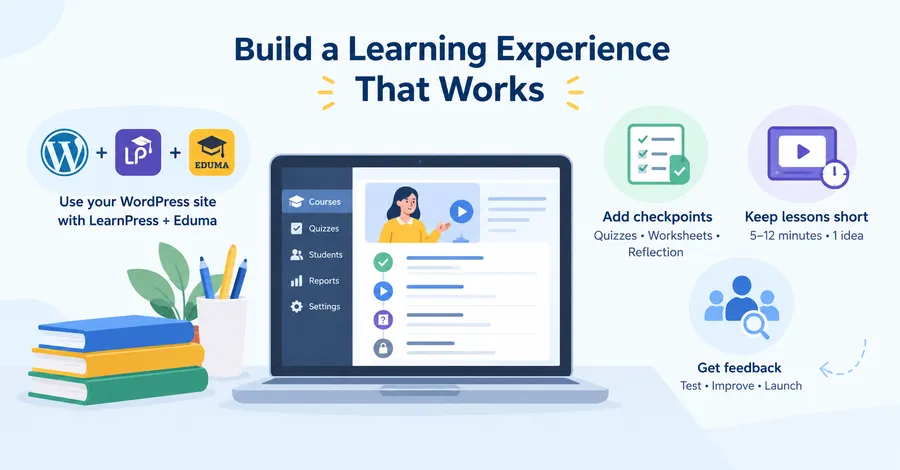
If you are running a WordPress site, an LMS plugin like LearnPress pairs well with an education-focused theme such as Eduma, giving you course listings, quizzes, student dashboards, drip content, and payment integration without moving your content to a third-party marketplace. This setup works particularly well if you already have a WordPress audience or want full ownership of your student data, branding, and pricing, rather than sharing a percentage of every sale with a marketplace. If you would rather avoid managing hosting, plugin updates, and security patches, hosted course platforms handle that layer for you in exchange for a smaller feature set or a revenue cut on each sale. Either route can work well; the deciding factor is usually how much control you want over the student experience versus how much setup you want to manage yourself.
Add checkpoints, not just content
Short quizzes, downloadable worksheets, or a single reflection question at the end of each lesson do more for completion rates than another five minutes of video. They give the student a reason to pause and apply what they just watched instead of passively clicking through to the next lesson without absorbing anything. On a LearnPress-powered course, quiz blocks and completion tracking are built into the plugin, which makes adding these checkpoints a matter of configuration rather than custom development.
Keep lessons short and singular
Aim for five to twelve minutes per lesson, and cover exactly one idea in that window. Long, meandering lessons that try to cover several loosely connected points are the top reason students abandon a course partway through a module. If a topic genuinely needs twenty minutes to explain properly, split it into two or three shorter lessons instead of forcing students to sit through one long recording.
Get a second set of eyes before you launch
Ask one or two people who match your target student to go through the course before it goes public, and watch for the exact points where they hesitate, rewatch a section, or ask a question you thought you had already answered. This kind of small-scale beta test catches confusing explanations and missing steps far more cheaply than discovering them through refund requests after launch.
Tools and equipment for building your first eCourse
You do not need a studio to produce a course that looks and sounds professional. What you need is a short, deliberate list of tools matched to the format you chose earlier, rather than every gadget marketed to course creators.
Recording and editing
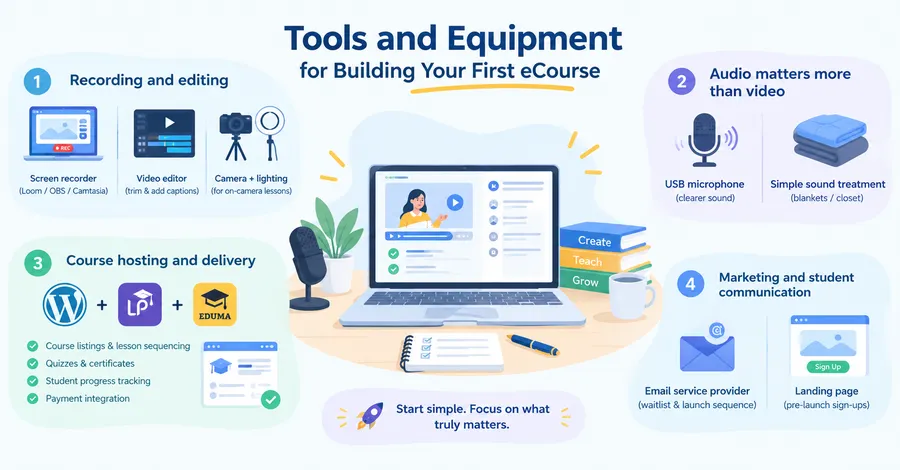
For screen-based tutorials, a screen recording tool such as Loom, OBS Studio, or Camtasia covers most needs, paired with a simple video editor to trim mistakes and add captions. For on-camera lessons, a webcam or entry-level mirrorless camera with a fixed lens is enough; consistent, even lighting from a window or a basic ring light matters far more to how professional the footage looks than the camera model itself. Editing does not need to be elaborate. Cutting long pauses, adding chapter markers, and burning in captions for accessibility will do more for watch time than transitions or animated intros.
Audio matters more than video
A twenty-dollar USB microphone will outperform a built-in laptop microphone by a wide margin, and clean audio is consistently the single biggest factor separating a course that feels professional from one that feels amateur. If you record in a room with an echo, a few blankets or a closet full of clothes can noticeably improve sound quality without spending anything on treatment.
Course hosting and delivery
This is where LearnPress and an education theme like Eduma come in if you are building on WordPress: together they handle course listings, lesson sequencing, quizzes, certificates, and student progress tracking, so you are not stitching together separate tools for hosting video, tracking completion, and processing payment. If your course library grows over time, a WordPress-based setup also makes it easier to bundle courses, offer memberships, or run promotions without rebuilding your entire student experience on a new platform.
Marketing and student communication
An email service provider to manage your waitlist and launch sequence, plus a simple landing page for pre-launch sign-ups, rounds out the essential stack. Resist the urge to add a dozen additional tools before you have sold a single seat. Most successful first launches run on a screen recorder, a microphone, a course platform, and an email list, in that order of importance.
How to launch and price your first digital course
Getting from “the course is built” to “people are enrolled” is its own project, and it deserves its own plan. Here is how to launch and price your first digital course without guessing your way through it.
Choose a pricing model that matches your positioning
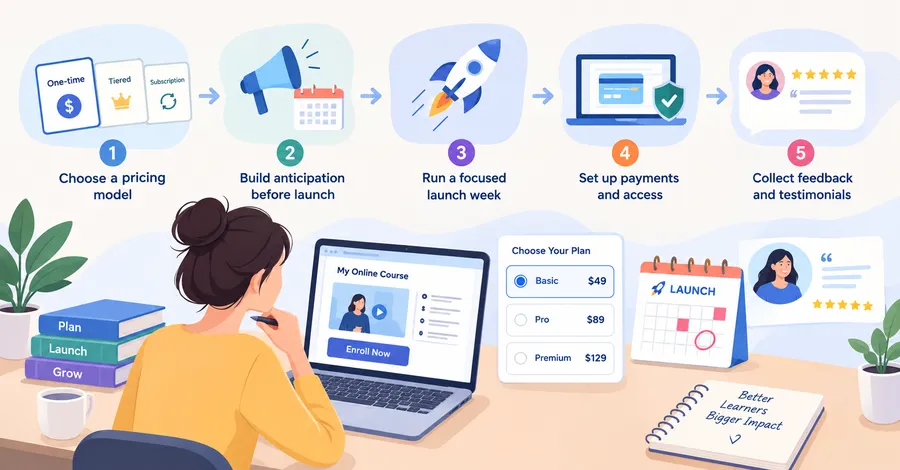
There are three common approaches. A one-time flat price works well for self-paced courses with a clear, narrow outcome, and it is the simplest model to explain and sell for a first launch. A tiered pricing structure, where a higher tier adds live coaching, feedback, or a private community, lets you capture more revenue from students who want extra support without changing your core content. A subscription model suits courses built around content that updates regularly, such as an evolving skills library or an ongoing membership, but it requires steady content investment to keep subscribers from canceling after a month or two. For a first course, a flat one-time price is usually the least risky way to test the market and gather feedback before you commit to a more complex pricing structure.
Build anticipation before the cart opens
Announce a launch date at least two to three weeks ahead of opening enrollment. Use that window to share previews of the content, answer questions publicly from your audience, and let your waitlist know exactly when doors open and when they close. A defined close date creates a genuine reason to enroll now rather than “eventually,” which is where most course sales quietly disappear on an always-open sales page.
Run a focused launch week instead of a slow trickle
Concentrate your promotion into a short, defined window: an email sequence spread across several days, a handful of social posts, and direct outreach to anyone who showed interest earlier in the process. A tight launch window with a genuine deadline consistently outperforms a passive “buy anytime” page for a first cohort, because urgency does the selling work that a quiet, permanently available page simply cannot do on its own.
Decide how you will handle payments and access
Set up your payment processor and access rules before launch day, not during it. If you are using a WordPress LMS like LearnPress, this typically means connecting a payment gateway plugin and confirming that enrolled students automatically get access to the right modules the moment payment clears, without you manually granting access for every sale. Test the full purchase path yourself, from checkout to first login, before you ever send traffic to it.
Collect feedback and testimonials from your first cohort
Your first students are also your best marketing asset. Ask for a short testimonial or a specific, measurable result once they finish a module, and use their language, not your own polished marketing copy, to describe the transformation in future launches. A single specific quote from a real student tends to outperform a paragraph of generic praise you wrote yourself.
Online course creation tips for keeping students engaged after launch
A launch is the beginning, not the finish line. These online course creation tips help you keep students engaged, finishing, and talking about your course well past the first cohort.
Watch where students drop off
Most course platforms, including a WordPress and LearnPress setup, show lesson-level completion data inside the student dashboard. If a large share of students stall at the same lesson, that lesson is usually too long, too dense, or missing a clear next action for the student to take. Treat that data as a running to-do list for improvements, not as a report card to feel discouraged about.
Refresh content on a schedule, not just when it breaks
Set a recurring reminder, every six to twelve months, to review pricing, screenshots, and any tool-specific instructions inside your lessons. Software interfaces change often, and a lesson showing an outdated screen or a discontinued tool erodes student trust even when the underlying advice still holds true.
Turn students into your next source of traffic
Encourage a short review or a shareable win once a student completes the course, and make it easy for them by providing a template caption or a specific question to answer, such as what result surprised them most. Word-of-mouth from a genuinely satisfied student converts better than almost any paid ad you could run for the same budget.
Avoid the most common first-course mistakes
Skipping the validation step, cramming too much material into the first module out of excitement, and setting a price so low that it signals low value are the three mistakes that show up most often in first courses. Pricing a course based on the transformation it delivers, rather than on the number of video minutes it contains, tends to perform noticeably better than underpricing “to be safe” and then struggling to raise the price later.
Keep promoting after the launch window closes
Once the initial launch push ends, do not let the course disappear from view. Mention it naturally in relevant blog posts, link to it from your email signature, and reference specific lessons when answering questions in communities where your target students already spend time. A short case study post, built around one student’s specific before-and-after result, tends to bring in slow, steady enrollments long after the original launch emails stop getting opened. Reopening enrollment periodically with a short, genuine deadline, rather than leaving the cart open indefinitely, keeps the same urgency that worked during the first launch working for every cohort after it.
FAQs about how to make an eCourse
How long does it take to create an online course?
A focused course with five to eight modules typically takes four to eight weeks to plan, record, and edit if you are working part-time around another job. Courses built faster than that often skip the validation step, while courses that stretch past three months usually suffer from scope creep as the creator keeps adding modules instead of shipping.
Do I need expensive equipment to make an eCourse?
No. A decent USB microphone and a laptop’s built-in screen recorder are enough for most tutorial-style courses, since clear audio matters far more to viewers than camera quality or video resolution. Many successful first courses are recorded entirely as screen-share tutorials with no camera footage at all.
Should I use a WordPress LMS or a hosted course platform?
Choose a WordPress LMS like LearnPress with an education theme such as Eduma if you want full ownership of your site, pricing, and student data, especially if you already run a WordPress site for your business. Choose a hosted platform instead if you would rather skip plugin maintenance and hosting in exchange for a simpler setup, often at the cost of a revenue share on each sale.
How much should I charge for my first digital course?
Base your price on the specific outcome the course delivers and what your audience already pays to solve that same problem elsewhere, not on how many hours of video you happened to record. Most first courses in a skills-based niche launch somewhere between $50 and $300, with a higher-priced tier available for students who want added coaching or feedback.
Conclusion
Learning how to make an eCourse comes down to a short list of decisions made in the right order: pick a specific problem, validate it before building anything, outline around an outcome, produce in short focused lessons, and launch with a real deadline instead of a quiet, always-open page. None of that requires a large budget or a full production team. It requires a clear plan and a willingness to put an early, imperfect version in front of real students, then improve it based on what they actually tell you. Start with one module, get it in front of five people willing to give honest feedback, and build the rest of the course around what genuinely helps them finish.
Read more: 5+ Best AI Chatbot Live Chat Plugin for WordPress