Providing recognition is a crucial part of any educational journey. When learners finish a program, they expect a professional document proving their achievement. Many website administrators frequently ask how to create LearnPress certificate layouts quickly and efficiently.
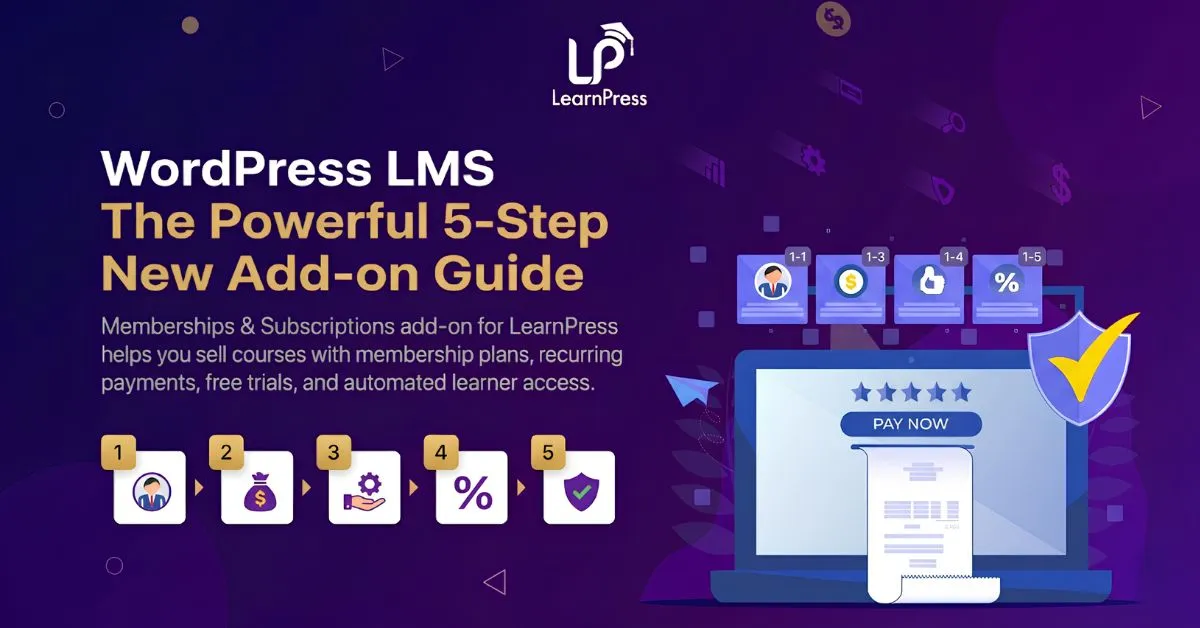
If your goal is to design custom certificates on WordPress effortlessly, you are in the right place. With the release of LearnPress Certificate Add-on v4.2.0 (Certificate V2.0), the entire credentialing experience has been revolutionized.
Powered by the latest Fabric.js library for buttery-smooth drag-and-drop mechanics and a refactored database architecture that ensures your website stays lightning-fast, rewarding your students has never been this intuitive.
In this detailed guide, we will explore every feature of this new interface so you can build stunning certificates in 5 easy steps.
Table of Contents
LearnPress – WordPress LMS Plugin
We provide an amazing WordPress LMS plugin to create & sell online courses. Let’s find out!
Try NowThe Power Behind Certificate V2.0
Before diving into the technical steps, it is important to highlight what makes Certificate V2.0 a significant improvement for educators and developers alike:
- Performance Optimized: Unlike older versions, V2.0 stores certificate data in a dedicated custom database table instead of bloating your standard WordPress
wp_poststable. This means your website speed remains unaffected, even if you issue thousands of certificates simultaneously. - True Drag-and-Drop: The pure visual editor requires absolutely no coding skills. You retain total creative control without hiring a graphic designer.
- Multiple Formats: Allow students to download their rewards in high-quality PNG or PDF formats.
Step 1: Install and Configure Global Settings
Before designing, ensure you have installed and activated the latest LearnPress Certificate Add-on. If you need help with the installation process, please check our official installation guide.
Once activated, you need to set up how your certificates will behave globally.
(Navigate to LearnPress > Settings > Certificates)
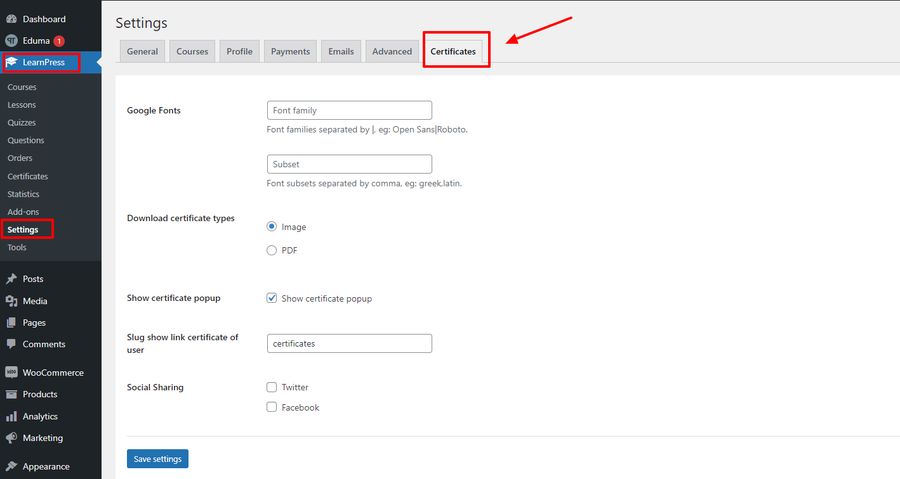
- Typography: Define your Google Font families and subsets to match your brand identity.
- Download Types: Choose whether students will download their documents as an Image (.png) or a PDF.
- Visibility & Sharing: Enable the Show certificate popup option to display the reward immediately upon course completion. You can also enable Social Sharing, allowing students to flaunt their achievements on Twitter and Facebook with a single click.
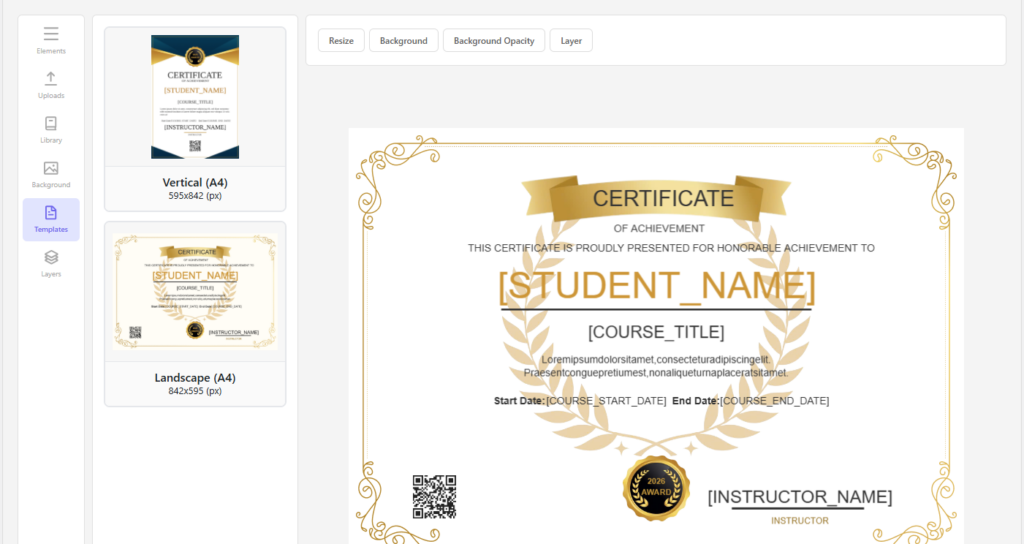
Step 2: Access the Builder and Choose a Template
To begin creating, navigate to LearnPress > Certificates > Add New. Enter your certificate title at the top to easily manage it later.
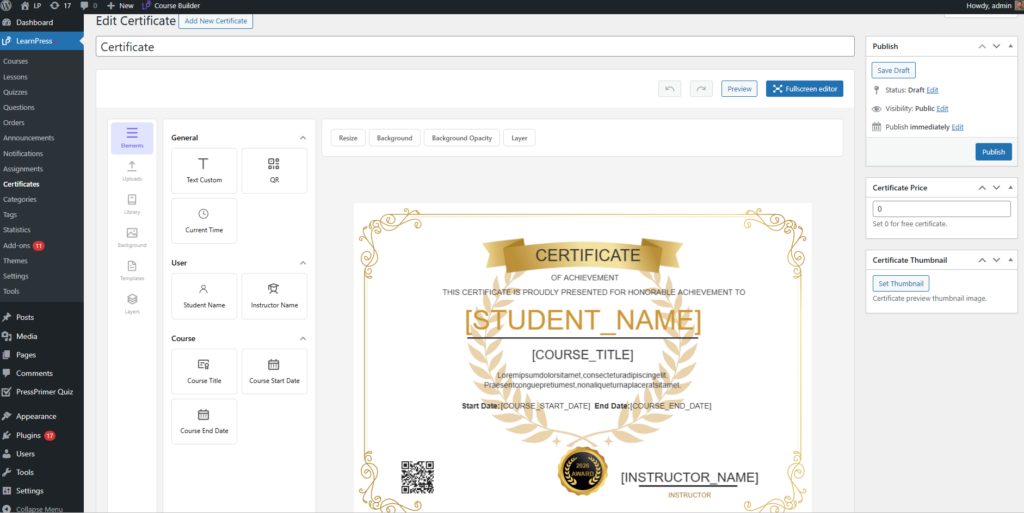
You will be greeted by the new, clean editing interface. You have two ways to start:
- Start from scratch: Build your own layout using a blank canvas.
- Pre-built Templates: Click on the Templates tab in the left panel. LearnPress provides built-in layouts such as Vertical (A4) and Landscape (A4). Clicking a template instantly applies a professional structure to your canvas.
Step 3: Mastering the Drag & Drop Elements
The left panel is the core of the Certificate V2.0 experience. It houses everything you need to populate your document:
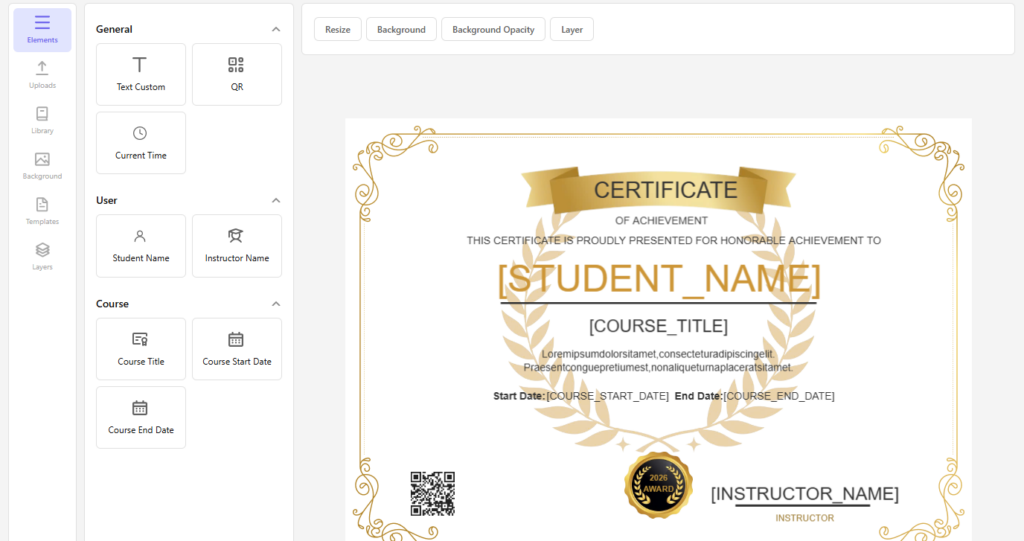
- General Elements: Drag dynamic fields onto the canvas. Use the Student Name, Instructor Name, and Course Title blocks. These smart elements automatically fetch and display real data when a specific user completes the course. You can also add QR Codes for quick authenticity verification and dynamic Start/End Dates for corporate compliance.
- Library: Need design flair? The Library tab provides built-in assets like decorative badges, seals, ribbons, and basic shapes (circles, rectangles, lines). These are perfect for framing or highlighting important text.
- Uploads: Click the Upload tab to bring in your custom corporate assets. Drag and drop your school’s logo, the instructor’s digital signature, or an official company stamp to make the document highly authoritative.
Step 4: Layer Management and Background Styling
A professional document needs a high-quality visual foundation and perfect alignment.
- Backgrounds: Navigate to the Background tab. You can set a solid brand color or upload a high-resolution background image. If your text is hard to read against the background, simply use the Background Opacity slider to fade the image and create elegant contrast.
- Layers: Certificate V2.0 introduces a powerful Layers tab, similar to professional design software. If your logo is hiding behind a shape, simply open the Layers panel and drag the element up or down, or use the “Bring Forward / Send Backward” tools to arrange them perfectly.
Step 5: Preview and Assign to a Course
Always preview your completed work! Use the Preview button to test the layout. You can input dummy data to see exactly how long student names will look without breaking your symmetry. Once satisfied, set the status to Published.
Finally, it is time to link your masterpiece to a curriculum and set up your storefront display:
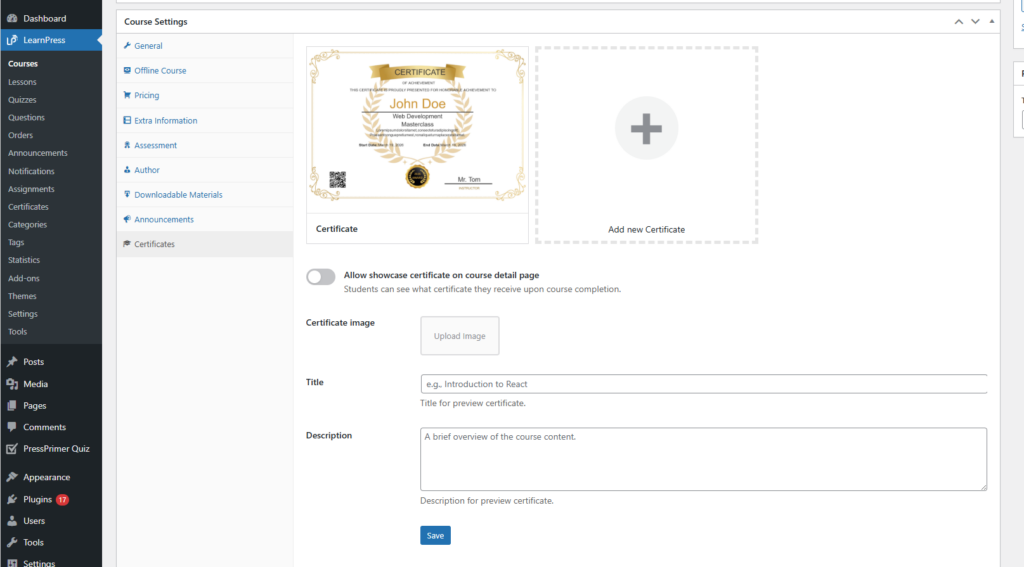
- Go to LearnPress > Courses and Edit your desired course.
- Scroll down to the Course Settings section and navigate to the Certificates tab.
- Select your newly published certificate to assign it to the course.
- Showcase on Course Detail Page (New Feature): To boost enrollments, you can now show potential students exactly what they are working towards! Toggle the “Allow showcase certificate on course detail page” switch.
- Upload a striking Certificate Image (thumbnail), then enter an engaging Title and Description.
- Click Save and Update your course.
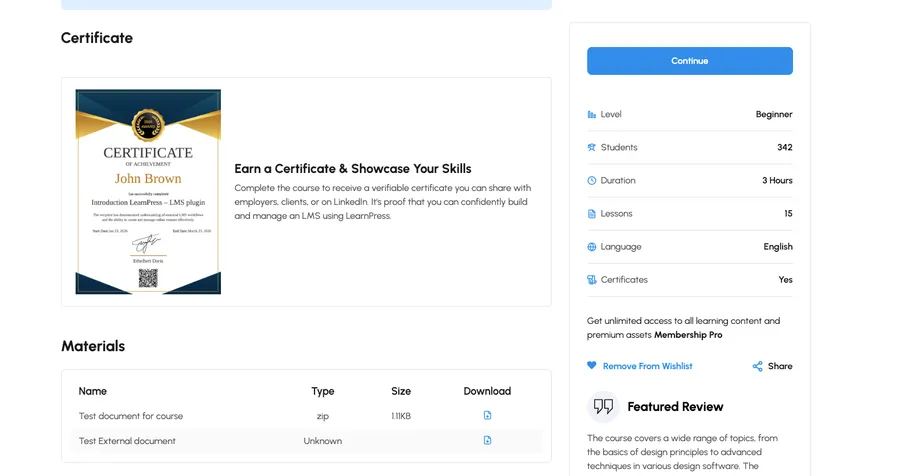
That’s it! Potential students will now see the beautiful reward waiting for them right on your course landing page, highly motivating them to enroll. Meanwhile, enrolled students will automatically receive the official document upon completing their educational journey.
The Final Result: As you can see in the example above, potential students will now see the beautiful reward waiting for them right on your course landing page. This dedicated “Earn a Certificate” section acts as a powerful conversion tool, highly motivating users to enroll. Meanwhile, enrolled students will automatically receive this official document upon completing their educational journey.
Conclusion
Rewarding your dedicated students is no longer a complicated technical challenge. By utilizing the lightweight, highly optimized LearnPress Certificate V2.0, you can design custom certificates that WordPress users will truly love.
Mastering how to create LearnPress certificate designs will ultimately boost course engagement, improve student satisfaction, and organically grow your online academy through social sharing. Open the builder today and start designing!
Frequently Asked Questions (FAQs)
Q1: Do I need coding skills to design custom certificates?
A: Not at all. LearnPress Certificate V2.0 features a completely visual, Fabric.js-powered drag-and-drop builder. You can place dynamic text, QR codes, and images directly onto the canvas without writing a single line of code.
Q2: Will generating thousands of certificates slow down my website?
A: No. The V2.0 update introduced a refactored database structure. Certificates are now stored in optimized custom tables rather than the default WordPress posts table, ensuring peak performance and stability for your LMS.
Q3: Can students download their certificates as PDFs?
A: Yes! In the global settings, administrators can choose to allow certificate downloads as either high-quality PNG images or standard PDF documents.
Q4: Why is my text hard to read against the certificate background?
A: If your typography blends into the image, use the styling options in the editor to lower the "Background Opacity". This fades the background image slightly, creating a clean contrast that makes your text highly readable.
Read more: 7 Best AI Powered LMS Innovations for Education
Contact US | LearnPress:
Website: https://learnpresslms.com/
Fanpage: https://www.facebook.com/learnpresslms
Email: [email protected]