
After installing and activating the add-on, you can begin creating interactive learning content from the WordPress Dashboard.
Navigate to LearnPress → Interactive to access the Interactive management page.
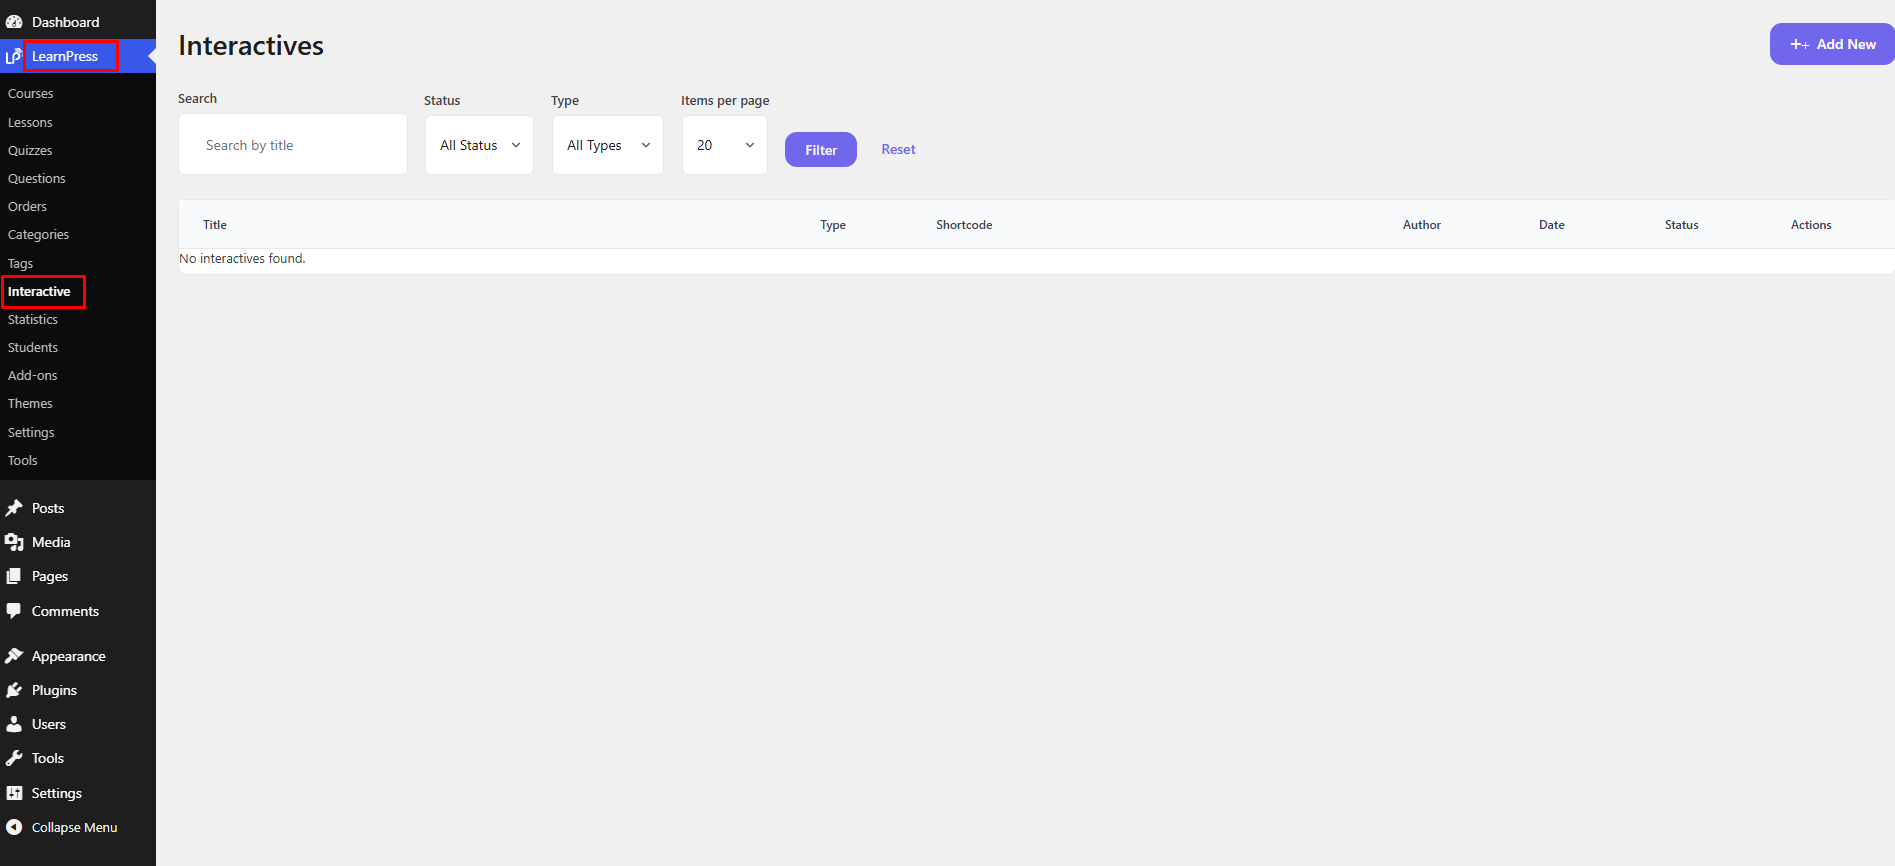
Here, you can view all previously created interactive items, search for specific content, filter items by type or status, and create new interactive content.
To create a new interactive item, click the Add New button located in the top-right corner of the page.
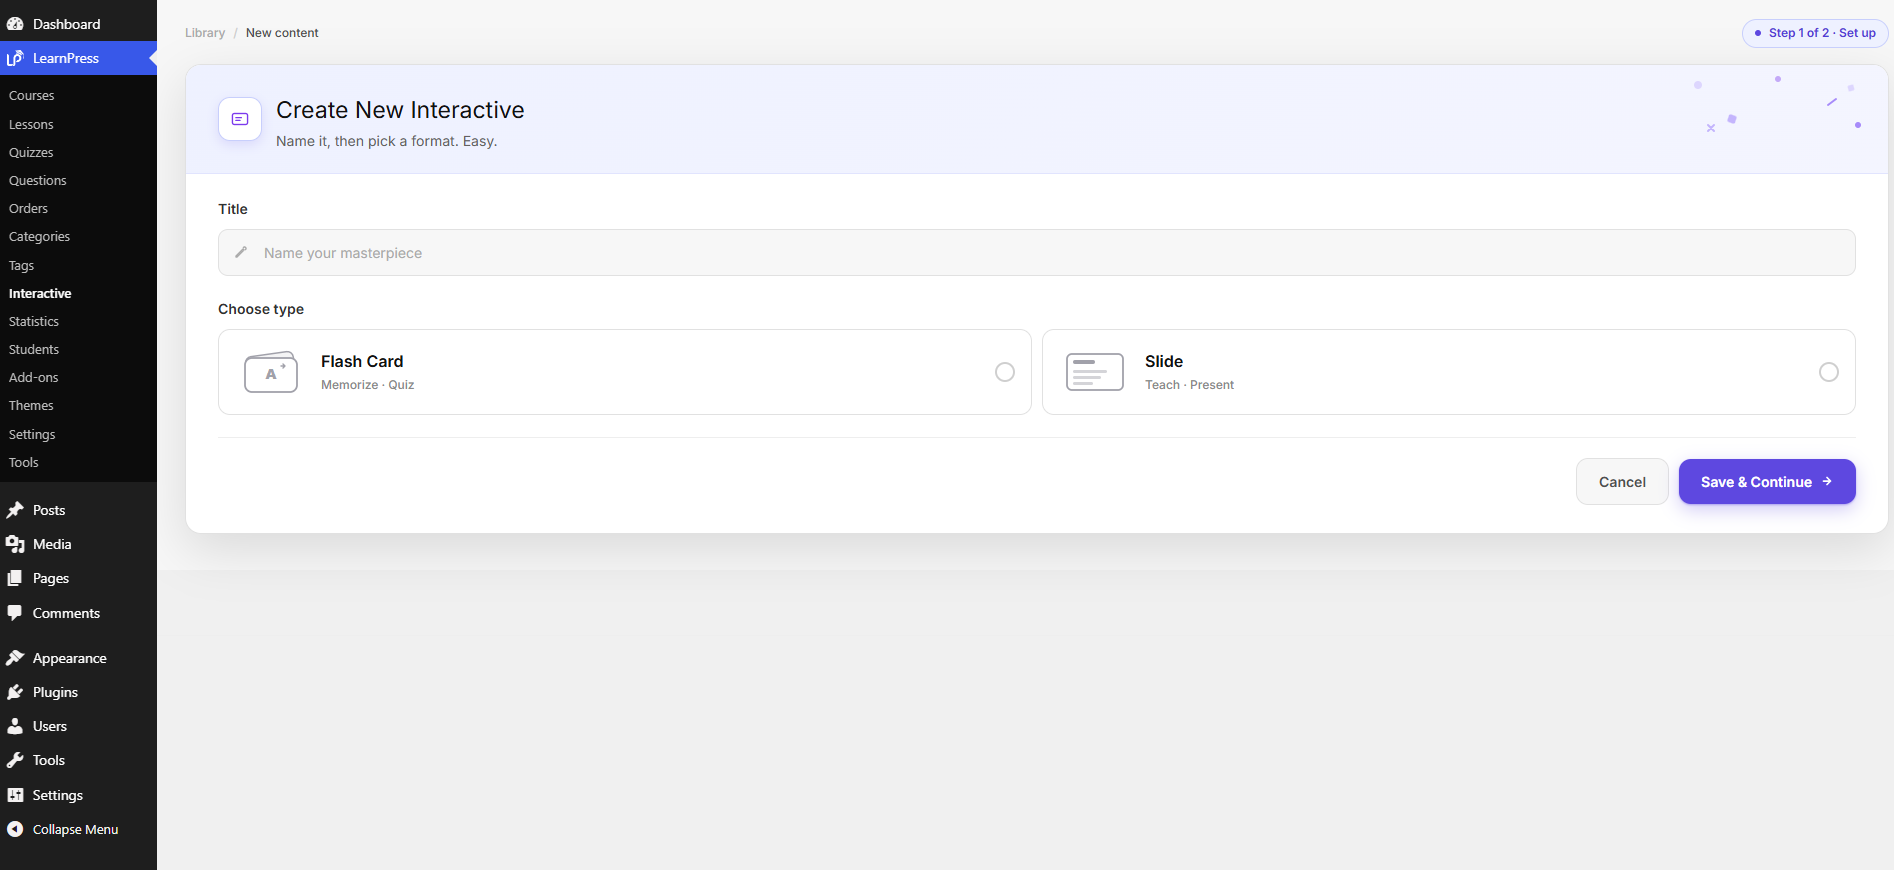
You will be asked to provide the following information:
- Title – Enter a descriptive name for your interactive content. This title is used for management purposes and can help you easily identify the content later.
- Type – Select the type of interactive content you want to create. Currently, the add-on supports:
- Flash Card
- Slide
After entering the required information, click Save & Continue to create the interactive item. The editor corresponding to the selected content type will then open, allowing you to start building your interactive content.
Note: Once an interactive item has been created, it will automatically generate a unique shortcode. You can copy this shortcode and insert it into any LearnPress lesson to display the interactive content on the frontend.
Interactive Management Page
The Interactive management page displays all interactive content that has been created.
Each interactive item includes the following information:
| Column | Description |
| Title | Displays the title of the interactive content. |
| Type | Indicates whether the content is a Flash Card or a Slide. |
| Shortcode | Displays the shortcode used to embed the interactive content into a lesson. Click Copy to copy the shortcode. |
| Status | Shows the current publication status of the interactive item. |
| Author | Displays the user who created the interactive content. |
| Date | Displays the creation or publication date. |
You can also use the available search and filter options to quickly locate existing interactive content.