
Interactive Blocks for LearnPress provides two ways to create Flash Cards. You can either create them as standalone interactive content from the Interactive page or create them directly while editing a LearnPress lesson.
Method 1: Create Flash Cards from the Interactive Page
Navigate to LearnPress → Interactive and click Add New.
Enter a title for your Flash Card set, select Flash Card as the content type, then click Save & Continue.
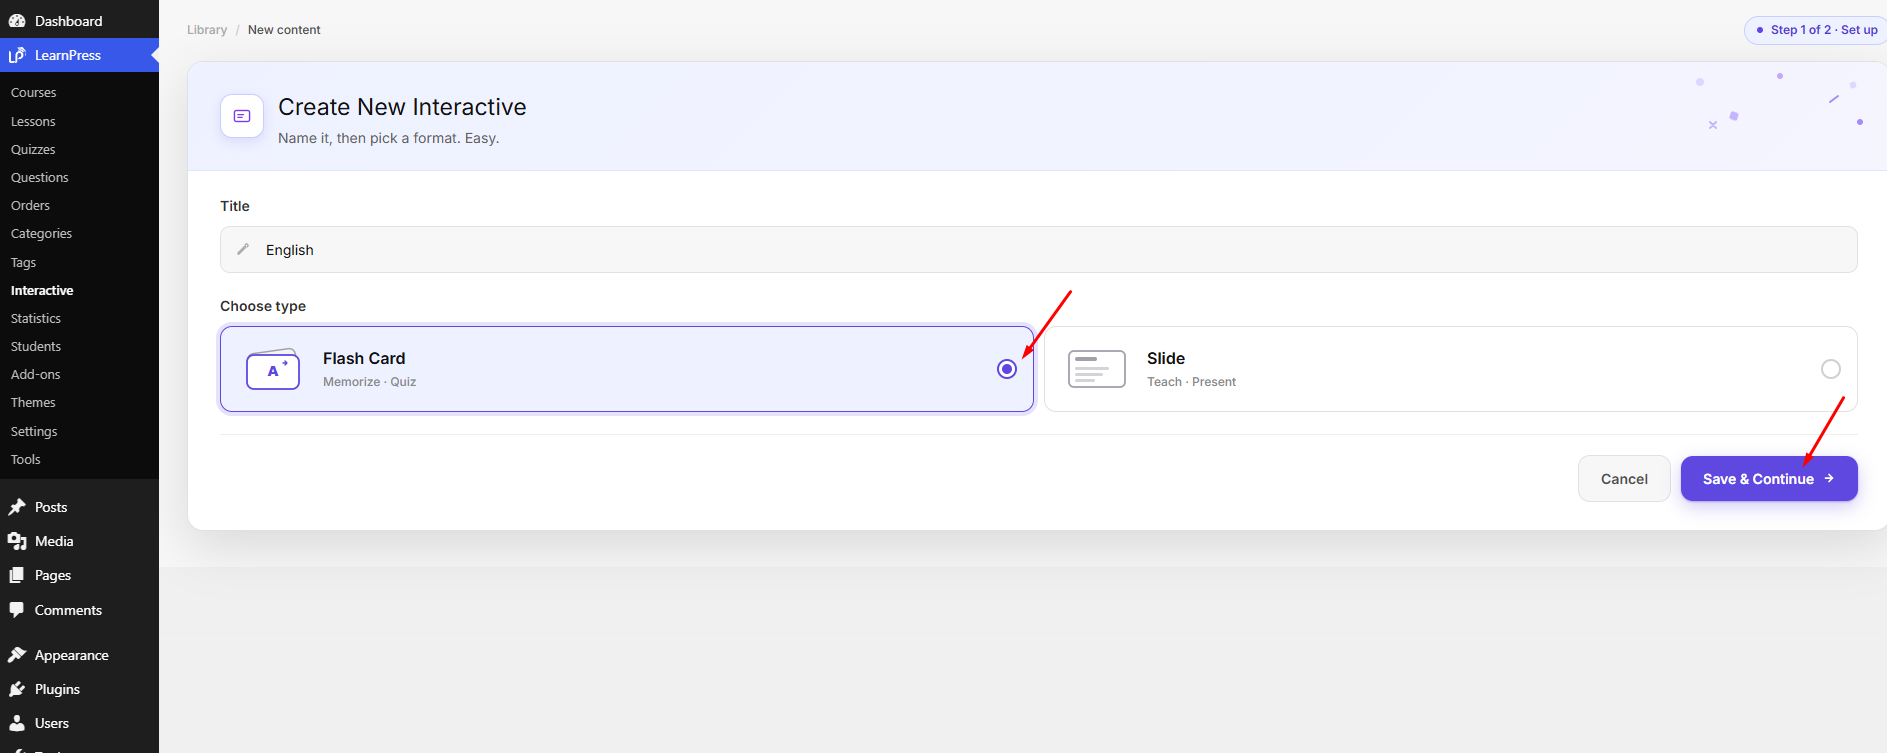
This will open the Flash Card editor, where you can start building your card set.
1. Adding Cards
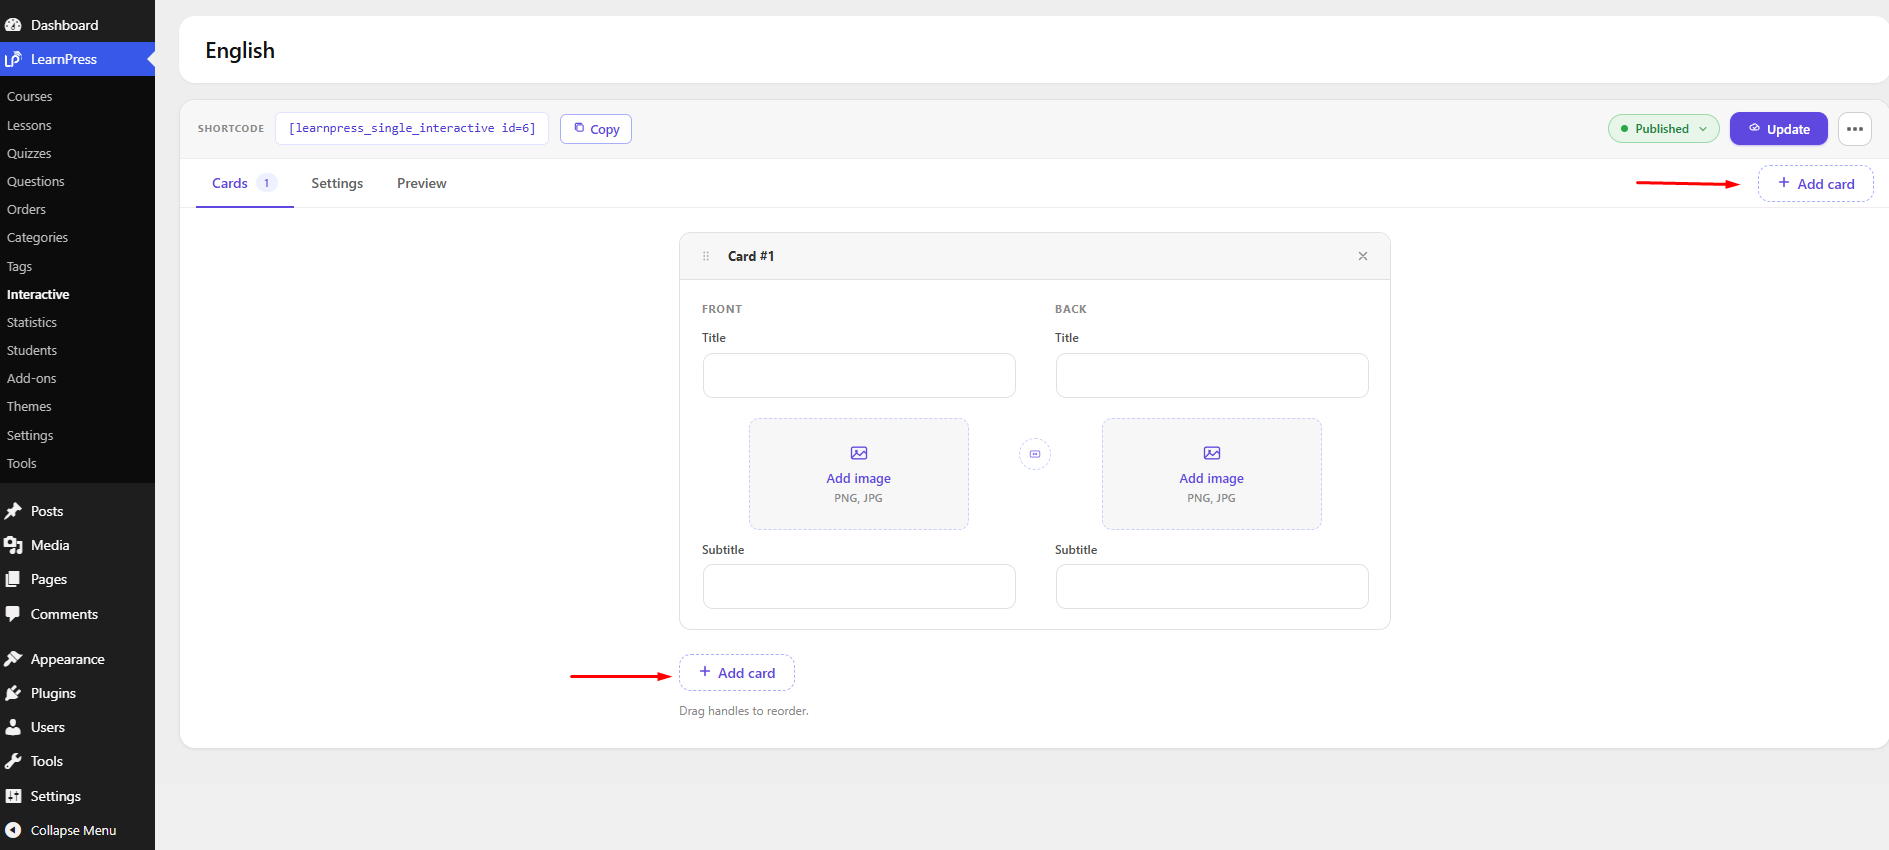
Each Flash Card consists of two sides:
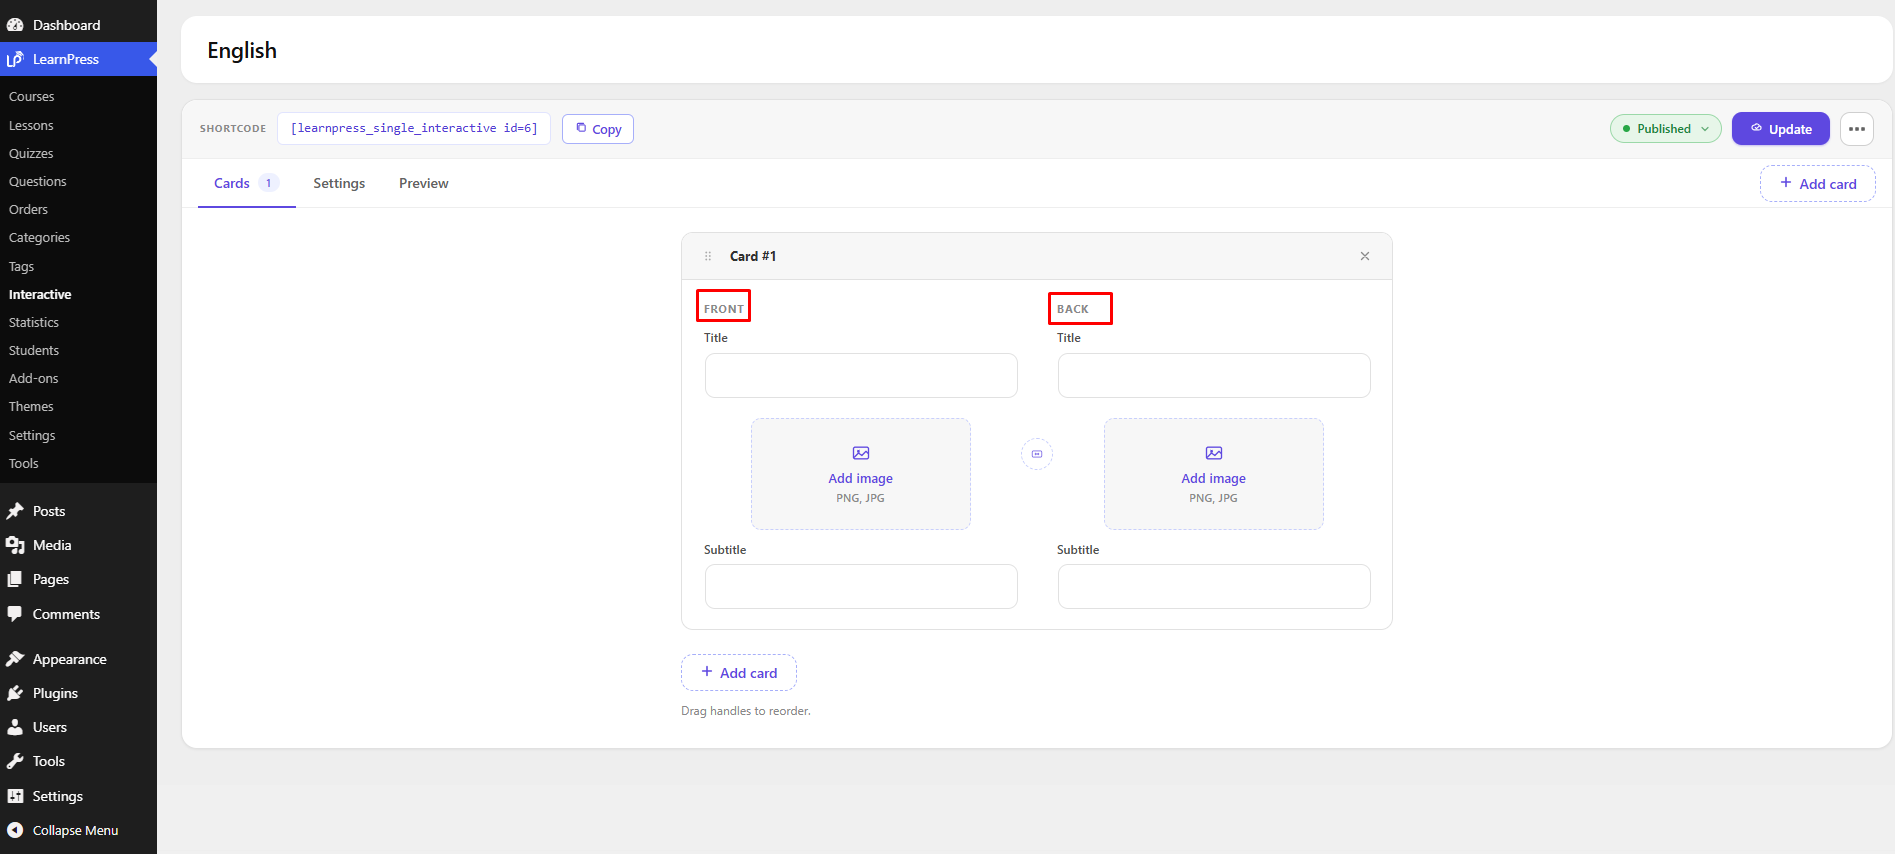
1.1. Front
The front side is displayed first to learners and includes the following fields:
- Title – Enter the main question or topic.
- Image – Upload an image to support the content.
- Subtitle – Add additional text or descriptions.
1.2. Back
The back side is revealed after the learner flips the card and contains:
- Title – Enter the answer or explanation.
- Image – Upload an optional image.
- Subtitle – Add supporting information or notes.
Click Add Card to create additional cards within the same Flash Card set.
When you have finished creating your content, click Update to save your changes.
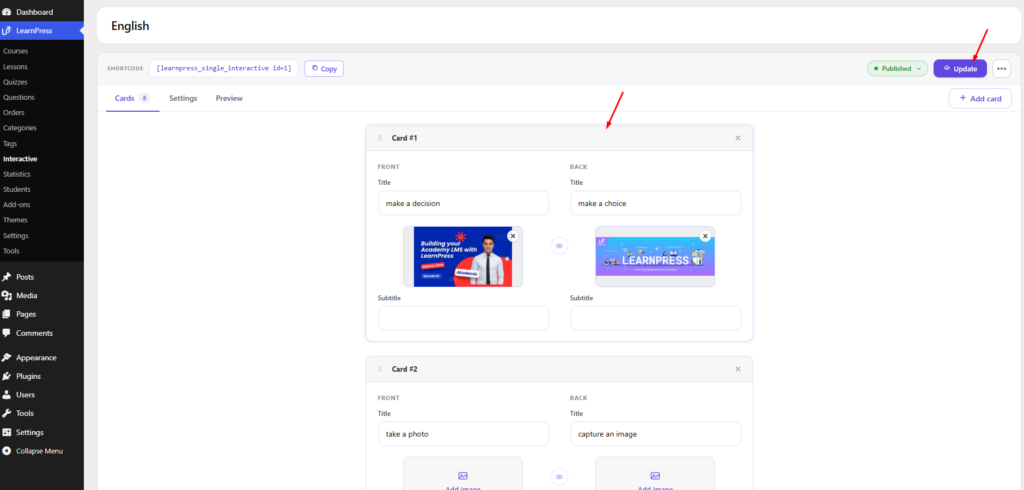
2. Flash Card Settings
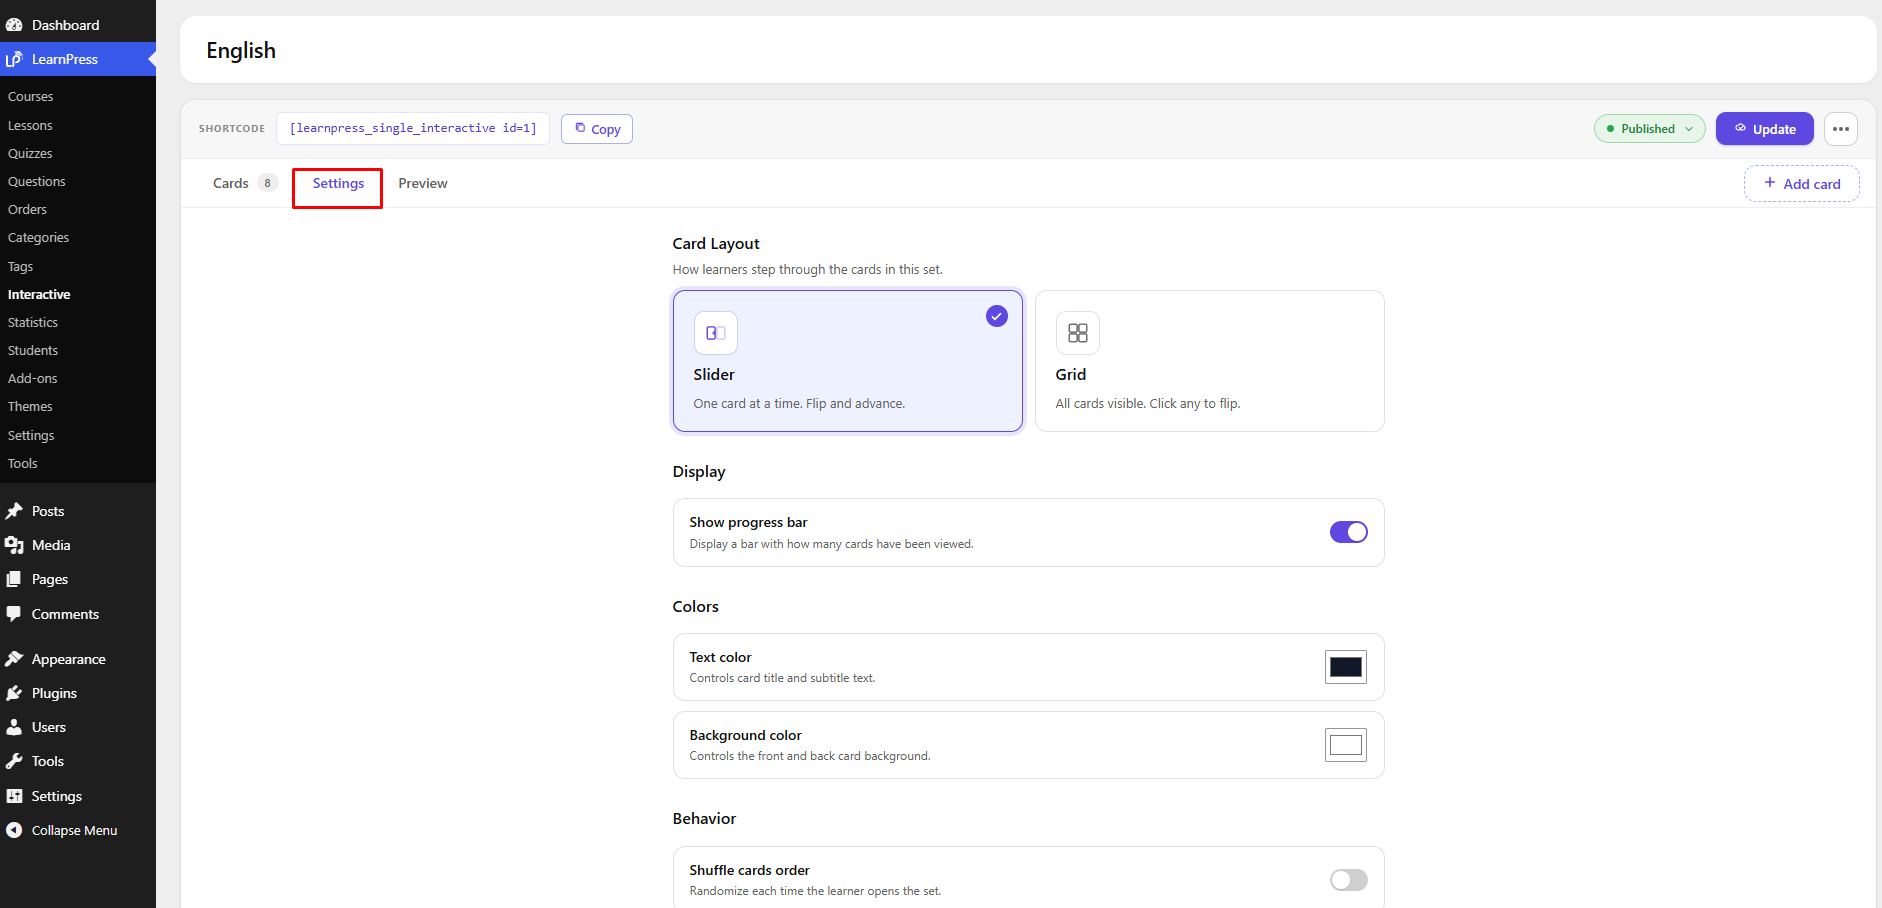
After creating your Flash Card, switch to the Settings tab to customize how learners interact with the cards.
2.1. Card Layout
Choose how Flash Cards are displayed.
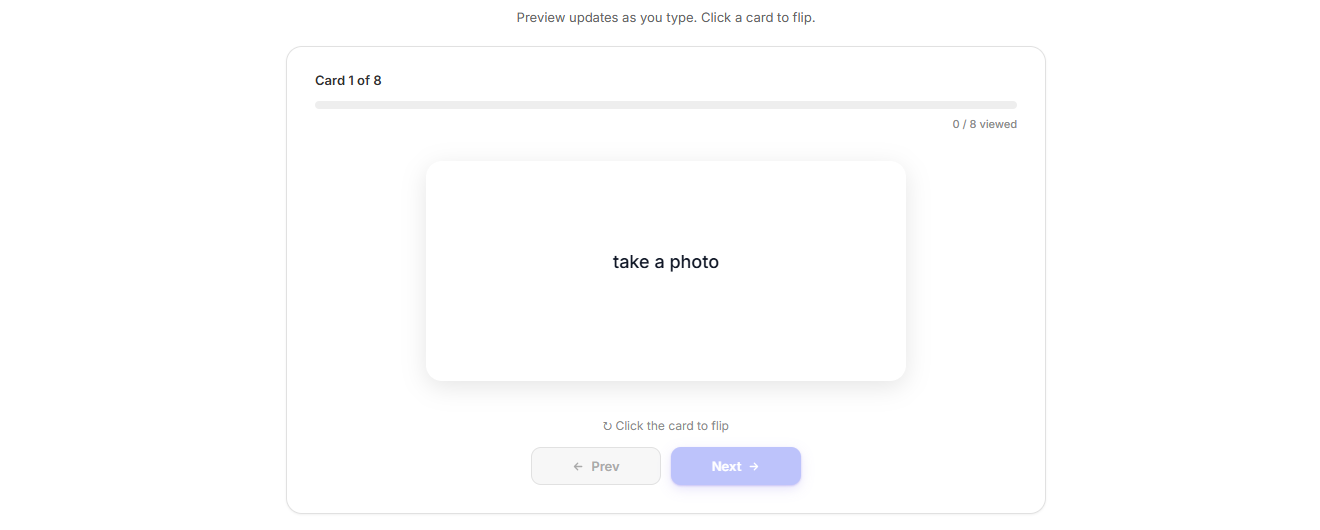
- Slider – Displays one card at a time. Learners flip the current card before moving to the next.
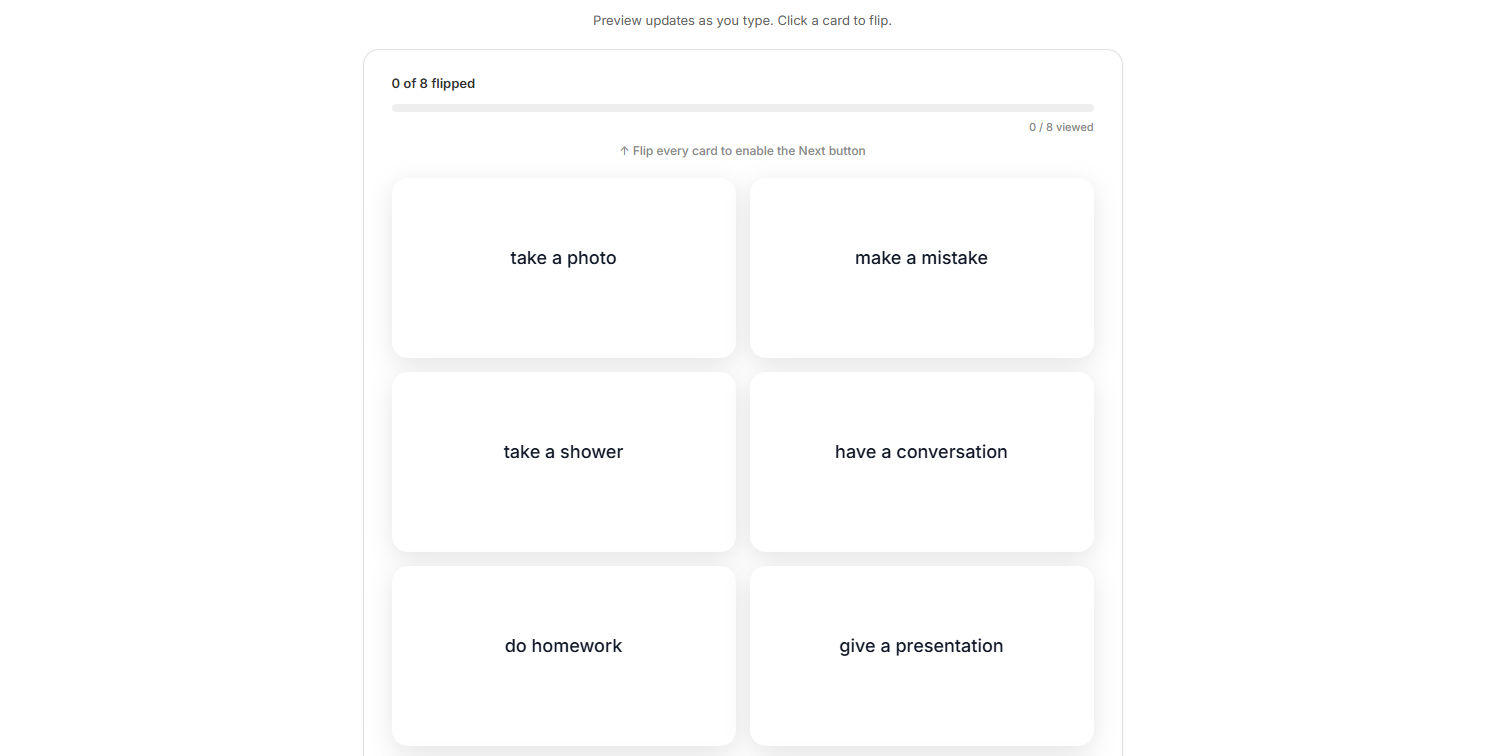
- Grid – Displays all cards in a grid layout. Learners can click any card to flip it.
2.2. Display
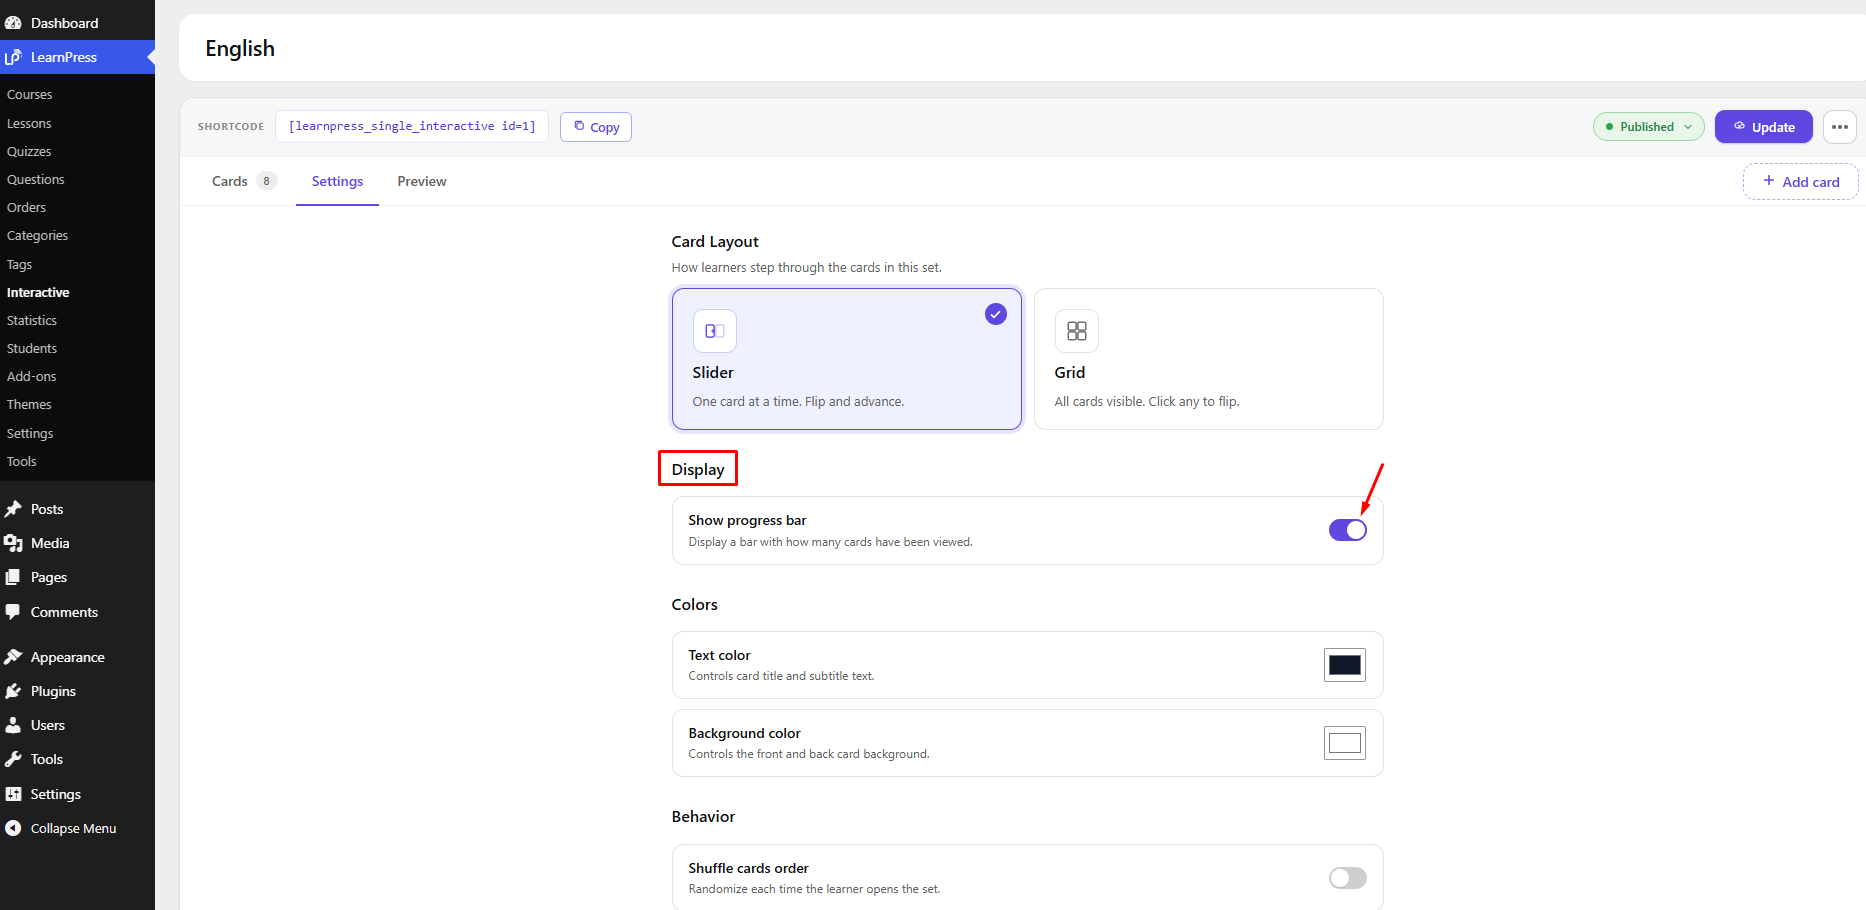
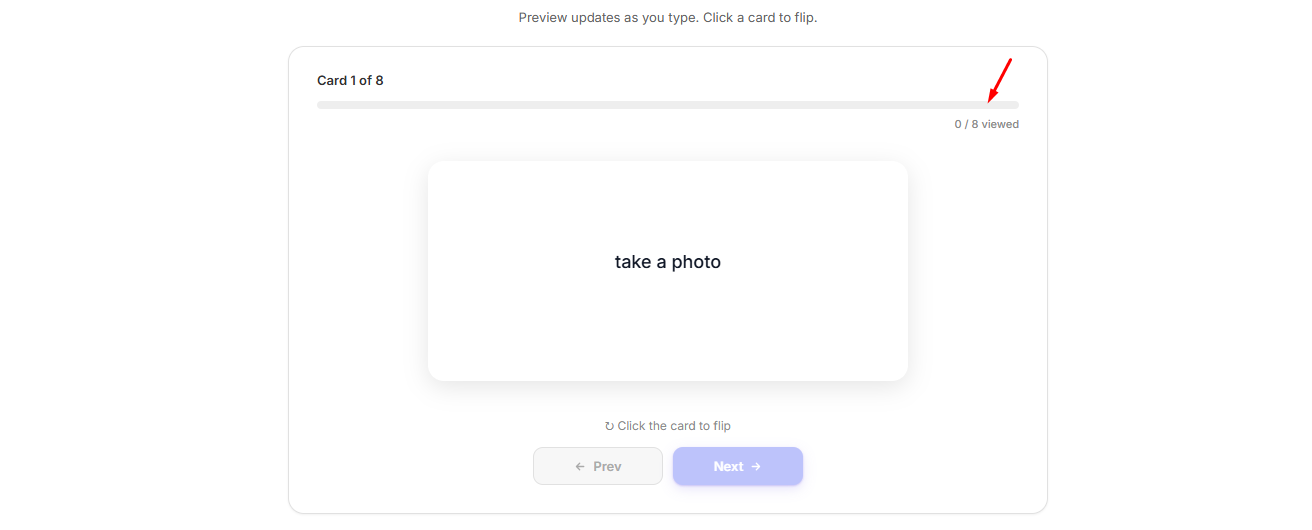
Show Progress Bar
Controls whether a progress bar is displayed during the Flash Card activity.
Disabled: Hides the progress bar from the Flash Card interface.
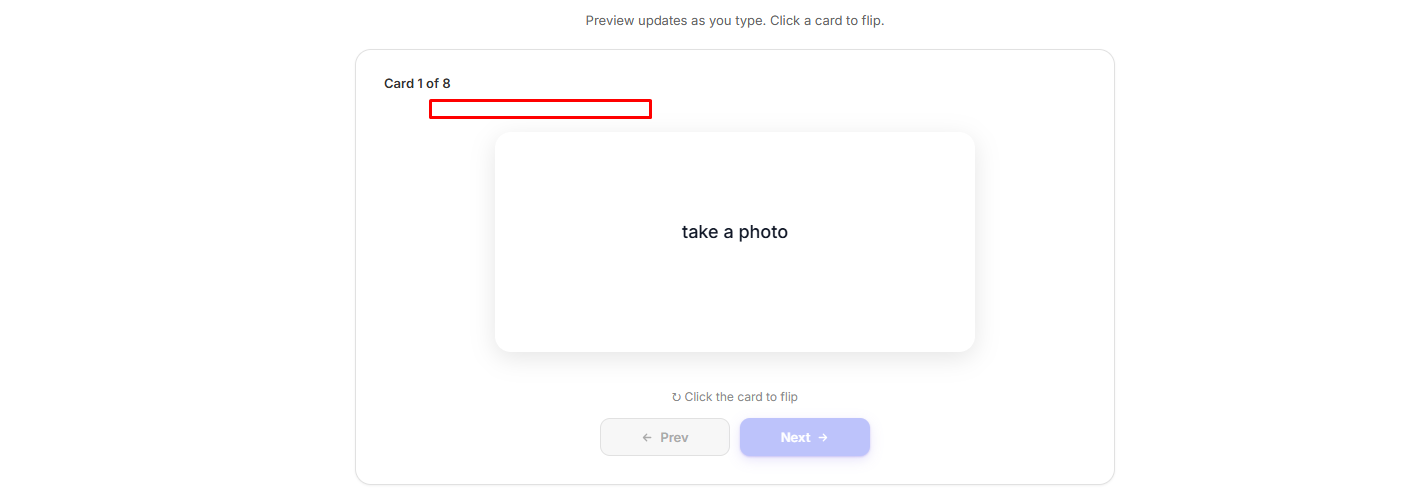
Enabled: Displays a progress bar showing the learner’s progress through the Flash Cards.
2.3. Colors
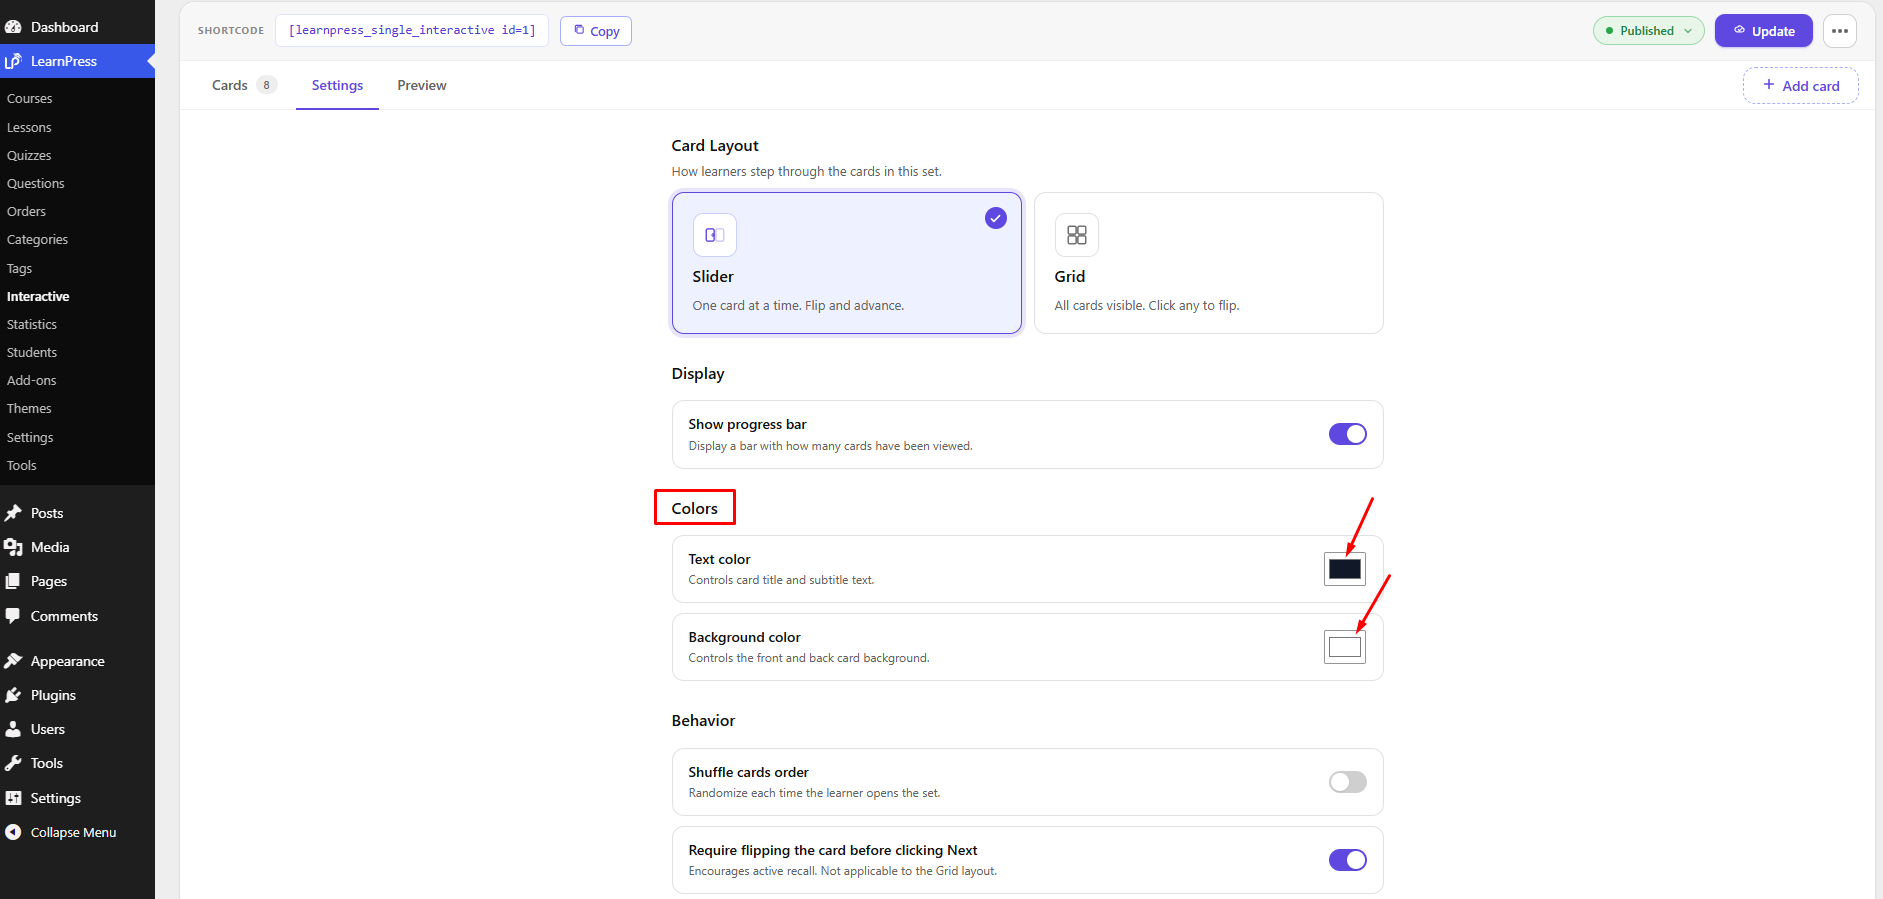
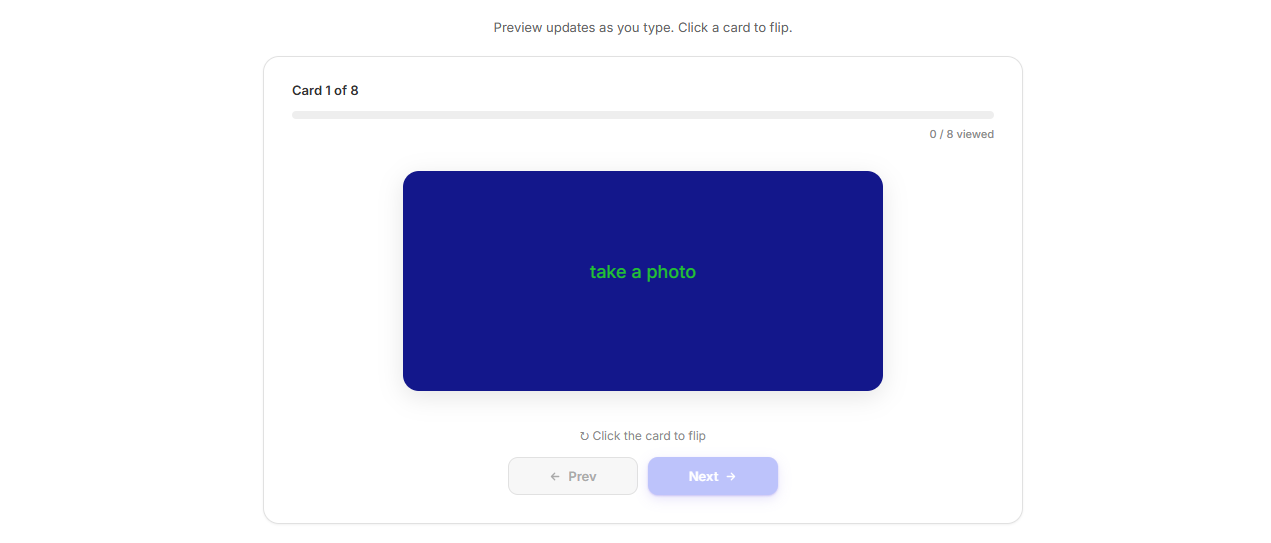
Customize the appearance of your Flash Cards.
- Text Color – Changes the color of the card title and subtitle.
- Background Color – Changes the background color of both the front and back sides of the cards.
2.4. Behavior
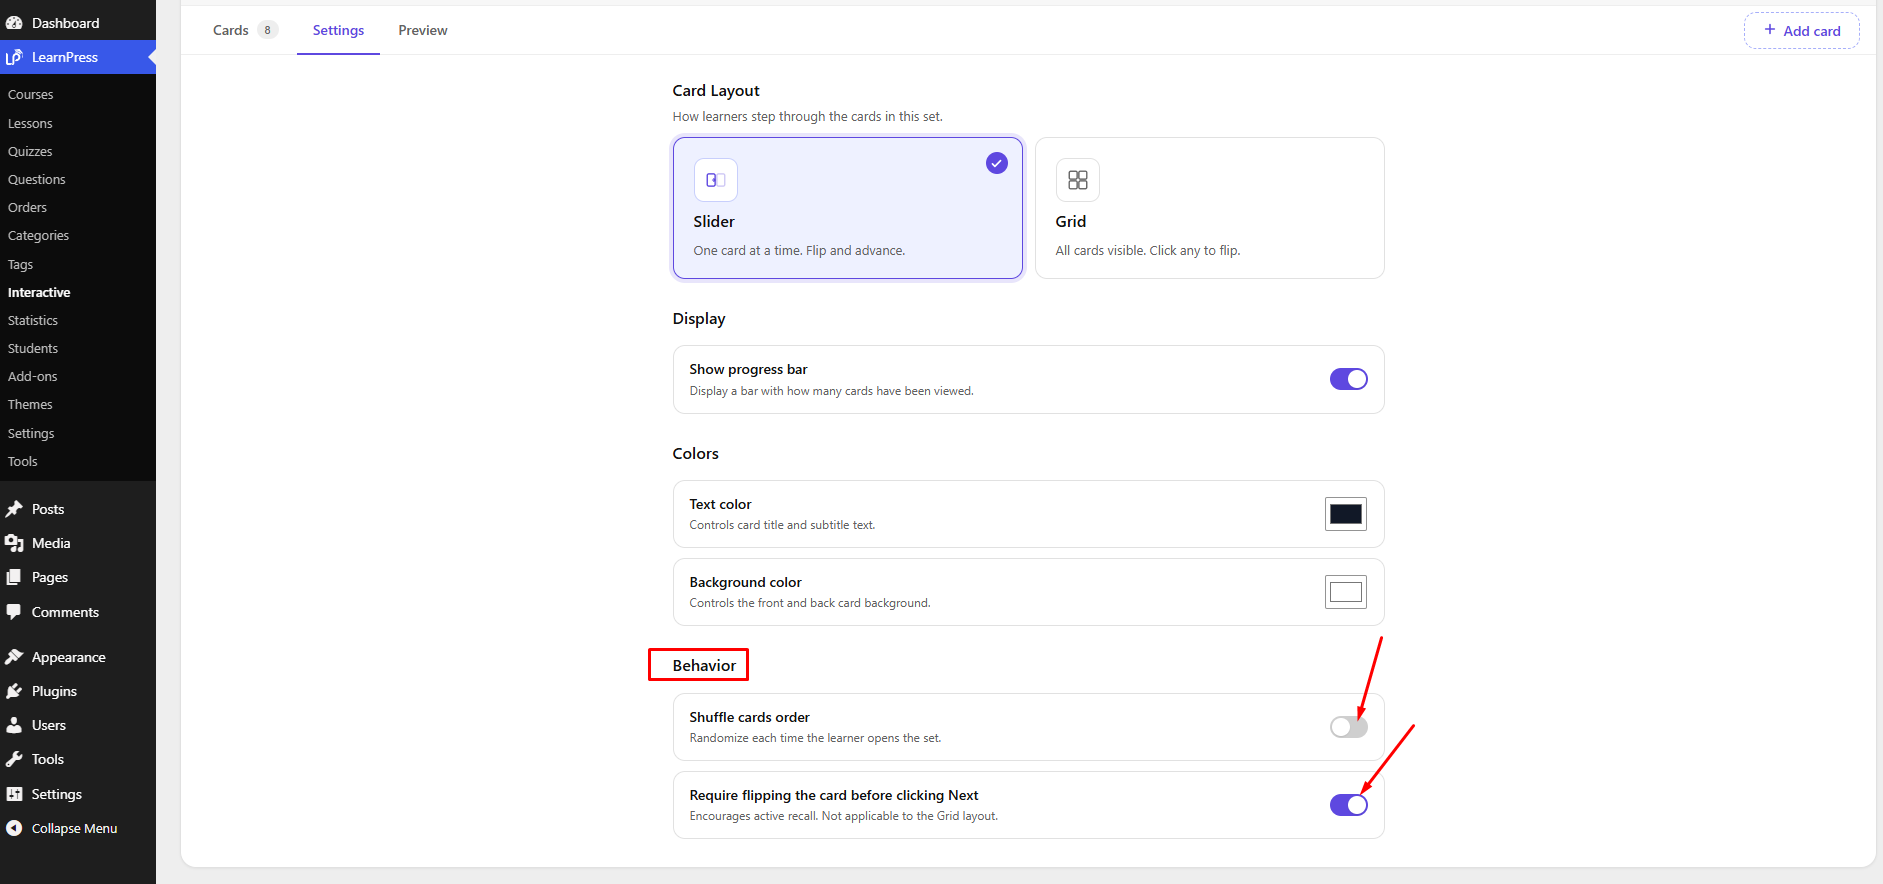
Configure learner interaction.
Shuffle Cards Order
Controls whether the order of Flash Cards is randomized each time learners open the Flash Card set.
- Enabled: The Flash Cards are displayed in a random order each time learners open the Flash Card set, providing a different learning experience on each attempt.
- Disabled: The Flash Cards are displayed in the order they were created, ensuring learners always see the cards in the same sequence.
Require Flipping the Card Before Clicking Next
Controls whether learners must flip the current Flash Card before moving to the next one.
- Enabled: Learners must flip the current Flash Card before the Next button becomes available. This encourages learners to view both the question and the answer before continuing.
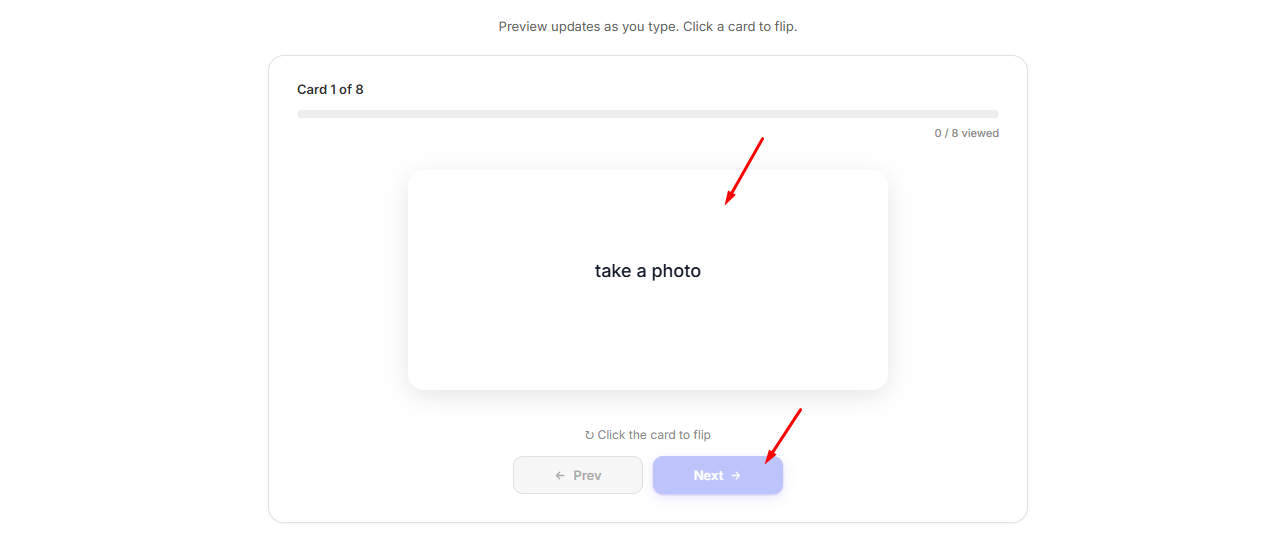
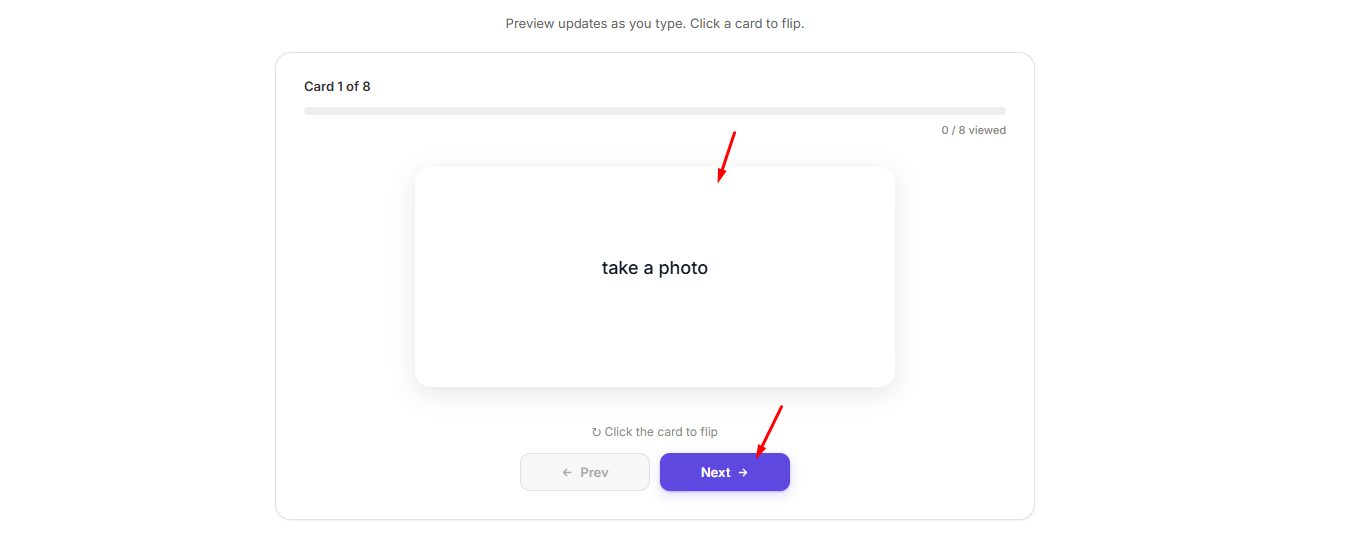
- Disabled: Learners can click the Next button at any time without flipping the current Flash Card.
3. Preview Flash Cards
Open the Preview tab to see how your Flash Cards will appear to learners before publishing.
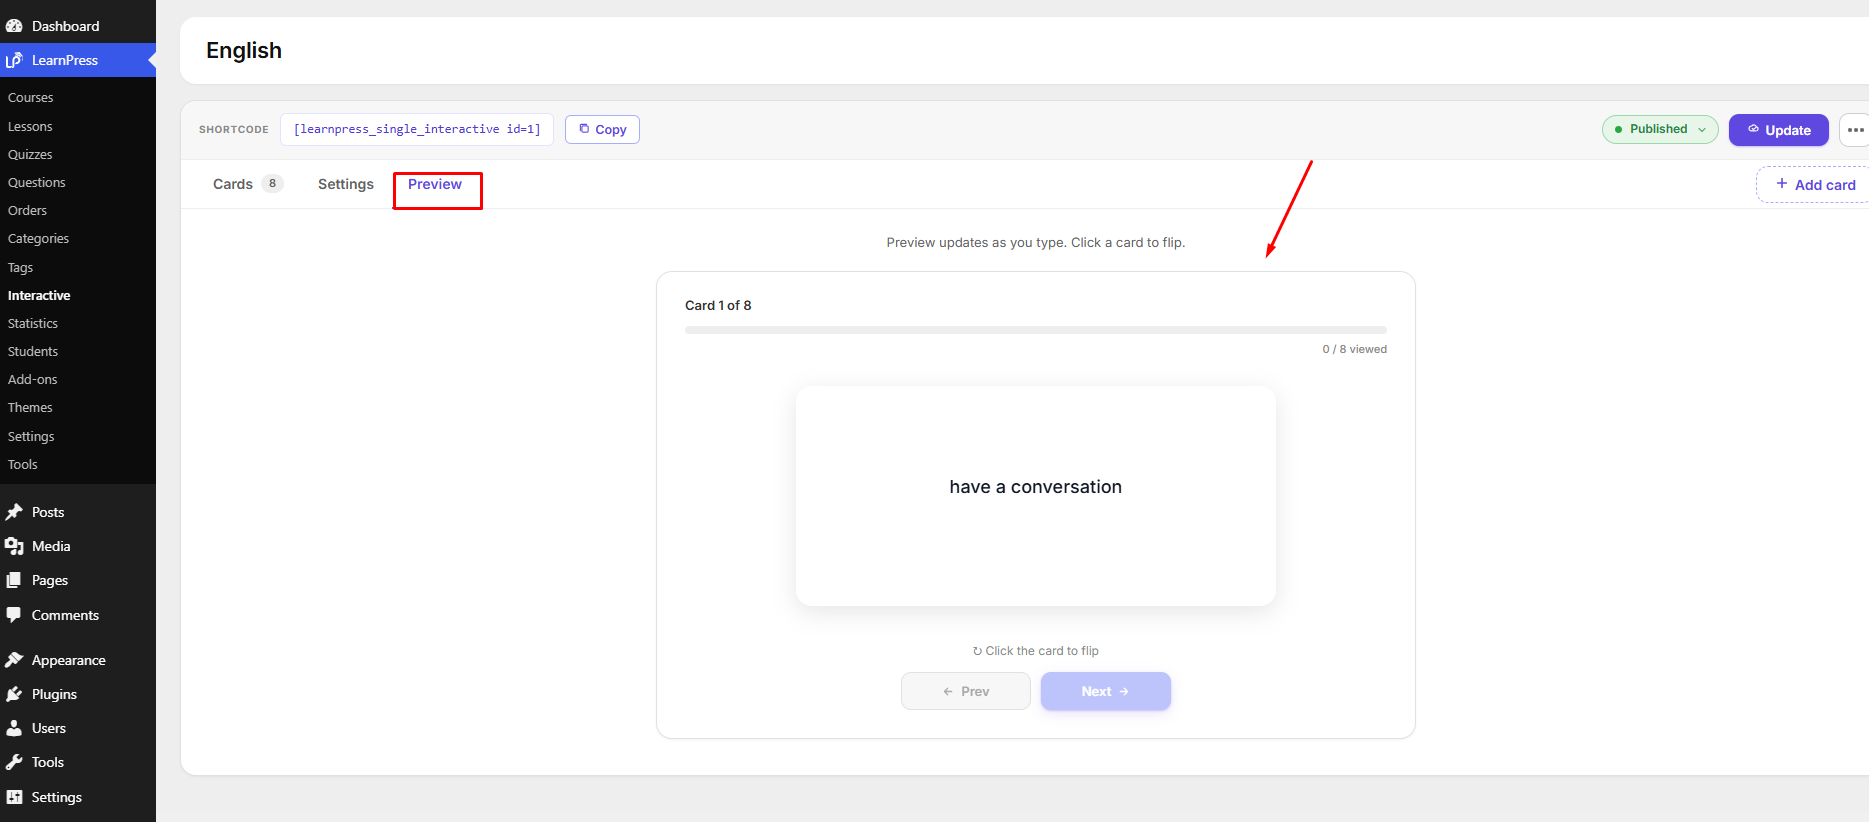
The preview updates automatically as you edit your content, allowing you to verify the layout, navigation, colors, and card content without leaving the editor.
If everything looks correct, click Update to save your changes.
4. Add Flash Cards to a Lesson
After creating and configuring your Flash Card, you can insert it into any LearnPress lesson.
Method 1: Insert from the Library
- Navigate to LearnPress → Lessons and open the lesson you want to edit.
- Place the cursor where you want the Flash Card to appear.
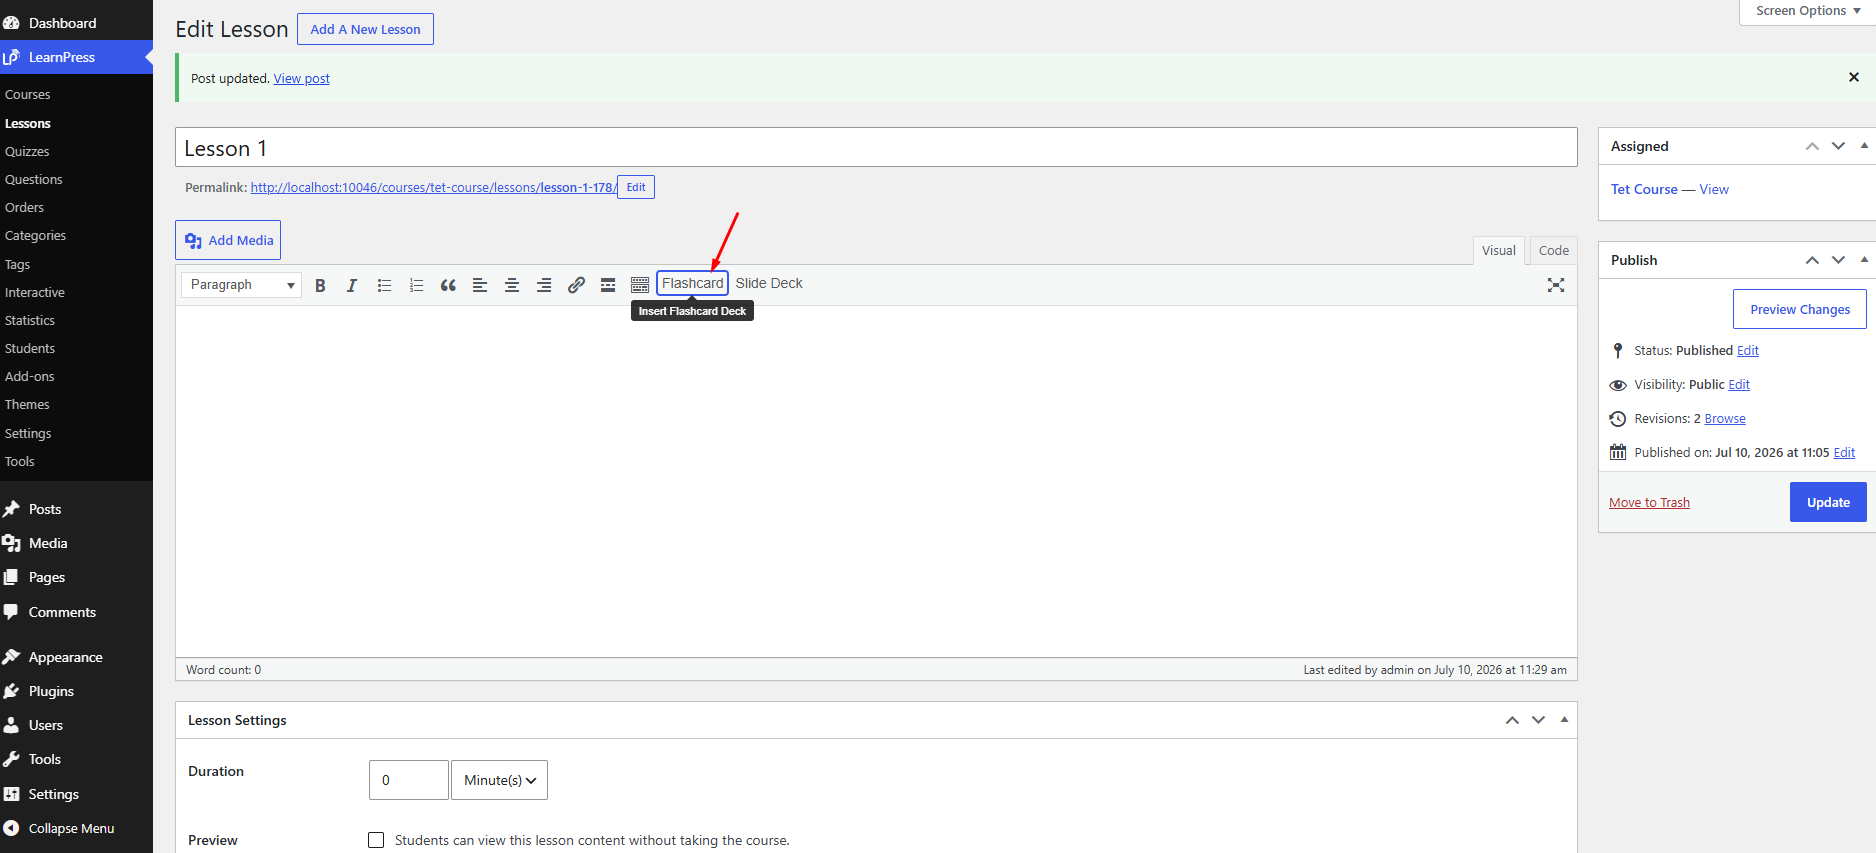
- Click the Flashcard button in the editor toolbar.
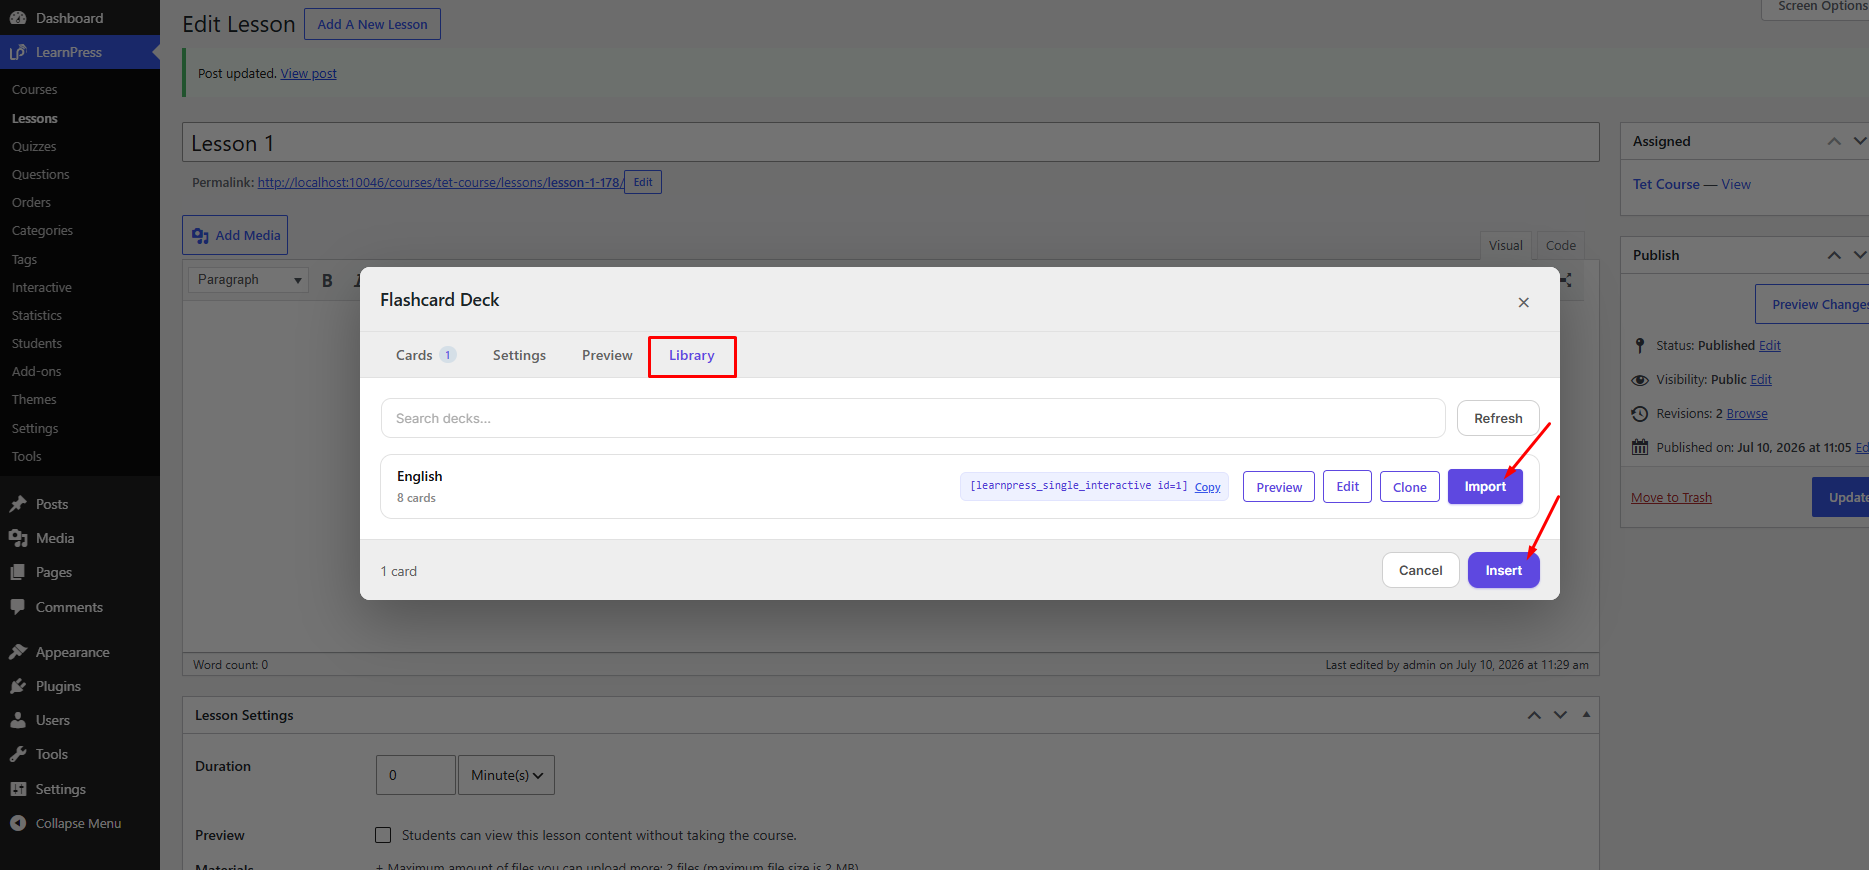
- Open the Library tab.
- Select an existing Flash Card from the list.
- Click Import
The Flash Card shortcode will be automatically added to the lesson content.
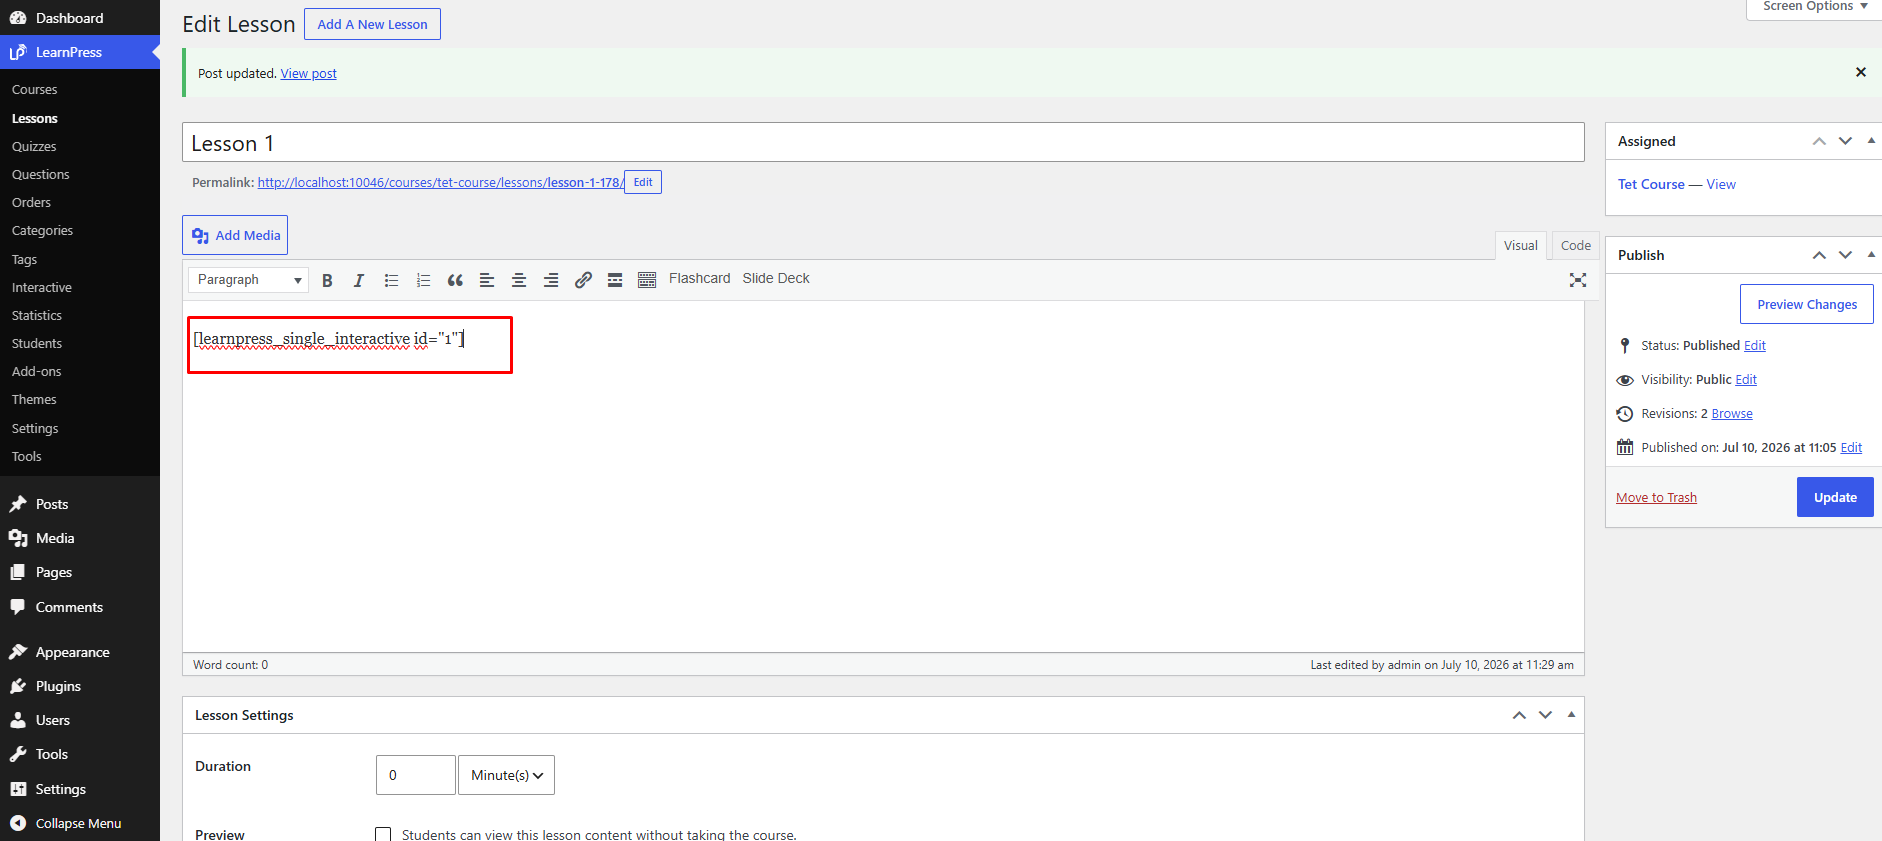
After inserting the Flash Card, click Update to save your lesson.
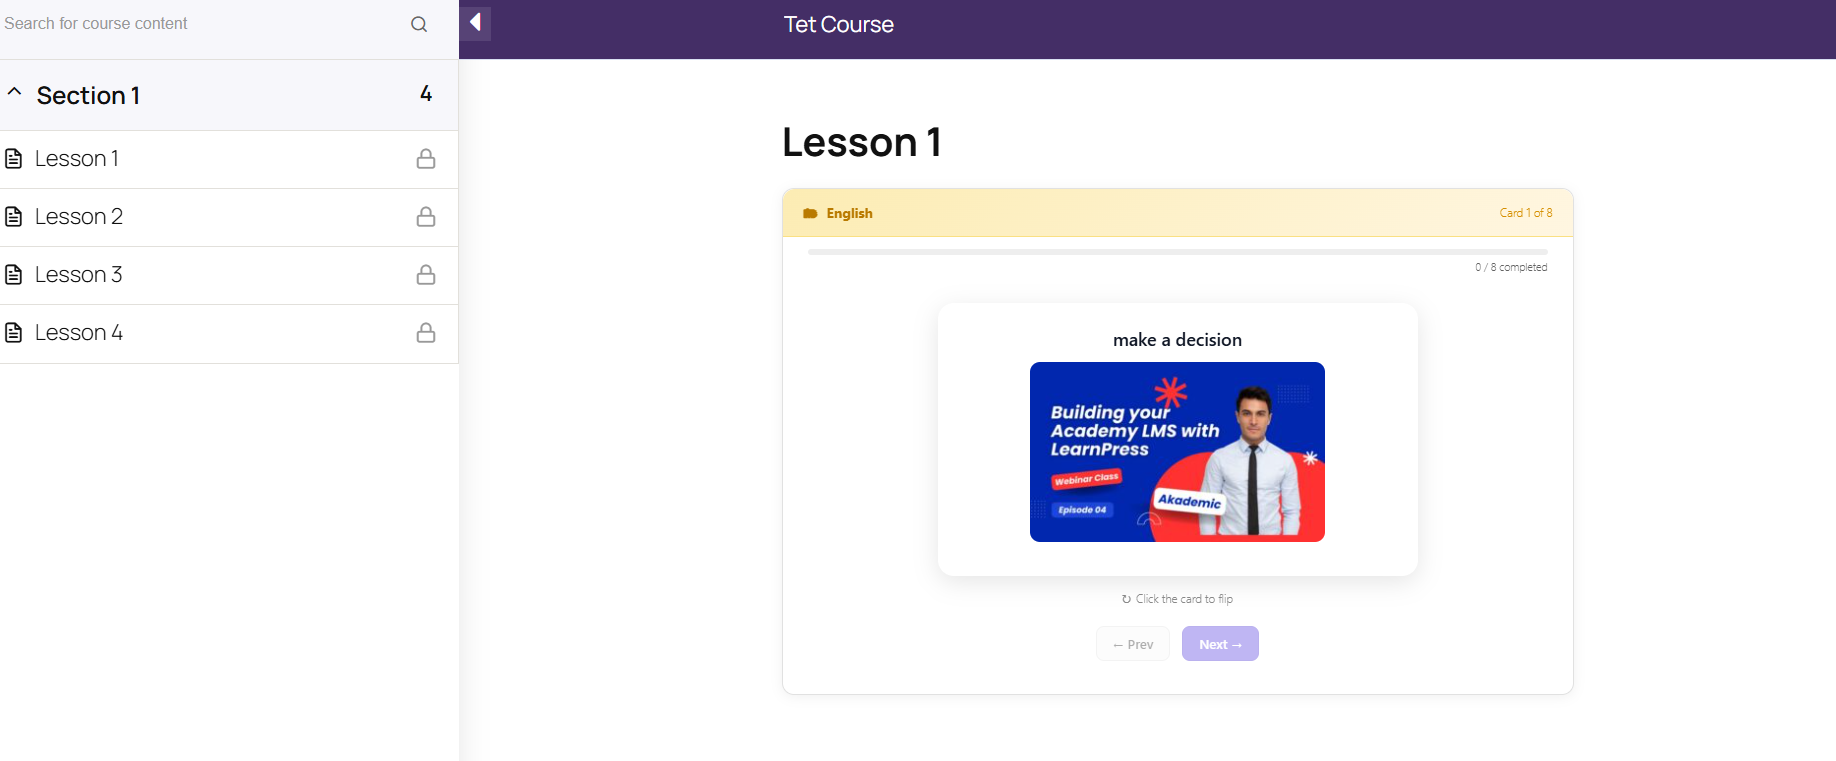
When learners open the lesson on the frontend, the Flash Card will be displayed exactly where it was inserted, allowing them to interact with the cards directly within the lesson.
Method 2: Insert Using the Shortcode
You can also insert a Flash Card manually using its shortcode.
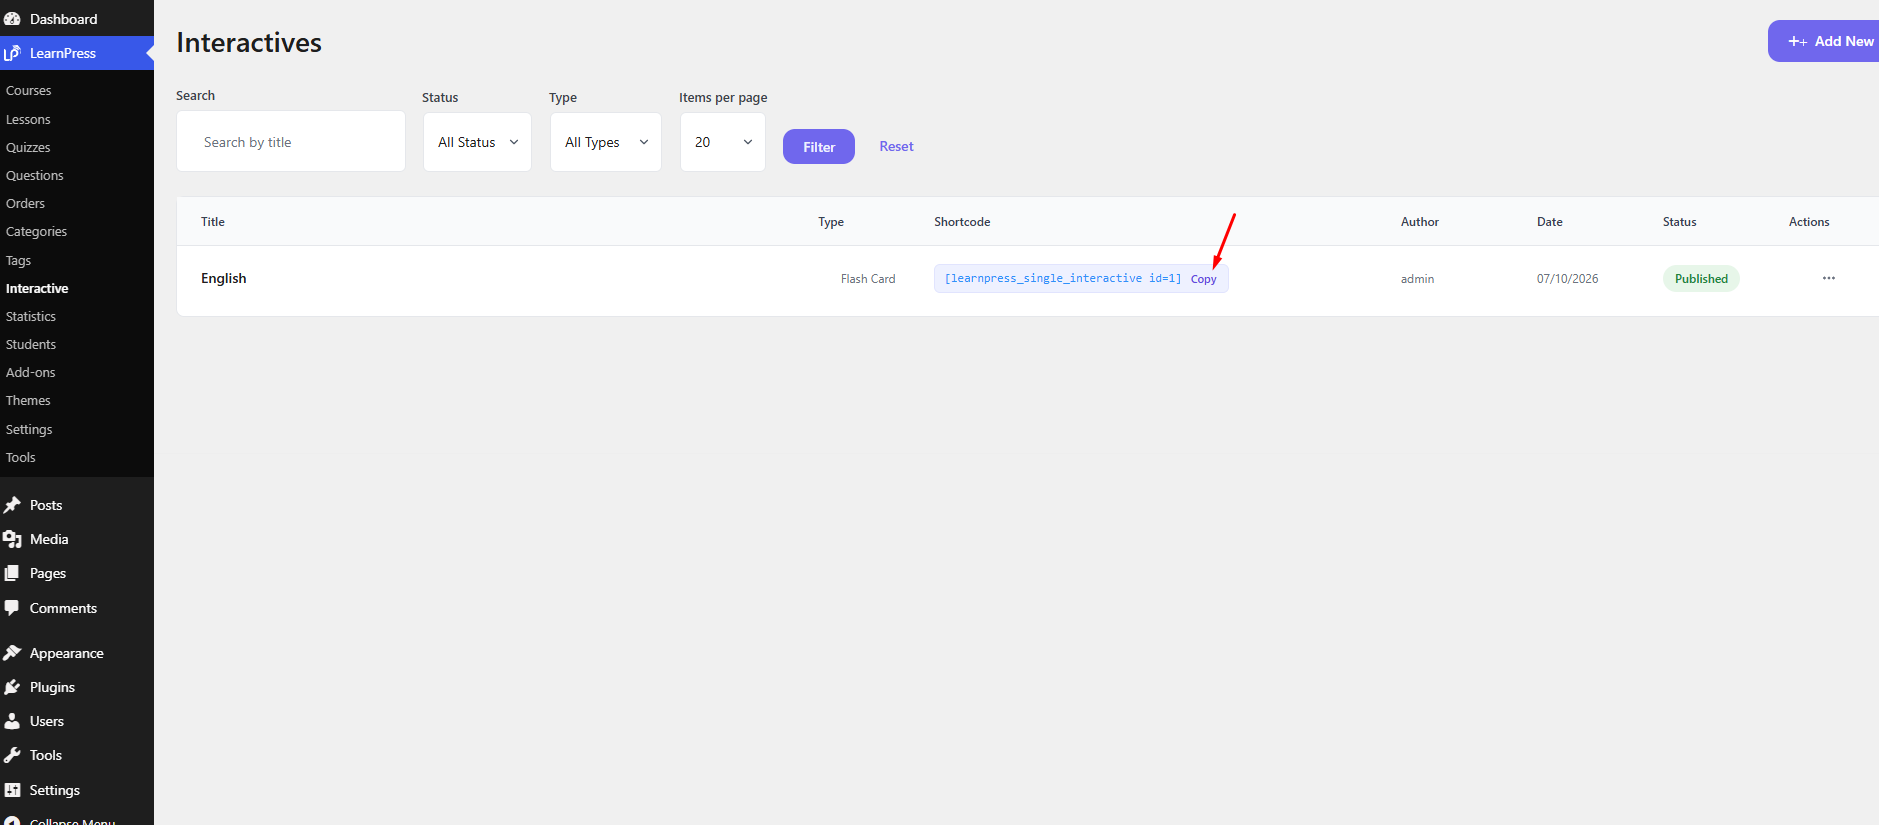
- Navigate to LearnPress → Interactive.
- Locate the Flash Card you want to use and copy its shortcode.
- Open the LearnPress lesson where you want to display the Flash Card.
- Paste the shortcode into the lesson content.
- Update the lesson.
The Flash Card will be displayed at the location where the shortcode is placed.
Note: Every Flash Card automatically generates a unique shortcode. Whether the Flash Card was created from the Interactive page or directly while editing a lesson, it is saved in the Interactive library and can be reused in any LearnPress lesson by either importing it from the Library or inserting its shortcode manually.
Method 2: Create Flash Cards While Editing a Lesson
You can also create a Flash Card directly from the LearnPress lesson editor.
Open the lesson you want to edit and click the Flashcard button in the editor toolbar.
The Flash Card editor will appear in a popup window.
Create your Flash Card, configure the available settings if needed, then click Insert.
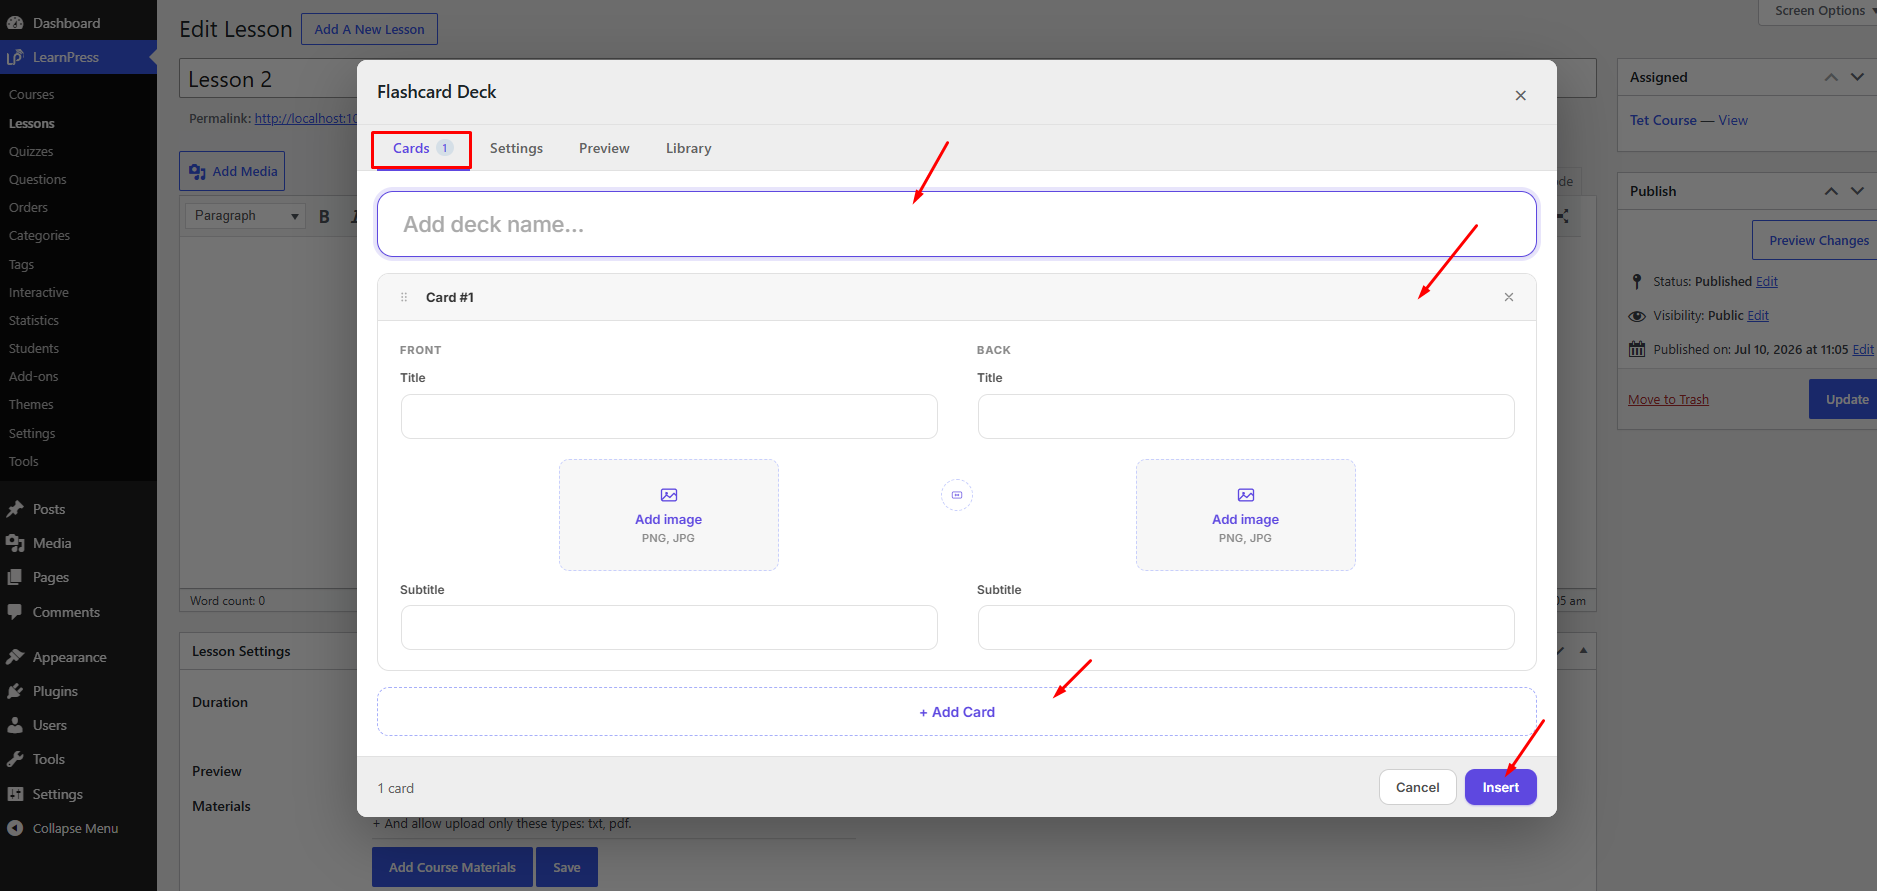
The Flash Card will be automatically created, assigned a unique shortcode, and inserted into the lesson content.
You can also find this Flash Card later by navigating to LearnPress → Interactive, where it can be edited, managed, or reused in other LearnPress lessons.
Note: Regardless of where a Flash Card is created, every Flash Card automatically generates a unique shortcode and is stored in the Interactive library, allowing it to be managed and reused across multiple LearnPress lessons.