If you have typed how do I use WordPress to build a website into Google more than once this week, you are not alone.
WordPress now powers 41.5% of all websites, according to W3Techs’ May 2026 report, and holds roughly 59% of the market among sites running a known content management system.
Most of the people behind those sites started exactly where you are now: no live site, no code experience, just a domain idea and a deadline.
This is WordPress for beginners, not a developer manual. You will not need to touch PHP or open a terminal.
By the time you finish reading, you will know how to register hosting, install WordPress, pick a theme, add the plugins that actually matter, build your core pages, and publish your first post.
Consider this an introduction to WordPress designed specifically for beginners. No prior experience or technical knowledge is required.
Let’s get started!
Table of Contents
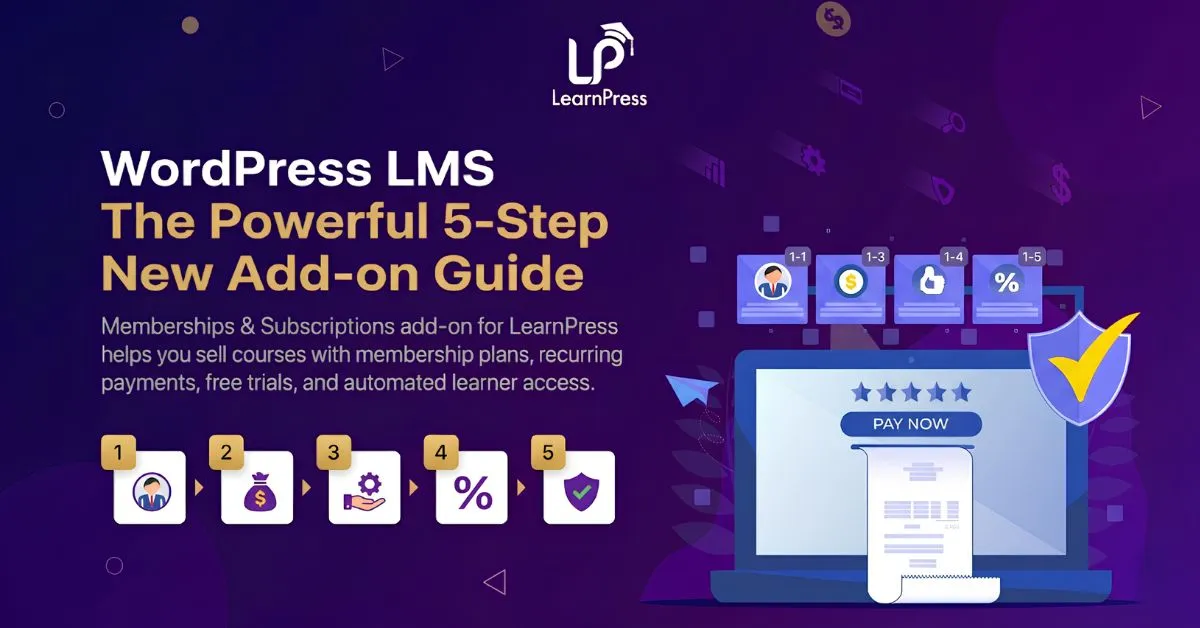
LearnPress – WordPress LMS Plugin
We provide an amazing WordPress LMS plugin to create & sell online courses. Let’s find out!
Try NowWhat You Need Before You Touch WordPress
Before any installation happens, three things need to exist: a domain, a hosting account, and a rough idea of what visitors should be able to do on the site.
Skipping this step is the most common reason beginners restart their build halfway through.
A domain name
Your domain is the address people type to find you, like learnpresslms.com. Buy it from a registrar such as Namecheap, Google Domains’ successor Squarespace Domains, or directly through your hosting provider during signup. Keep the name short, skip hyphens if you can, and match it to your brand rather than to a keyword you think Google wants to see.
A hosting account
Hosting is the server space where WordPress and all your files actually live. For a first site, shared hosting from a company like Bluehost, SiteGround, or Hostinger is enough, and most plans now bundle a free domain and a one-click WordPress installer into the first year of service.
If the site will sell products or run a membership area from day one, managed WordPress hosting (Kinsta, WP Engine) handles traffic spikes and security patching with less manual work on your end.
| Shared hosting | Managed WordPress hosting | |
| Typical price | $3 to $10/month | $20 to $40/month |
| Best for | Blogs, portfolios, small business sites | Stores, course platforms, high-traffic sites |
| Updates and patching | Mostly manual | Often automated |
| Example providers | Bluehost, Hostinger | Kinsta, WP Engine |
Neither option locks you in permanently. Plenty of site owners start on shared hosting and migrate to a managed plan once traffic or store volume actually justifies the extra cost, rather than paying for headroom they do not need yet.
A clear idea of what the site needs to do
Decide whether this is a blog, a small business site, a portfolio, a store, or a course platform before you pick a theme or a plugin. A five-page brochure site and a 200-product store need almost nothing in common on the back end, and choosing tools for the wrong use case is where most beginner builds get slow and cluttered.
Step 1: Install WordPress Through Your Host
Once hosting is active, installing WordPress itself usually takes less time than setting up an email account.
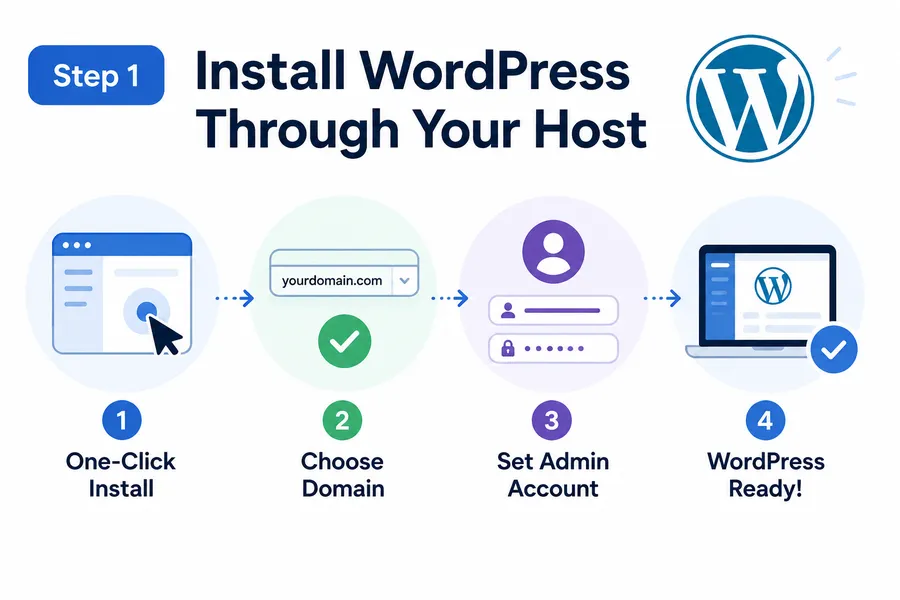
One-click installs
Almost every major host now ships a one-click installer, usually labeled “WordPress” or “Website” in the hosting dashboard. Click it, choose your domain, set an admin username and password that is not “admin,” and the host provides a fresh WordPress install in a few minutes. After activation, you land on wp-admin, the dashboard where every setting, page, and plugin gets managed.
Manual install for the rare case
If your host does not offer a one-click option, WordPress.org provides the software as a free download. You upload it to your server through an FTP client, create a MySQL database in your hosting control panel, then run the five-minute install script that connects the two. This route is rare in 2026 since almost no mainstream host still requires it, but it is worth knowing if you ever move to a custom VPS setup.
The walkthrough above is based on WordPress 7.0 “Armstrong,” released in May 2026. Menu labels and dashboard screens shift slightly with every major release, so a screenshot from an older tutorial may not match exactly what you see.
The first three settings worth changing
Before touching themes or plugins, three settings under Settings in wp-admin save trouble later.
- Under Settings > General, set your site title and tagline, since these often appear in browser tabs and search results before you have written a single page.
- Under Settings > Permalinks, switch the URL structure to “Post name” so your links read like yoursite.com/about-us instead of a string of numbers, which is both more readable and better for SEO.
- Under Settings > Discussion, decide whether comments stay open by default; most business sites turn them off everywhere except the blog to cut down on spam moderation.
Step 2: Choose A Theme That Matches Your Site
Your theme controls layout, typography, and how flexible the design will be once you start customizing.
Go to Appearance > Themes inside wp-admin to browse what is already installed and search the full WordPress.org theme directory.
If you do nothing else, the default theme that ships with a fresh install, currently Twenty Twenty-Five, is a safe starting point.
It is a full block theme built for the Site Editor, it loads light enough to score well on Core Web Vitals out of the box, and it covers blogs, portfolios, and small business layouts without a page builder plugin sitting on top of it.
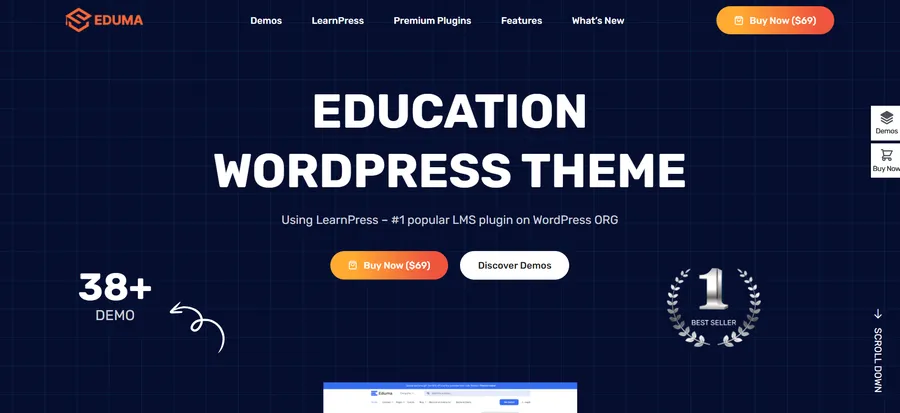
For more specific needs, free themes like Astra or GeneratePress pair well with the block editor, while premium themes such as Eduma are built specifically for course creators and education sites, with layouts already structured around instructor profiles, course catalogs, and student dashboards.
It helps to know which generation of theme you are looking at before you install one.
- Block themes (anything built for full-site editing, WordPress 5.9 and later) let you edit headers, footers, and templates visually inside Appearance > Editor, with no separate page builder needed.
- Classic themes still rely on the older Appearance > Customize panel and often pair with a page builder plugin like Elementor for layout flexibility.
Neither generation is “wrong,” but mixing a classic theme with modern block patterns sometimes creates styling conflicts, so check a theme’s listing for “full site editing” or “block theme” support before committing to it.
| Free themes | Premium themes | |
| Cost | $0 | Usually $39 to $99 one-time or per year |
| Support | Community forums | Direct developer support |
| Customization depth | Solid for general use | Built around specific niches (stores, courses, agencies) |
| Example | Twenty Twenty-Five, Astra | Eduma, Divi |
One habit worth building early: never edit a theme’s core files directly. If you want to tweak code, create a child theme first so your changes survive the next theme update instead of getting wiped out by it.
Step 3: Install Only the Plugins You Need
Plugins extend WordPress beyond what the core software does on its own, and this is where most beginner sites either become genuinely useful or become slow and bloated. The rule that holds up over years of running real sites: install for a need you have today, not a feature you might want someday.
SEO and performance
Rank Math or Yoast SEO handles meta titles, sitemaps, and basic schema without needing separate developer help.
Pair it with a caching plugin like WP Rocket or LiteSpeed Cache.
On a mid-size site we moved from no caching to WP Rocket with image lazy loading enabled, and the Largest Contentful Paint score on PageSpeed Insights dropped from over 4 seconds to under 2 seconds on mobile, which is the kind of gap that actually affects whether visitors stay or bounce.
Forms and contact
WPForms or Fluent Forms cover contact forms, quote requests, and simple surveys with a drag-and-drop builder, no custom code required.
Stores, memberships, and courses
If the goal is selling physical or digital products, WooCommerce is the standard choice and integrates with almost every WordPress theme on the market.
If the goal is selling and delivering online courses instead, LearnPress is a free, beginner-friendly LMS plugin that handles course structure, lessons, quizzes, and student progress directly inside WordPress, and it pairs naturally with the Eduma theme mentioned above for sites built around education from the ground up.
Whatever you install, check the “Last updated” date and active install count on the plugin’s WordPress.org listing before activating it. A plugin untouched for two years is a real security risk, not just an inconvenience.
| Goal | Plugin examples | What it handles |
| Search visibility | Rank Math, Yoast SEO | Meta titles, sitemaps, basic schema |
| Speed | WP Rocket, LiteSpeed Cache | Caching, image lazy loading, minification |
| Forms | WPForms, Fluent Forms | Contact, quote, and survey forms |
| Selling products | WooCommerce | Cart, checkout, inventory, shipping |
| Selling courses | LearnPress | Lessons, quizzes, student progress |
| Security | Wordfence, Sucuri | Firewall, malware scanning, login monitoring |
A realistic starting plugin count for a new site is five to eight. Beyond that, every additional plugin adds its own JavaScript or database queries, and that overhead is one of the most common reasons a beginner’s “fully loaded” site ends up scoring poorly on Core Web Vitals despite a fast host underneath it.
Step 4: Build Your Core Pages
Go to Pages > Add New to start building the pages every site needs regardless of niche: Home, About, Services or Shop, Contact, and a Blog index if you plan to publish regularly.
Each page is built using the block editor, where you stack blocks (paragraph, image, button, columns) the same way you would arrange furniture in a room: drag, drop, adjust.
Set your homepage explicitly under Settings > Reading by choosing “A static page” and selecting which page acts as Home and which acts as your Posts page.
Skipping this step is the single most common reason a brand-new WordPress site shows a blank blog feed instead of the homepage you actually designed.
Each page deserves a clear job. The homepage should answer “what is this and what do I do next” within the first screen a visitor sees, before any scrolling.
The About page works best with a real photo and a short, specific story rather than a generic mission statement, since that is what actually builds trust with a new visitor.
The Contact page should include more than one way to reach you, a form plus an email address or phone number, since some visitors avoid forms entirely.
Step 5: Set up menus and navigation
Go to Appearance > Menus, or Appearance > Editor if your theme is a full block theme, and add your core pages to a primary navigation menu. Keep the main menu to five or six items; anything more and visitors start scanning instead of clicking. A simple footer menu with your Contact page, Privacy Policy, and social links rounds out navigation without crowding the header.
Step 6: Customize Your Design with The Site Editor
Visual customization in 2026 happens mostly through the Site Editor rather than the older Customizer panel, assuming your theme supports full-site editing.
Working with the block editor
Open Appearance > Editor to adjust templates, headers, footers, and global colors directly on a live preview. Changing a font here updates every page using that template at once, instead of requiring you to edit each page individually like classic themes once did.
Global styles and the Customizer’s role today
Inside the Site Editor, the Styles panel (the icon that looks like a half-filled circle) controls your site-wide color palette, typography, and spacing. Classic, non-block themes still rely on the older Customizer under Appearance > Customize, so check which type of theme you are running before hunting for a setting that may have moved.
Step 7: Write and Publish Your First Posts
Go to Posts > Add New to start publishing. Give the post a clear, specific title, add a featured image (this is what shows up in social shares and search previews), and assign it to a category so your blog stays organized as it grows.
Before hitting Publish, preview the post on mobile using the eye icon in the top toolbar; a layout that looks fine on a desktop monitor sometimes breaks on a phone screen, especially with wide image blocks.
Two small habits compound over time.
- Link new posts back to relevant older posts or service pages whenever it makes sense in the text, since internal links help visitors find more of your content and help search engines understand how your pages relate to each other.
- And keep your category list short and stable; renaming or merging categories every few months breaks old links and confuses returning visitors more than it helps organize the blog.
Step 8: Secure, Back up, and Maintain Your Site
A live WordPress site needs basic upkeep the same way a car needs oil changes. Skipping this part is how a working site turns into a hacked or broken one.
Install a security plugin such as Wordfence or Sucuri to monitor login attempts and scan for malware.
Set up automated backups through UpdraftPlus or your host’s built-in backup tool, ideally stored off-server so a hosting outage cannot wipe both your site and its backup at once.
Log into wp-admin at least weekly to apply WordPress core, theme, and plugin updates, since outdated plugins are consistently named as one of the most common entry points for site compromises.
A few habits make this routine instead of stressful.
- Turn on two-factor authentication for every admin account, not just the main one, since shared logins are a frequent weak point on small business sites.
- Limit login attempts through your security plugin so automated bots cannot brute-force the wp-login.php page.
- And before running a major update on a live site, clone it to a staging environment first, either through your host’s built-in staging tool or a plugin like WP Staging, so a broken update gets caught before visitors ever see it.
Common Mistakes That Slow Beginners Down
A handful of habits explain most of the support requests new WordPress users post in forums. Knowing them in advance saves a weekend of troubleshooting later.
Installing too many plugins before launch is the most common one.
Each plugin adds its own settings screen, database tables, and sometimes its own JavaScript file, and a site with twenty plugins active on day one is usually slower than a site running five well-chosen ones.
Ignoring the homepage setting under Settings > Reading is another frequent issue, since it leaves a brand-new visitor staring at an empty blog feed instead of the designed homepage.
Editing a parent theme directly instead of creating a child theme is a third: the next theme update silently erases every change.
And skipping mobile previews before publishing means layout problems only get discovered once a customer reports them, rather than during your own review.
How Long This Actually Takes
For a five to eight page brochure site with a theme you do not heavily customize, expect somewhere between four and ten hours spread across a few sessions: roughly an hour for hosting and installation, two to three hours picking and configuring a theme, and the rest split between content and plugin setup.
A store or course platform with WooCommerce or LearnPress added on top typically adds another day or two, mostly spent configuring product or course settings rather than fighting the software itself.
By the end of this WordPress site tutorial, that timeline should feel realistic rather than aspirational, since every step above maps to an actual screen you will click through.
This is meant to work as a beginners guide to WordPress you can come back to, not a one-time read. Bookmark it as your WordPress tutorial for beginners reference for the next time you add a plugin or rebuild a page from scratch.
FAQs
Is WordPress free to use?
The WordPress software itself is free and open source, downloadable from WordPress.org. Costs come from hosting, a domain name, and any premium themes or plugins you choose to add, which typically run from a few dollars a month for basic shared hosting up to $25 or more for managed hosting plans.
Do I need to know how to code to build a WordPress site?
No, the block editor and modern themes are built for drag-and-drop use without touching code. Coding knowledge becomes useful only if you want custom functionality beyond what existing plugins offer, such as a unique checkout flow or a custom post type.
What is the difference between WordPress.com and WordPress.org?
WordPress.org is the free, self-hosted software you install on your own hosting account, giving you full control over plugins, themes, and monetization. WordPress.com is a hosted service that runs that same software for you, with more restrictions on free and lower-tier plans in exchange for less setup work.
Can I switch themes later without losing my content?
Yes, switching themes changes the design and layout but generally leaves your pages, posts, and media intact, since content is stored separately from the theme in the WordPress database. What can break is custom styling tied to your old theme and, in some cases, your heading structure, so it is worth reviewing your top pages after any theme switch.
Read more: WordPress Training: The Complete Guide