
Interactive Blocks for LearnPress allows you to create rich, presentation-style learning content that can be embedded into any LearnPress lesson.
Unlike Flash Cards, Slides can only be created from the Interactive page. Once created, every Slide automatically generates a shortcode and is stored in the Interactive library, allowing it to be inserted into one or multiple LearnPress lessons.
1. Create a Slide
- Navigate to LearnPress → Interactive.
- Click Add New.
- Enter a title for your interactive content.
- Select Slide as the content type.
- Click Save & Continue.
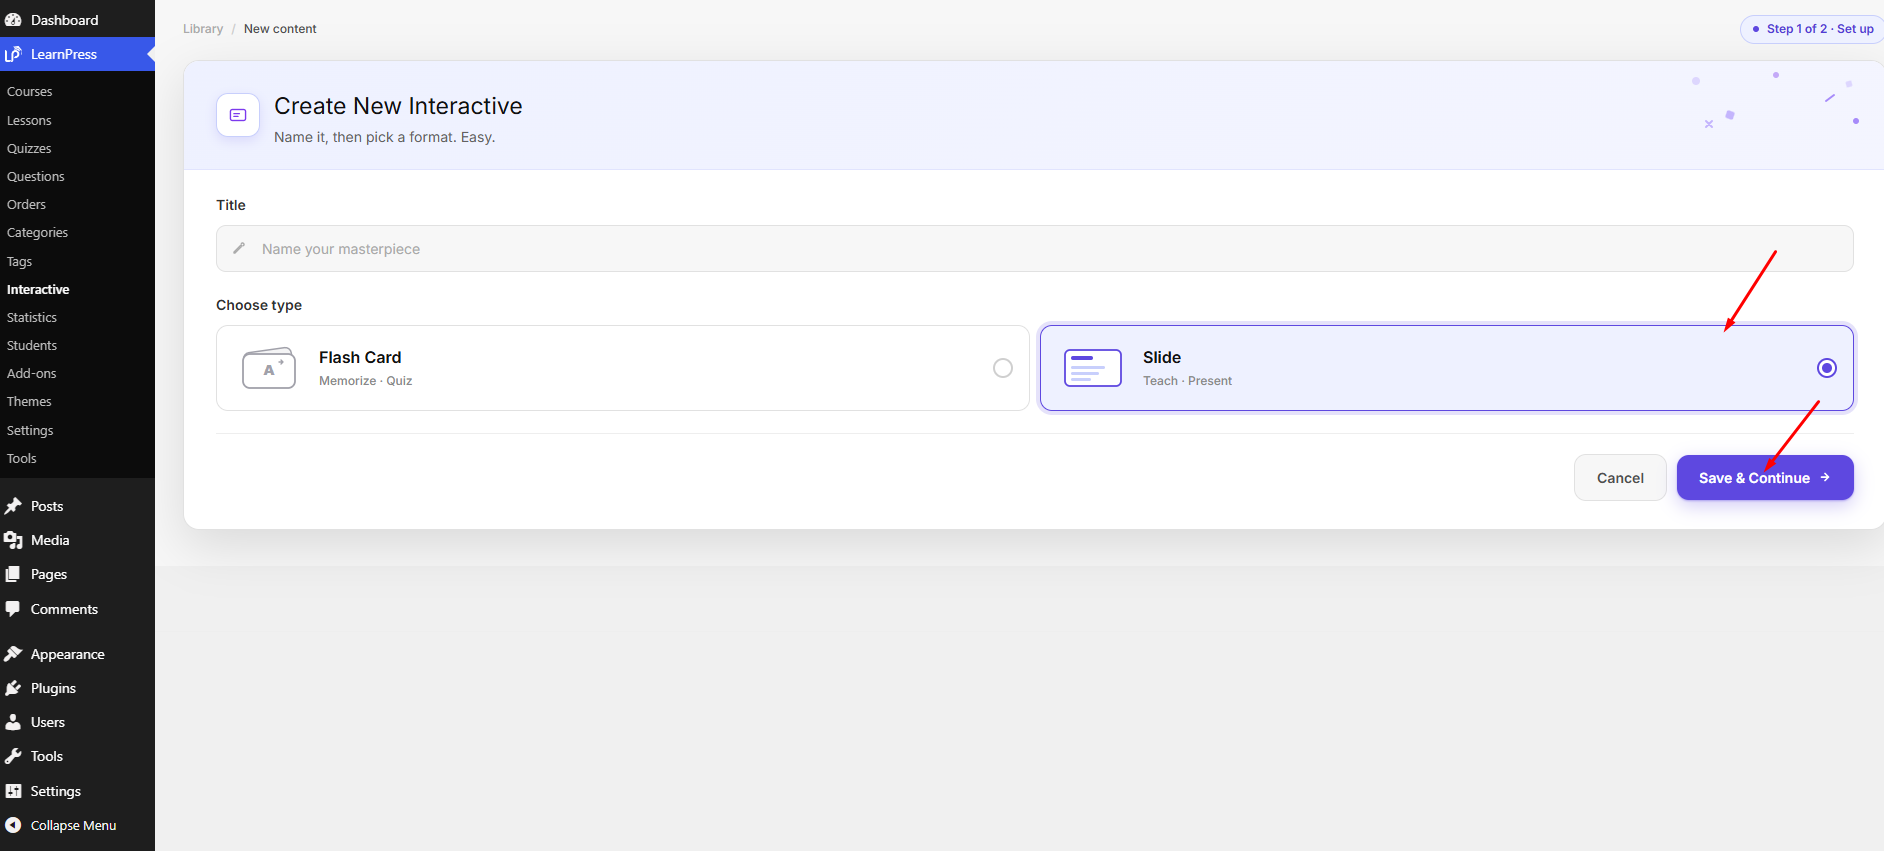
The Slide editor will open, allowing you to start building your presentation.
2. Build Your Presentation
The Slide editor provides a visual drag-and-drop workspace for creating interactive presentations.
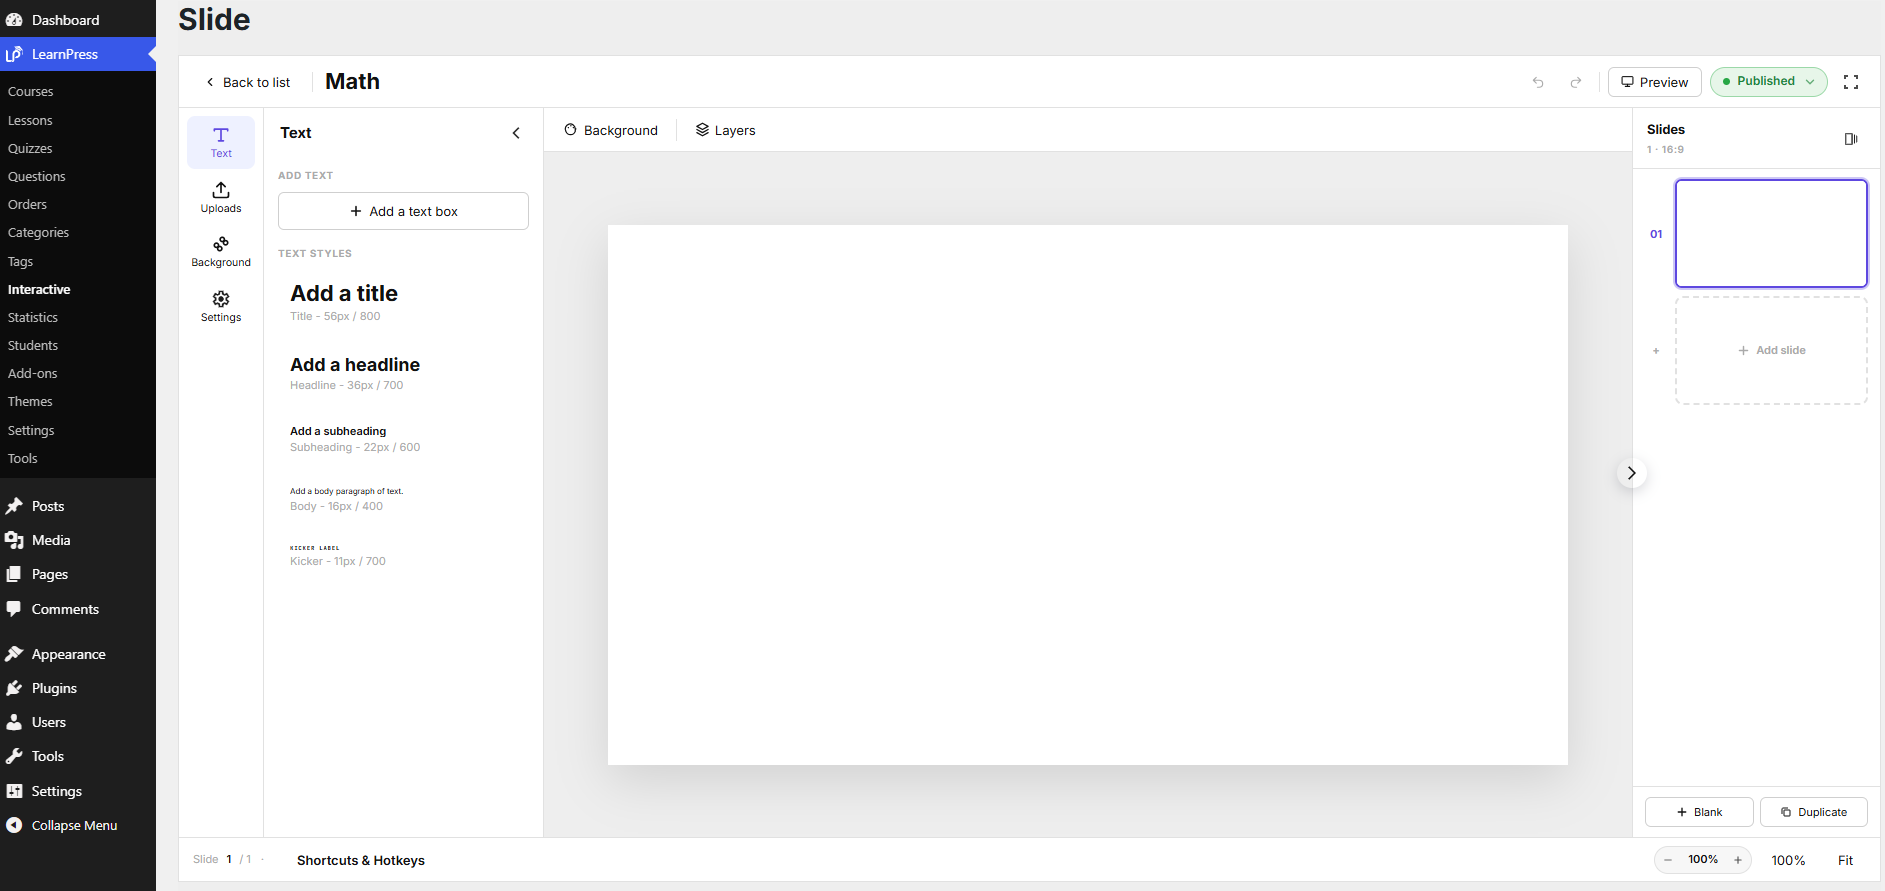
2.1. Add Slides
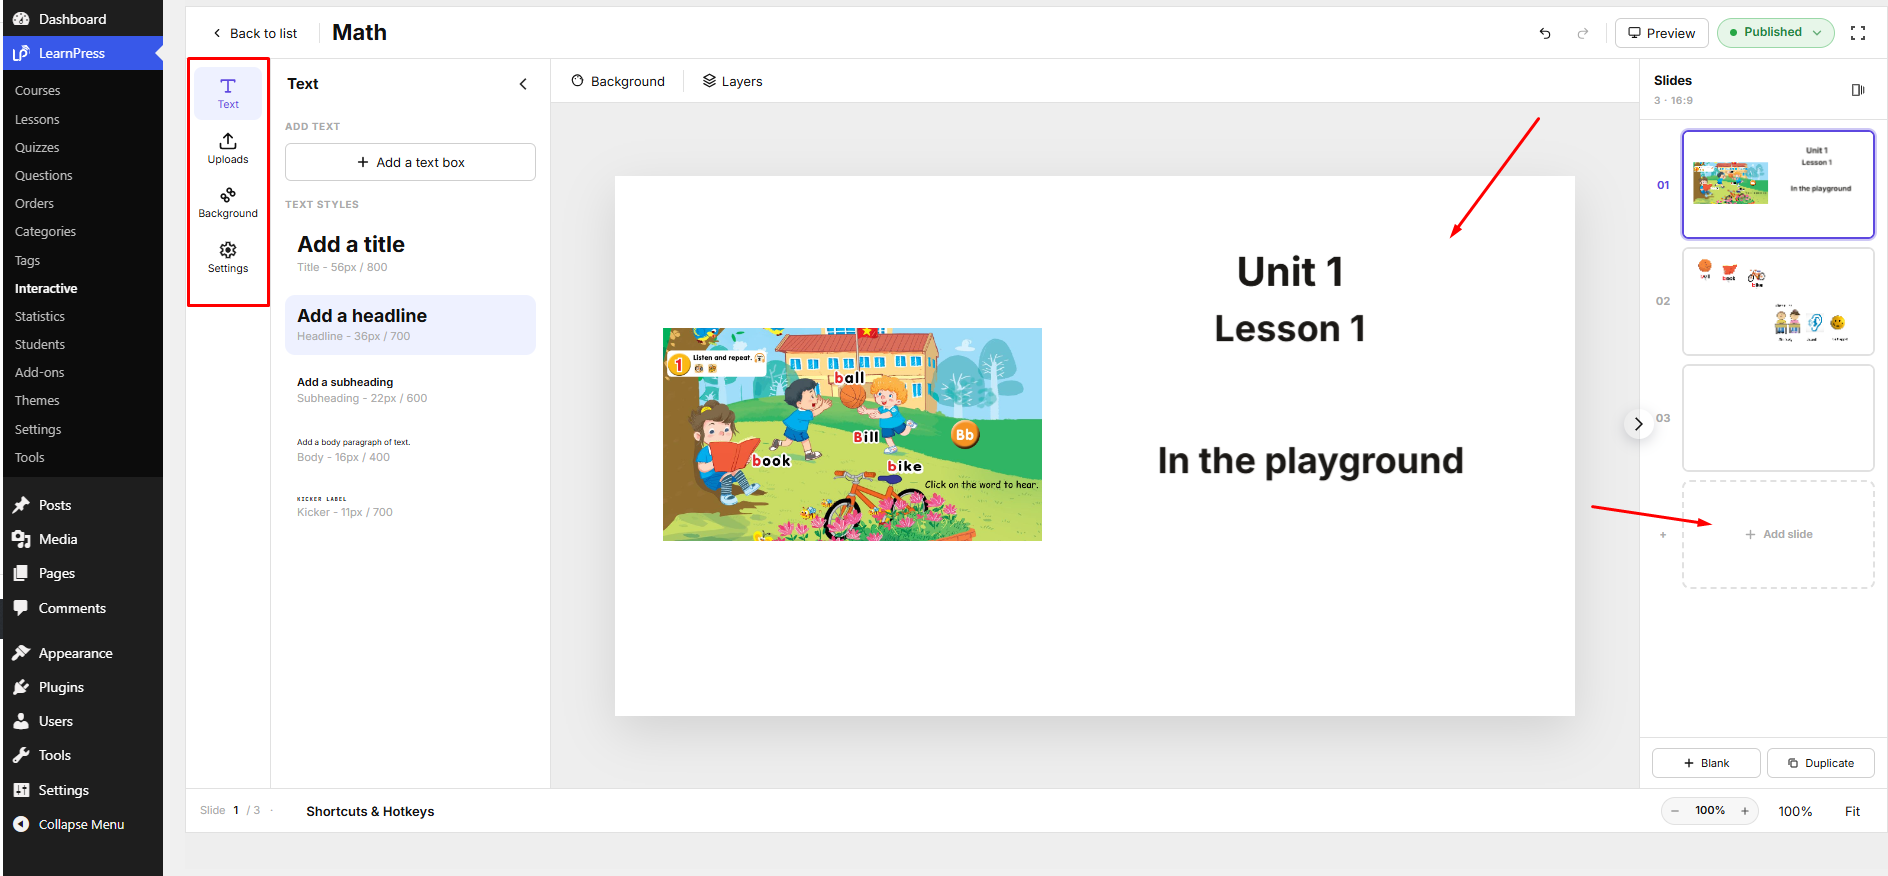
Use the Add Slide button in the right sidebar to create additional slides.
Each slide appears in the slide list on the right, where you can:
- Select a slide to edit.
- Reorder slides by dragging and dropping.
- Duplicate an existing slide.
- Create a blank slide.
2.2. Add Content
The left sidebar contains the tools used to build each slide.
Text
Add and customize text elements, including:
- Title
- Heading
- Subheading
- Body text
- Kicker
Each text element can be positioned and edited directly on the slide.
Uploads
Upload images or other supported media and place them anywhere on the slide.
Background
Customize the slide background by changing its color or adding a background image.
Layers
Manage all objects added to the current slide.
You can select, reorder, and organize individual elements to control how they appear.
2.3. Preview Your Slides
Click the Preview button in the top toolbar to review your presentation before publishing.
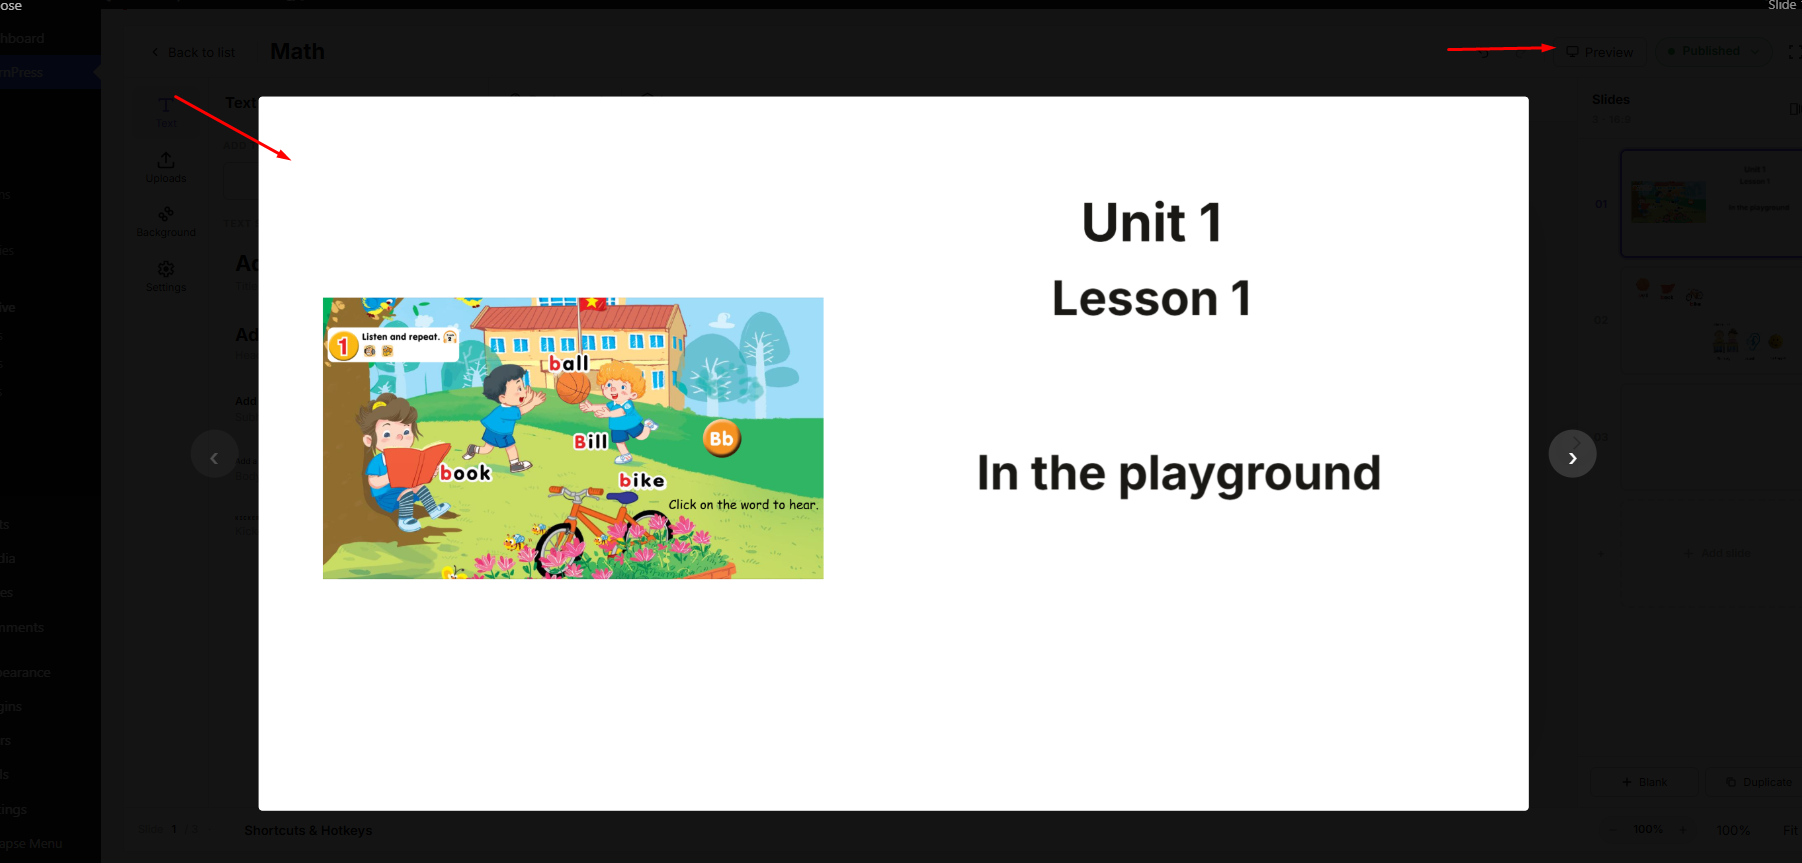
Preview mode allows you to verify:
- Slide layout
- Navigation
- Images and text
- Overall appearance
before making the presentation available to learners.
2.4. Publish Your Slide
When your presentation is complete:
- Choose the desired status (Published, Draft, or Trashed).
- Click Update to save your changes.
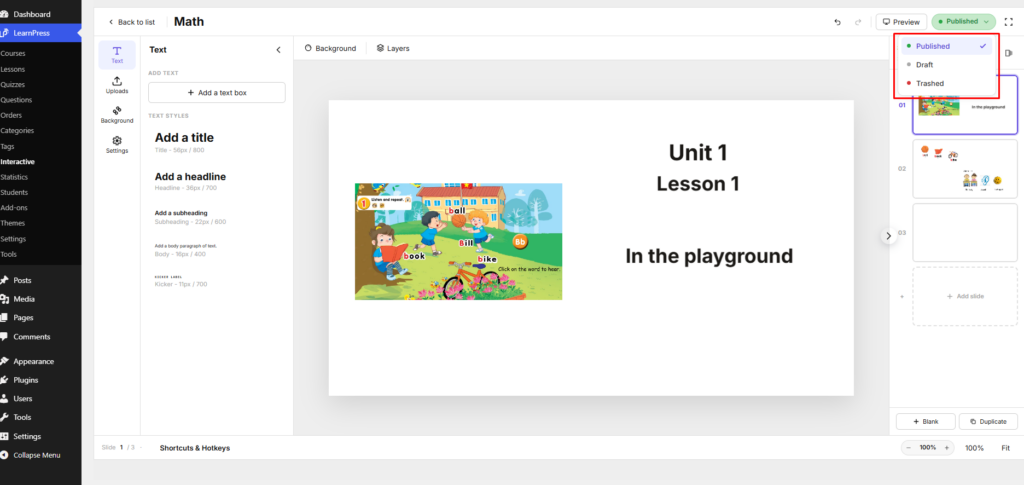
A unique shortcode is automatically generated for every Slide and displayed at the top of the editor. You can copy this shortcode at any time.
3. Add Slides to a Lesson
After creating a Slide, you can insert it into any LearnPress lesson.
Method 1: Insert from the Library
- Navigate to LearnPress → Lessons.
- Open the lesson you want to edit.
- Place the cursor where you want the Slide to appear.
- Click the Slide Deck button in the editor toolbar.
- Open the Library tab.
- Select an existing Slide from the Interactive library.
- Click Import.
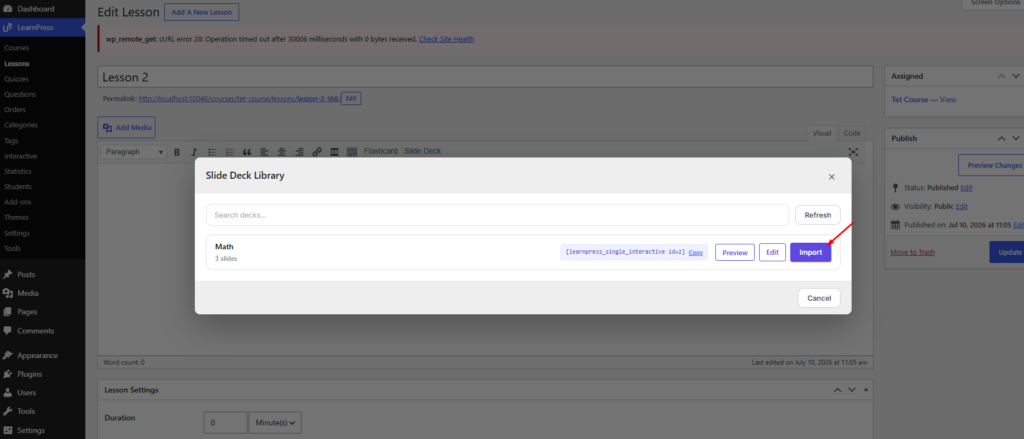
The Slide shortcode will be automatically inserted into the lesson content.
Method 2: Insert Using the Shortcode
You can also insert a Slide manually using its shortcode.
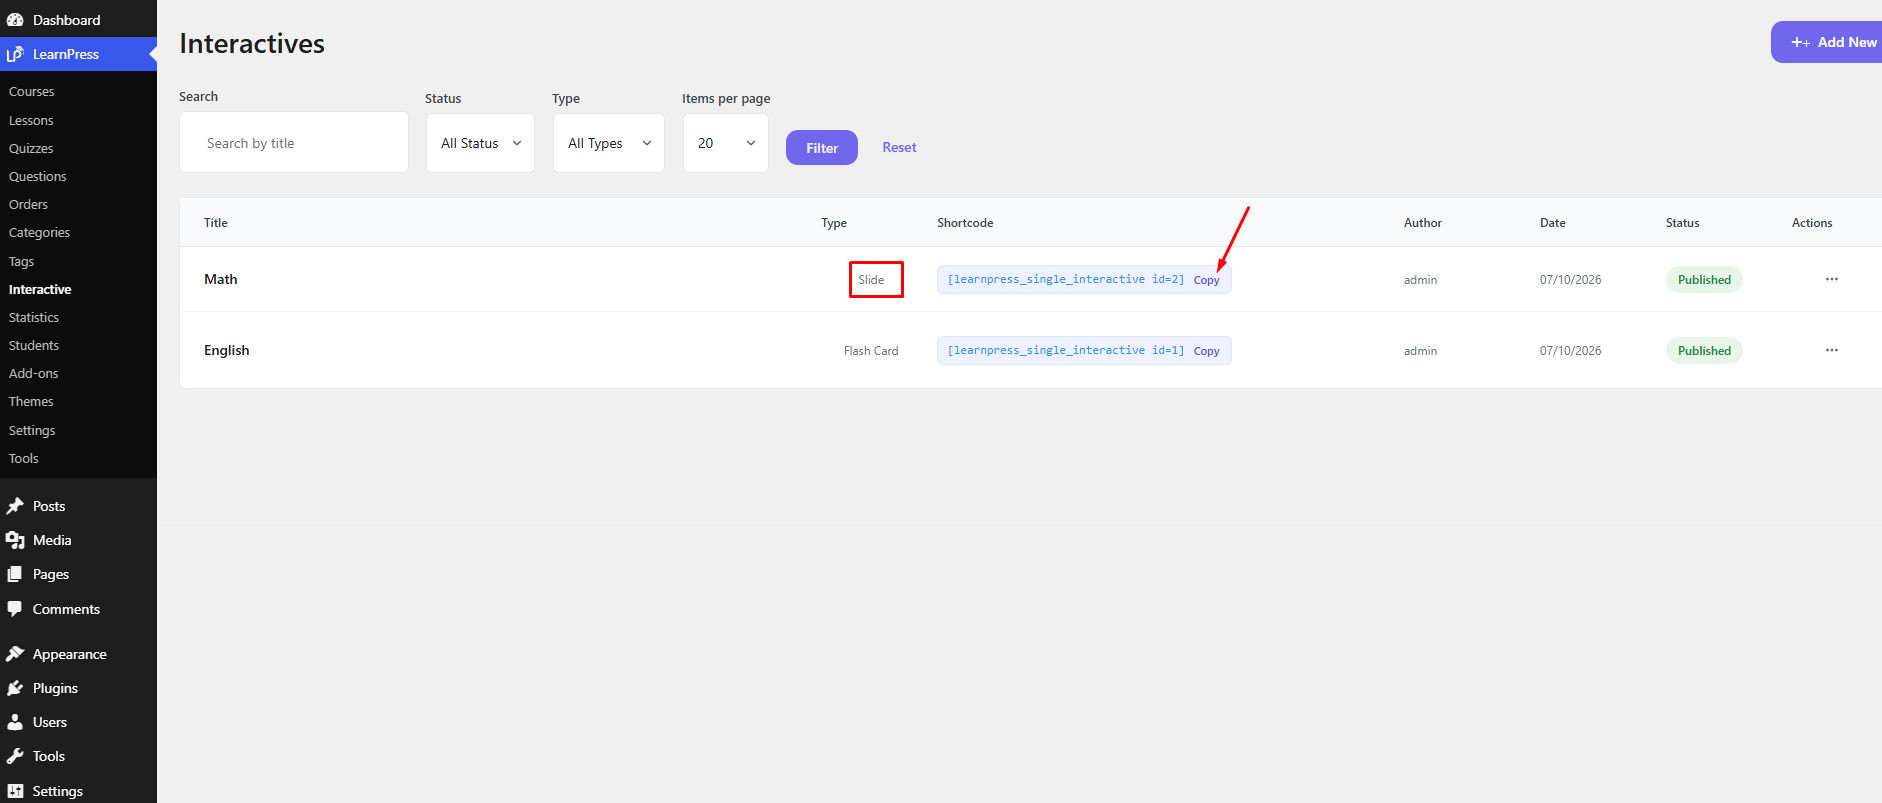
- Navigate to LearnPress → Interactive.
- Locate the Slide you want to use and copy its shortcode.
- Open the LearnPress lesson where you want to display the Slide.
- Paste the shortcode into the lesson content.
- Update the lesson.
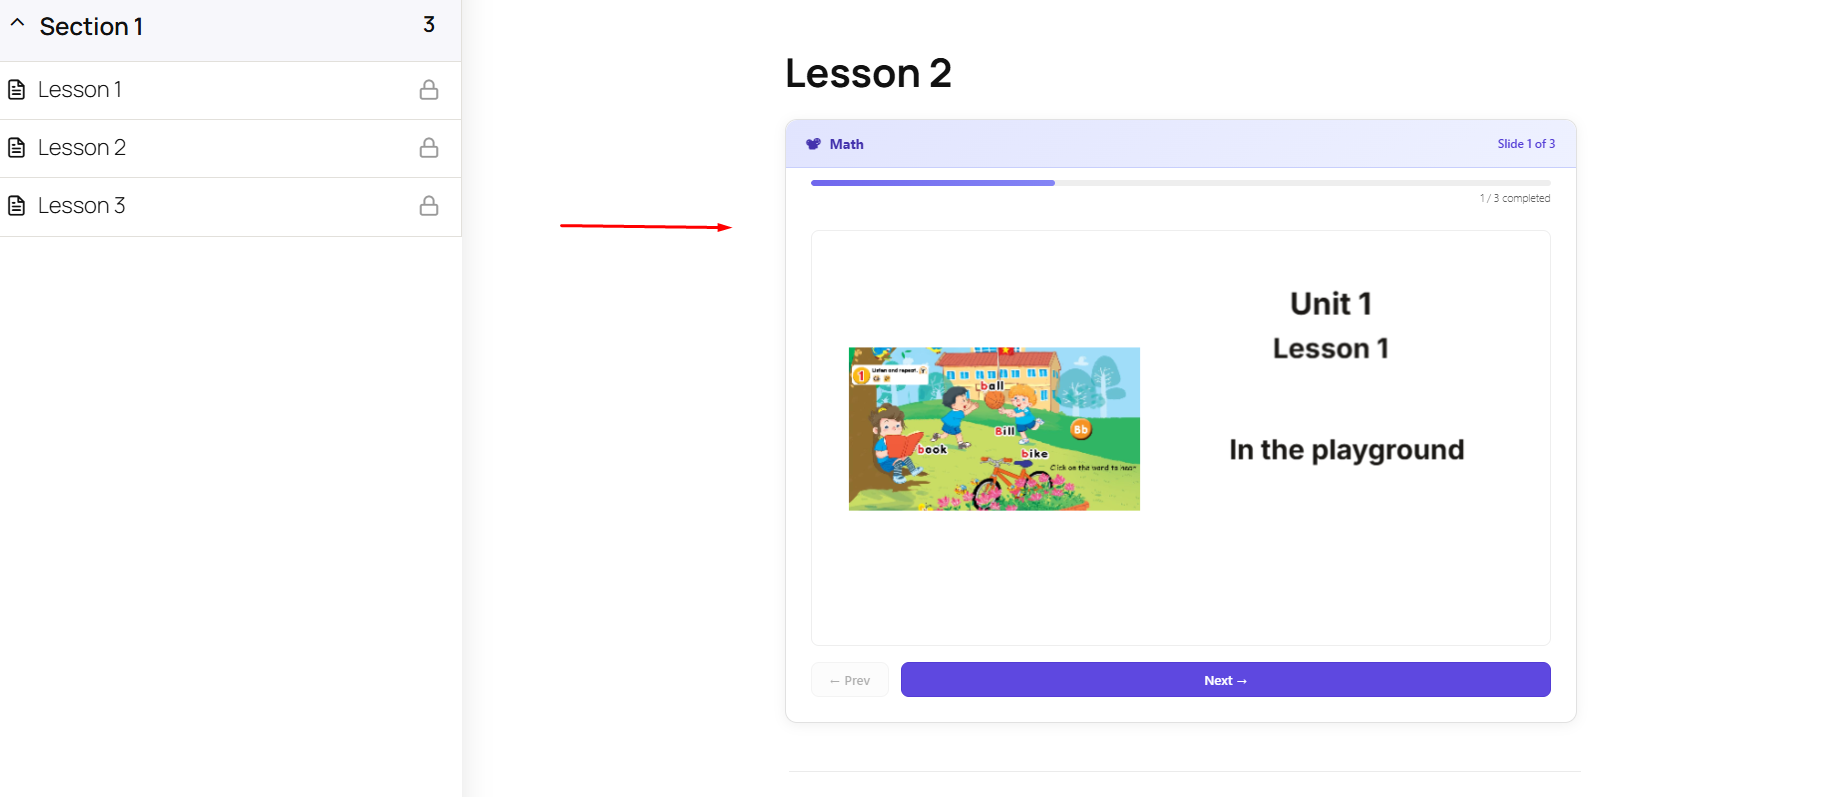
The Slide will be displayed at the location where the shortcode is placed.
After updating the lesson, learners can view and interact with the Slide presentation directly within the lesson.
Note: Every Slide automatically generates a unique shortcode and is saved in the Interactive library. You can reuse the same Slide in multiple LearnPress lessons by either importing it from the Library or inserting its shortcode manually.