
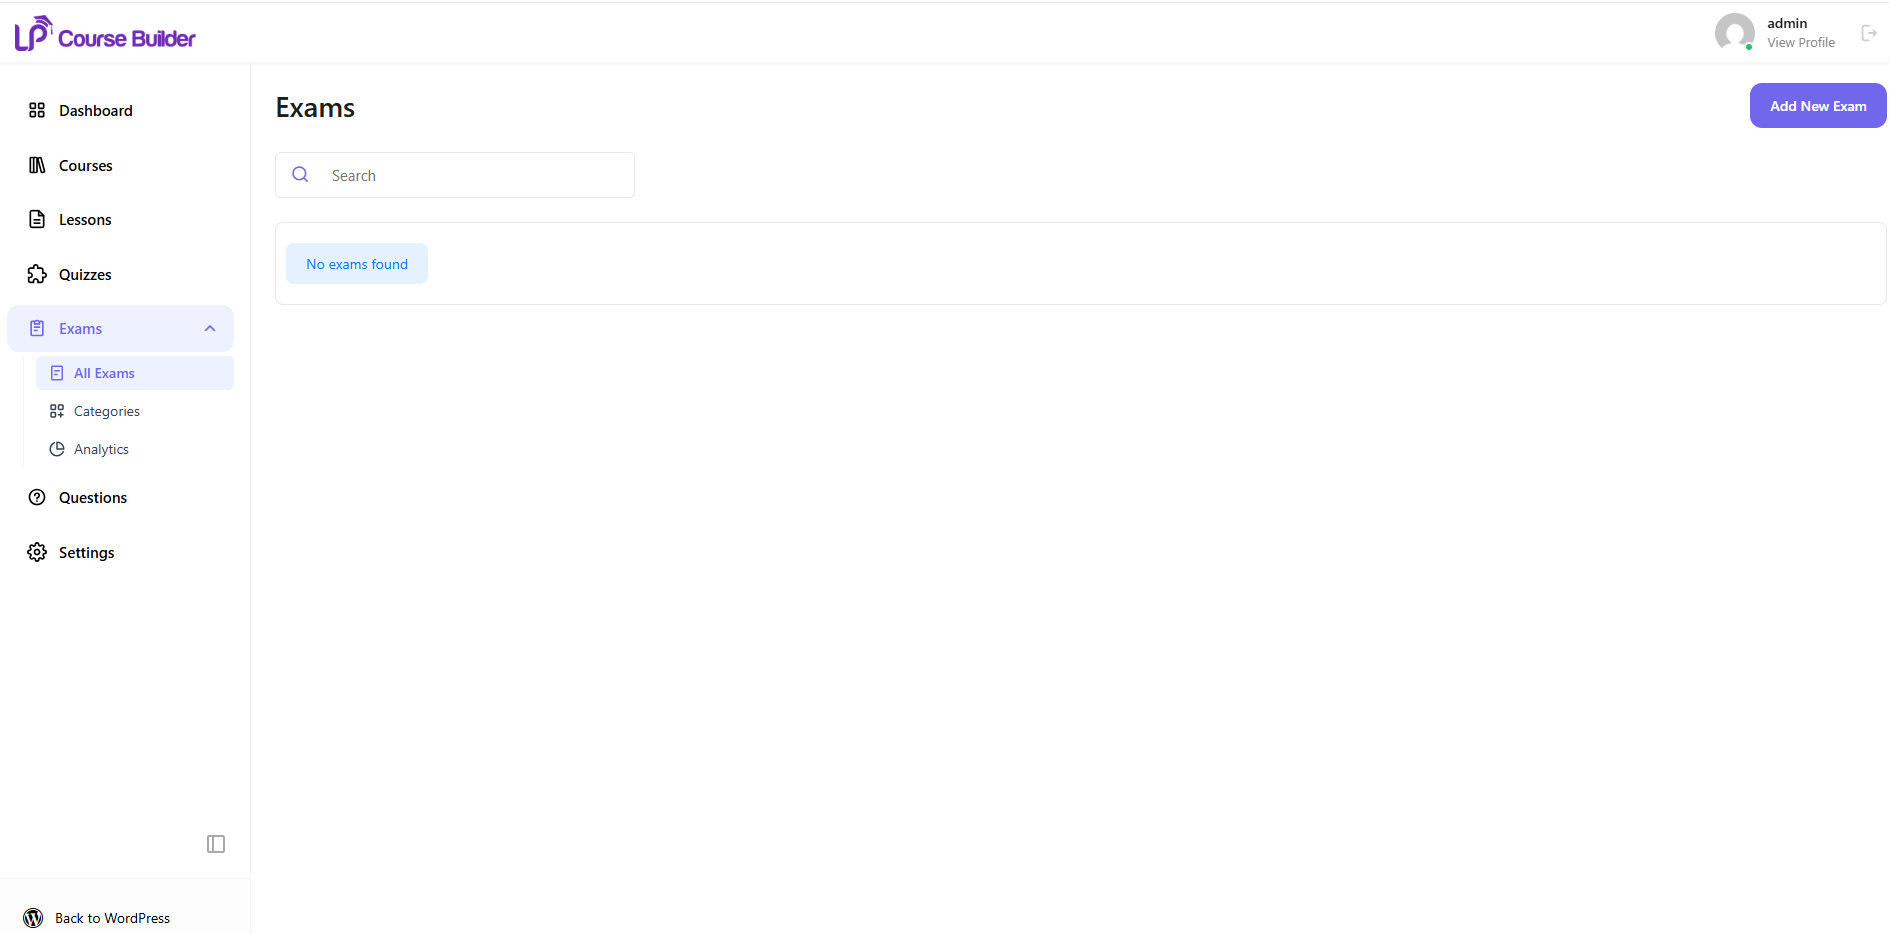
To create a new exam, navigate to LearnPress → Exams → All Exams.
The All Exams page is the central workspace for managing all exams on your website. Use the Search box to quickly locate an existing exam, or click Add New Exam in the upper-right corner to create a new one.
After clicking Add New Exam, you will be redirected to the exam editor, where you can configure your exam through the following tabs:
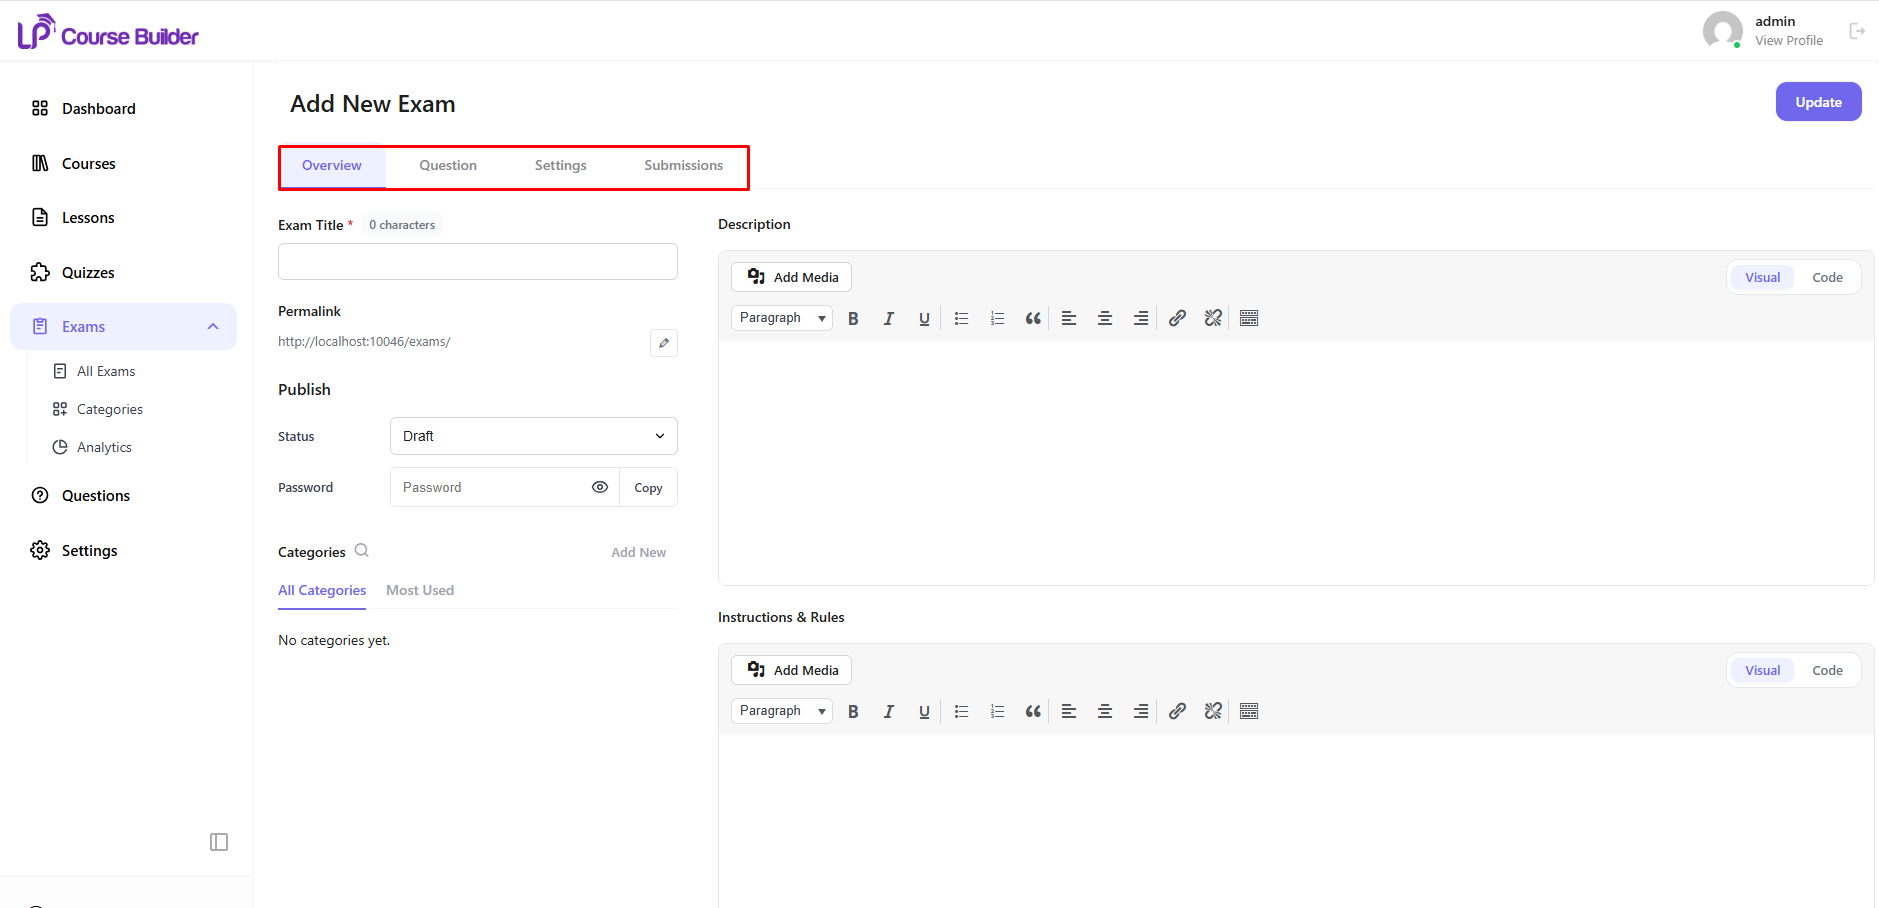
- Overview – Configure the basic information of the exam.
- Question – Create new questions or add existing questions from the Question Bank.
- Settings – Customize the exam behavior and student experience.
- Submissions – View and manage students’ exam submissions.
Complete the required information in each tab, then publish the exam when it is ready.
1. Overview
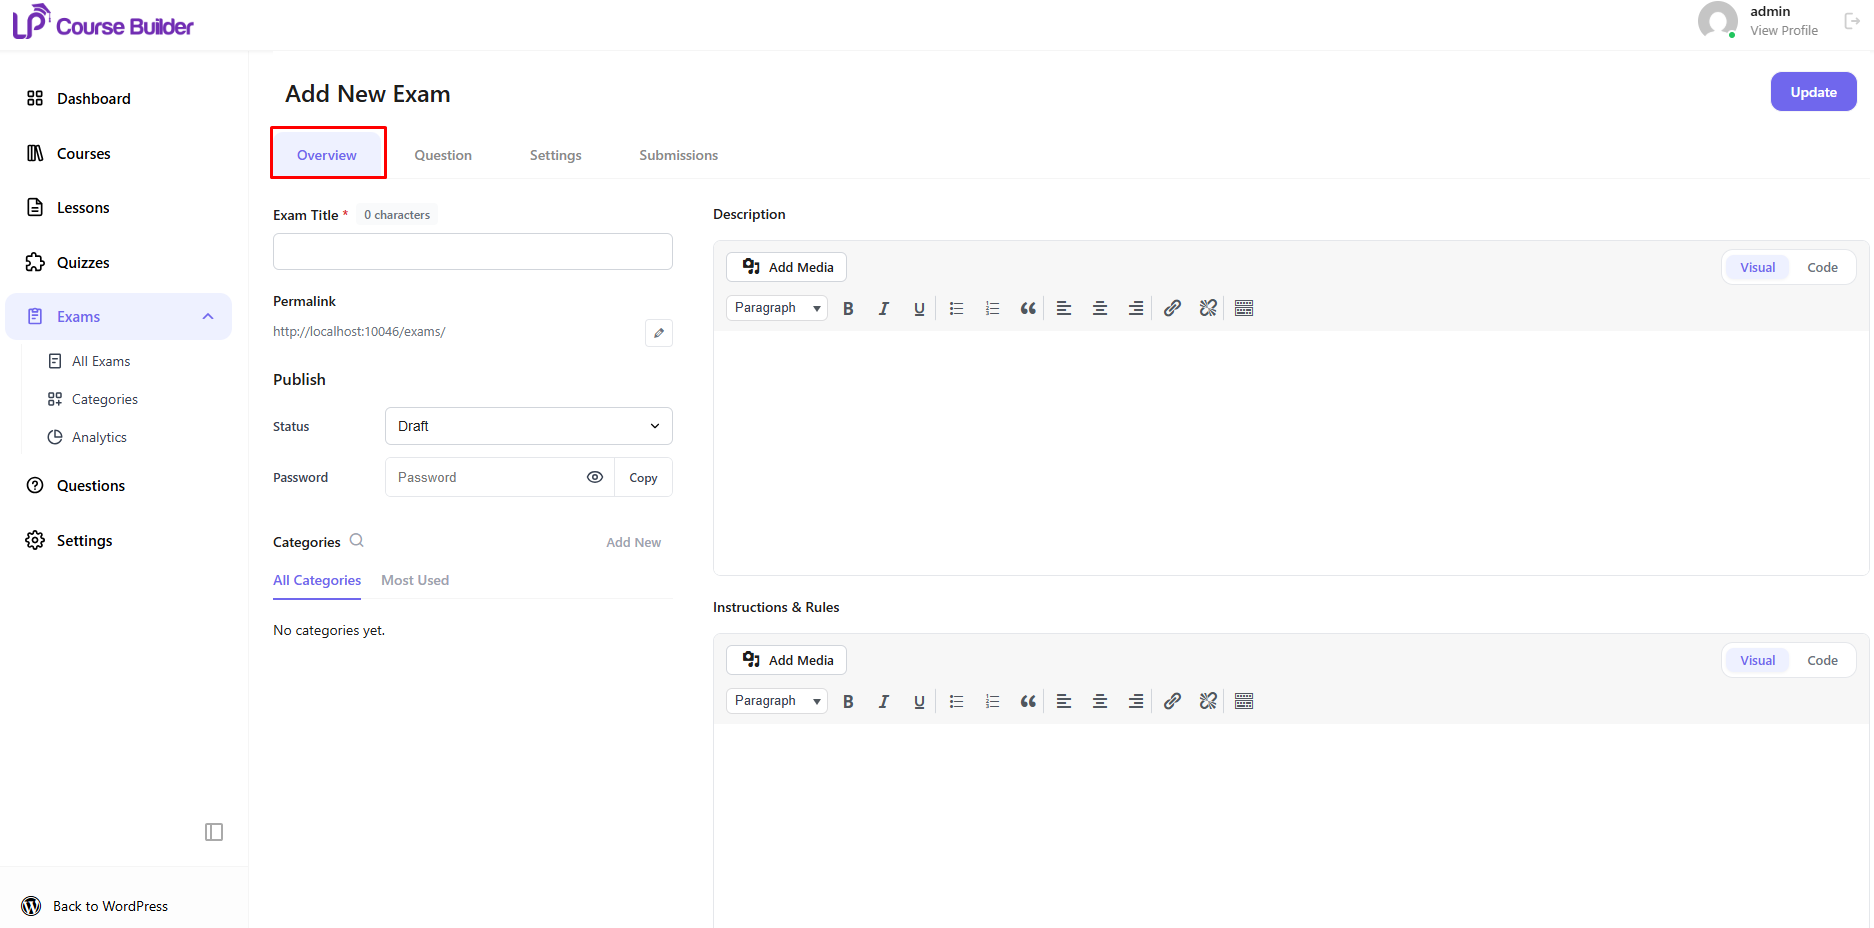
The Overview tab is where you configure the basic information for your exam before adding questions or customizing advanced settings.
On this page, you can configure the following information:
- Exam Title – Enter the name of the exam.
- Permalink – Customize the exam URL if needed.
- Description – Provide a brief overview or introduction to the exam.
- Instructions & Rules – Add important instructions, exam rules, or requirements that students should read before starting the exam.
- Status – Save the exam as Draft while editing or change it to Published when it is ready.
- Password (Optional) – Protect the exam with a password if required.
- Categories – Assign the exam to one or more categories for easier organization and management.
After entering the required information, click Update to save your changes.
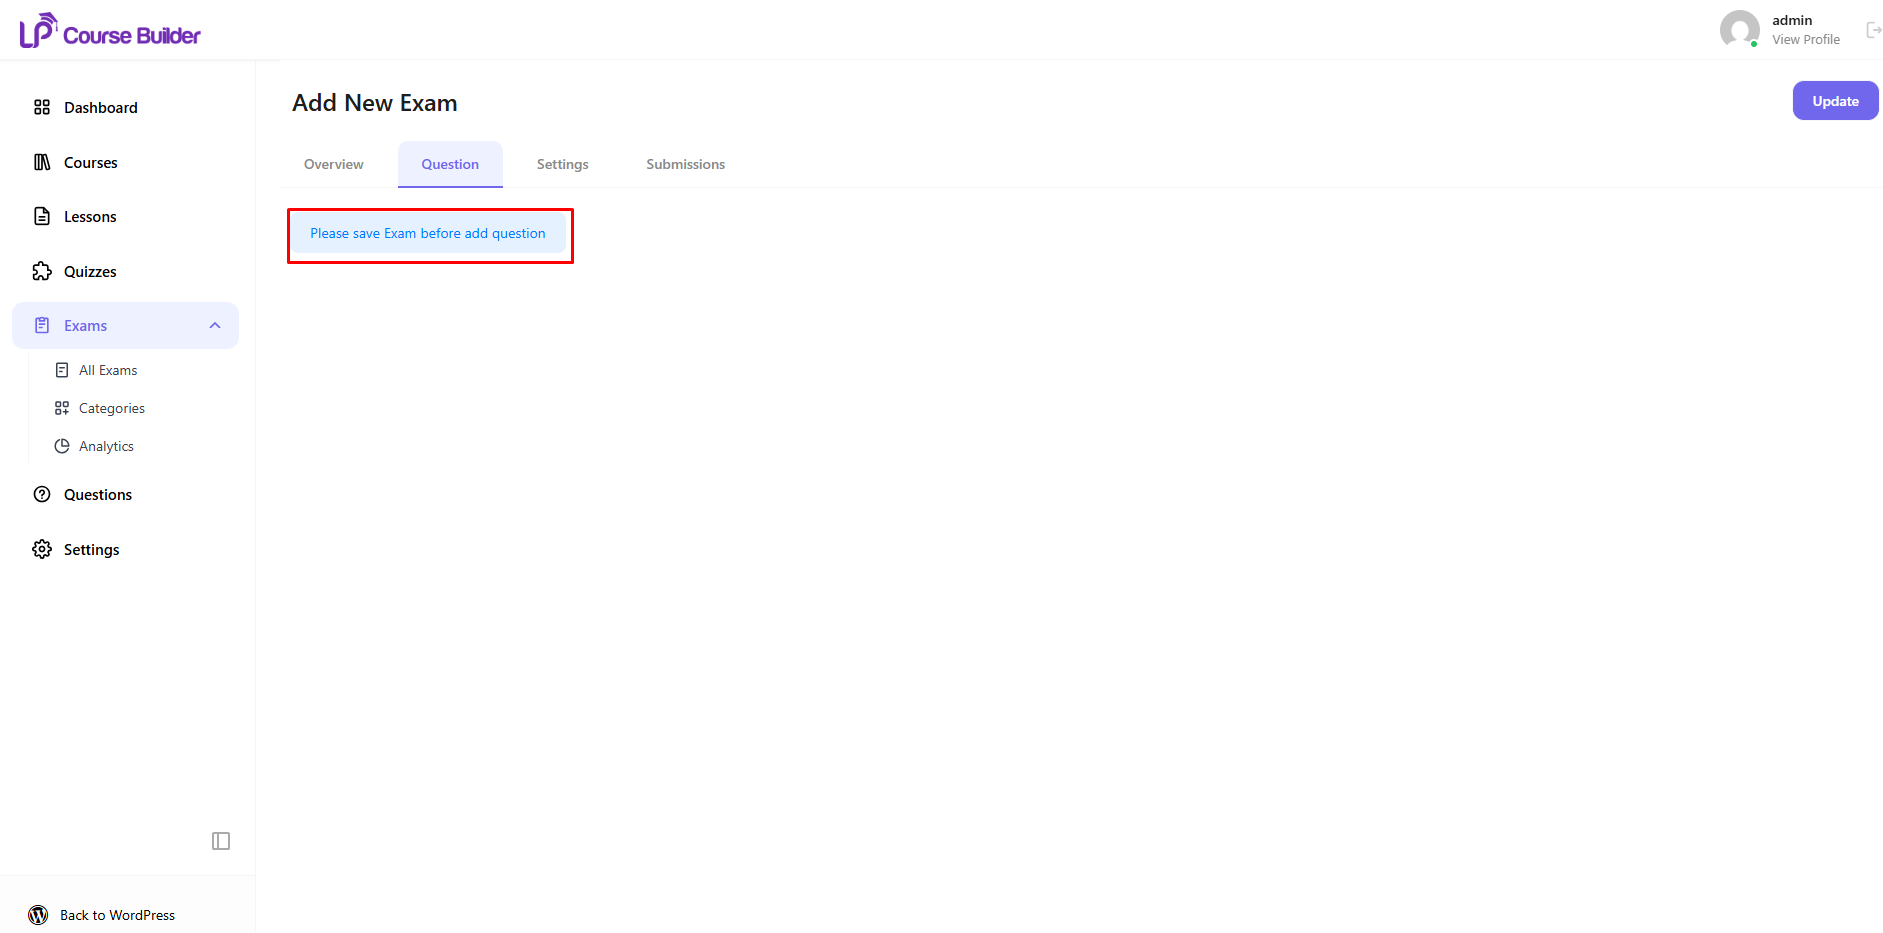
Note: The exam must be published before the Question tab becomes available.
2. Question
Once the exam has been published, the Question tab becomes available, allowing you to create new questions or add existing ones from the Question Bank.
The Question tab provides two ways to build your exam:
2.1. Create a New Question
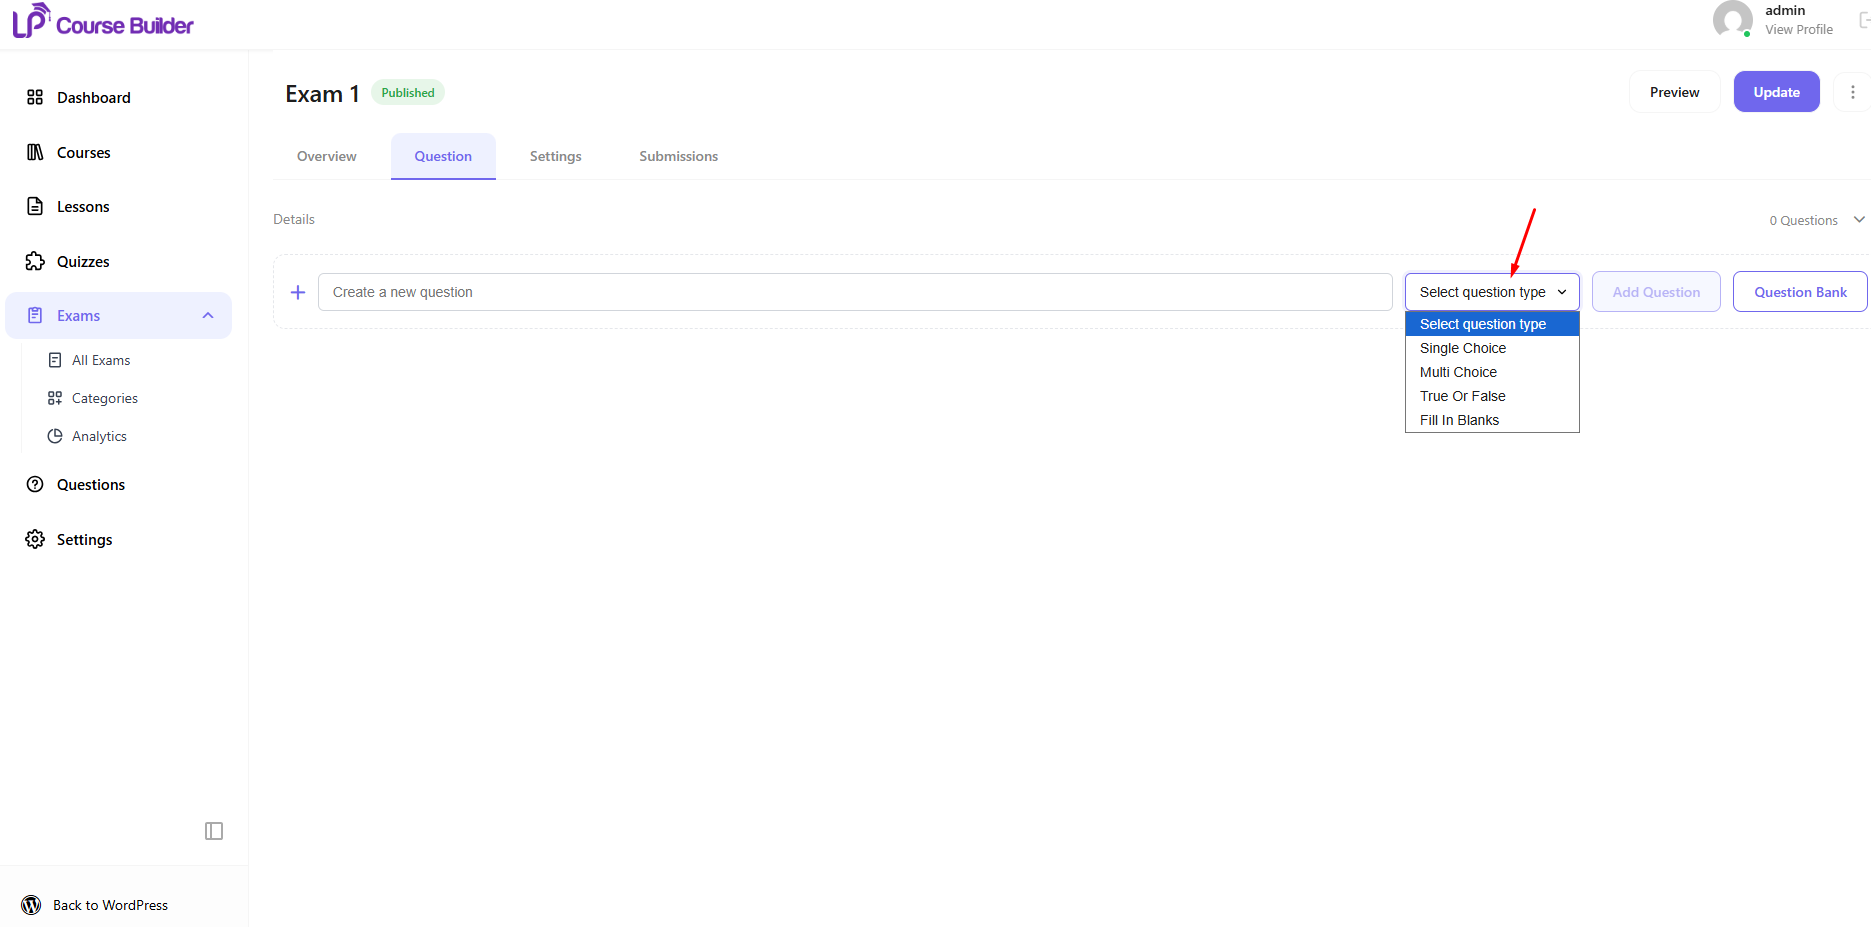
To create a new question directly within the exam:
- Enter the question title.
- Select a Question Type from the dropdown list.
- Click Add Question.
The following question types are currently supported:
- Single Choice
- Multiple Choice
- True or False
- Fill in the Blanks
The newly created question will be added directly to the current exam.
2.2. Add Questions from the Question Bank
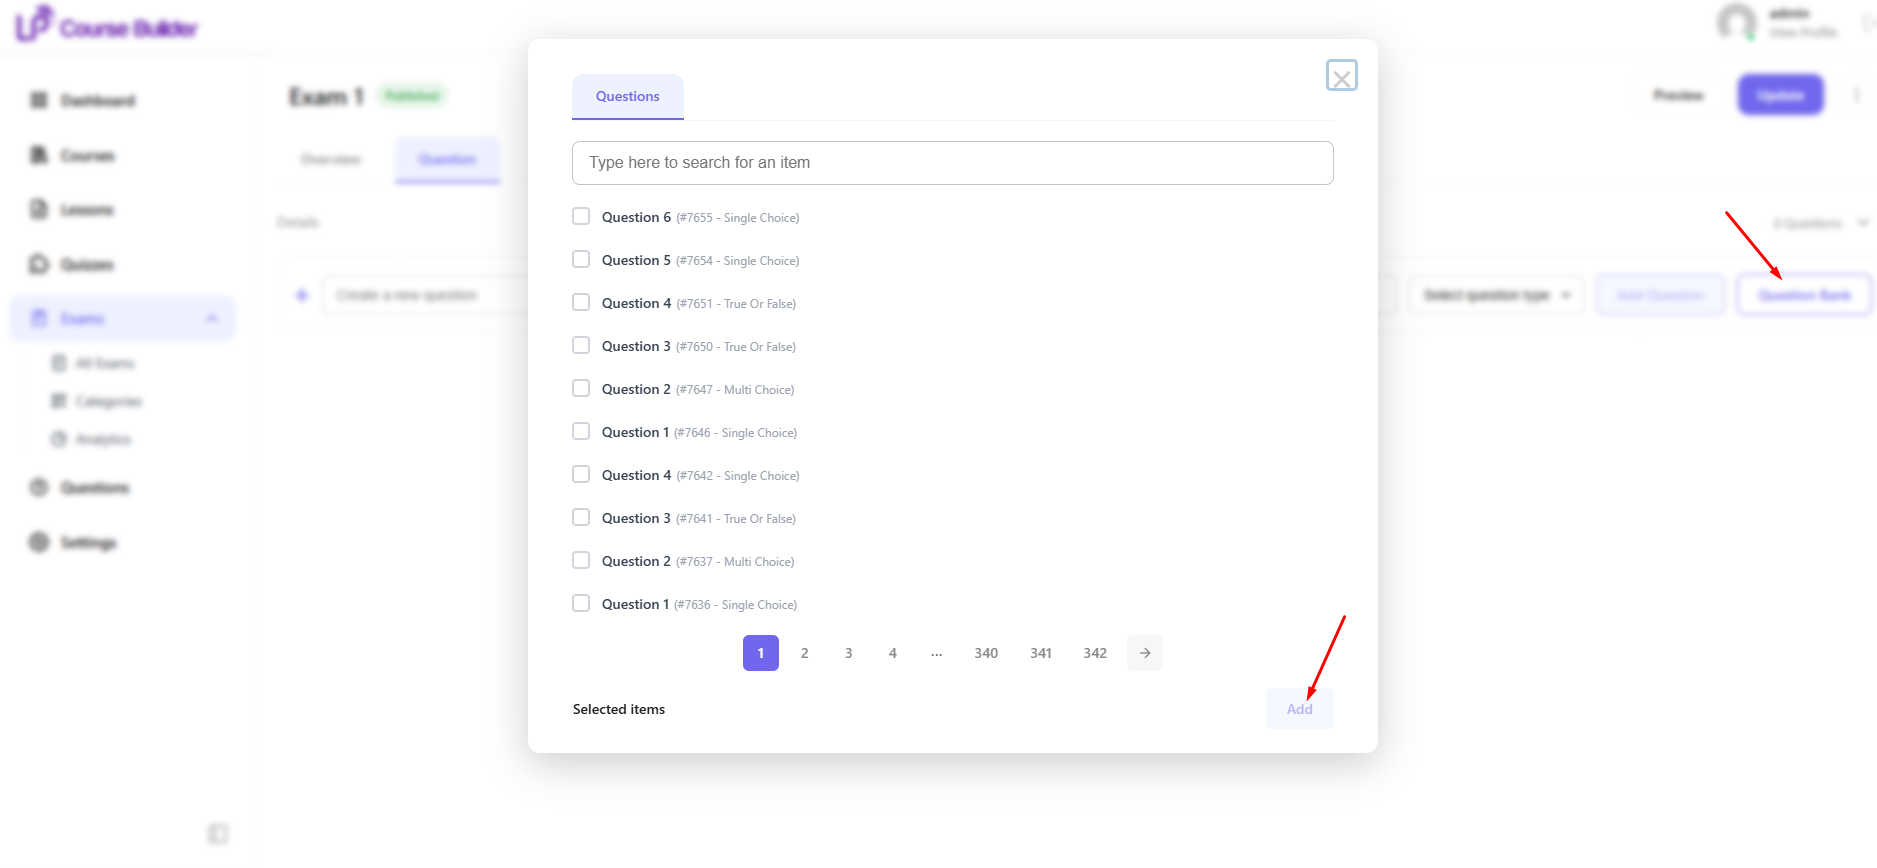
If you already have questions in your Question Bank, click Question Bank to browse your existing question library.
Select one or multiple questions and add them directly to the exam without creating them again.
Using the Question Bank allows you to reuse questions across multiple exams, making exam creation faster and more efficient.
Tip: Using the Question Bank is recommended when managing a large collection of questions or creating multiple exams with shared content.
3. Settings
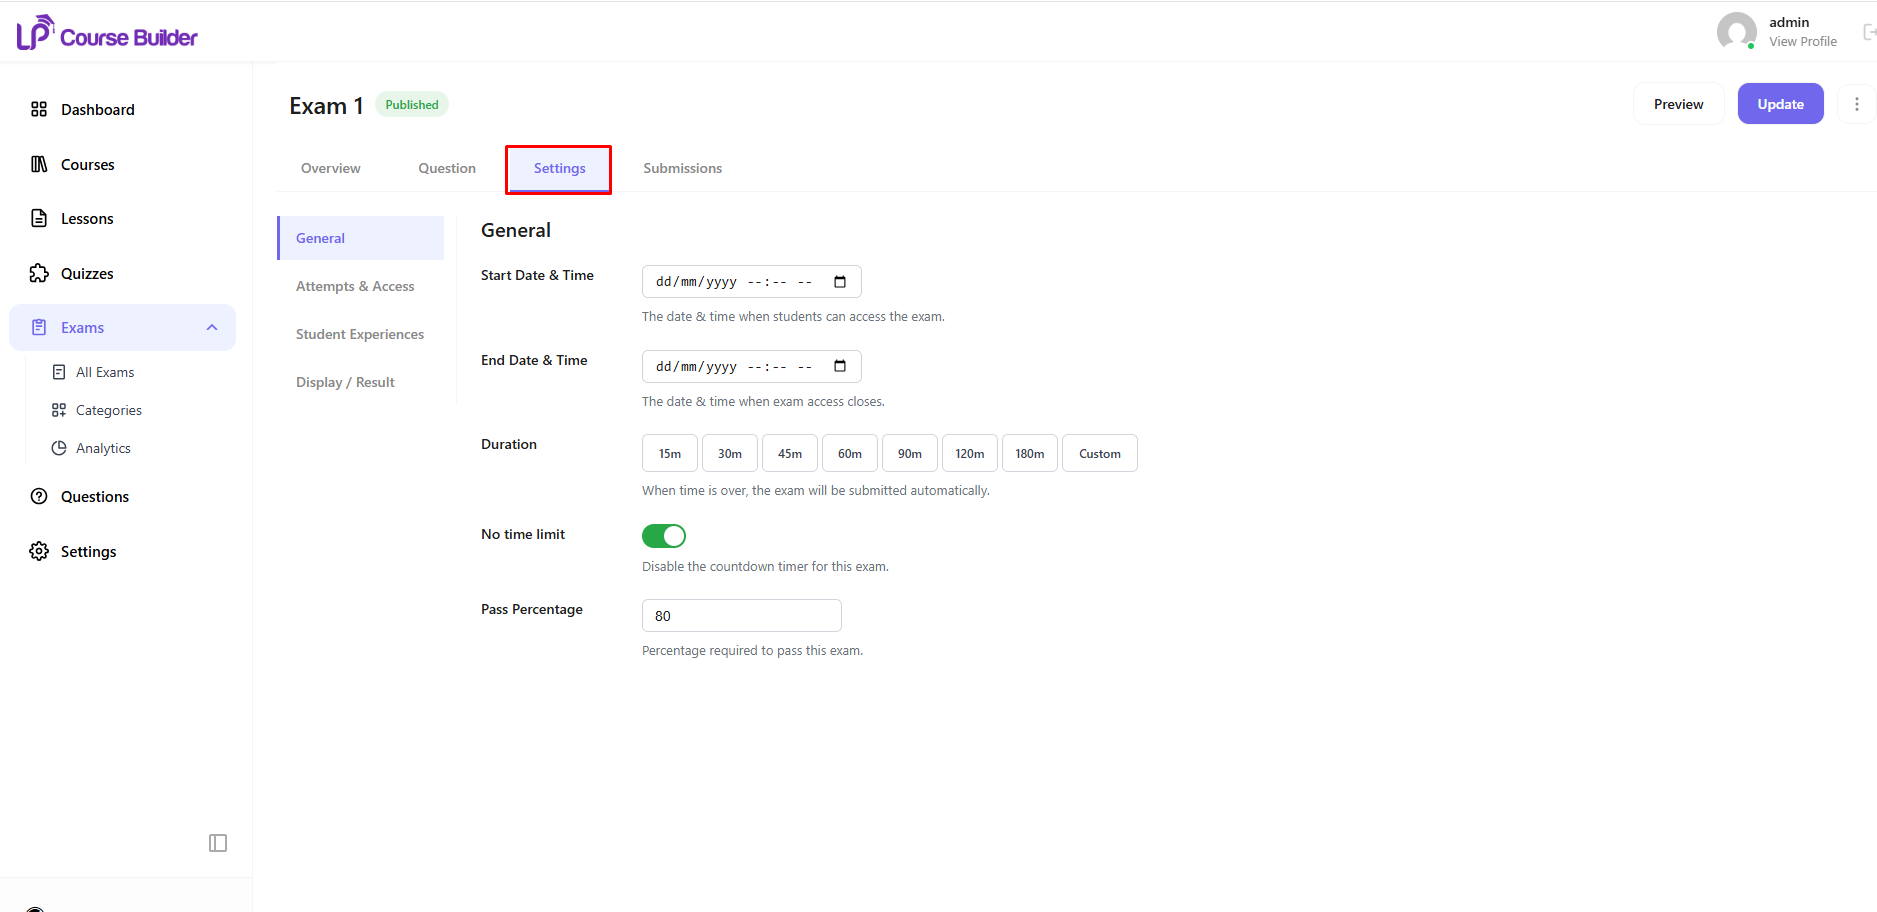
The Settings tab allows you to configure how the exam will be conducted and how students interact with it.
The available settings are organized into several sections, each focusing on a different aspect of the examination process.
The available sections include:
- General
- Attempts & Access
- Student Experiences
- Display / Result
Each section provides a set of options to help you customize the exam according to your teaching and assessment requirements.
The following sections explain each setting in detail.
3.1. General
The General section allows you to configure the basic rules and schedule for the exam, including the exam duration, availability period, and passing requirements.
The available settings include:
Start Date & Time
Specify the date and time when students are allowed to access the exam.
Note: Students cannot start the exam before the specified start date and time.
End Date & Time
Specify the date and time when access to the exam will close.
After the end date and time, students will no longer be able to access the exam unless Allow Late Access is enabled.
Duration
Set the maximum amount of time students have to complete the exam.
When the time limit is reached, the exam will be submitted automatically.
No Time Limit
Enable this option to remove the time limit for the exam.
When enabled, the countdown timer will be disabled and students can complete the exam without time restrictions.
Pass Percentage
Enter the minimum percentage required for students to pass the exam.
Students whose final score meets or exceeds this percentage will be marked as Passed.
3.2. Attempts & Access
The Attempts & Access section controls how students access the exam and how many times they are allowed to take it.
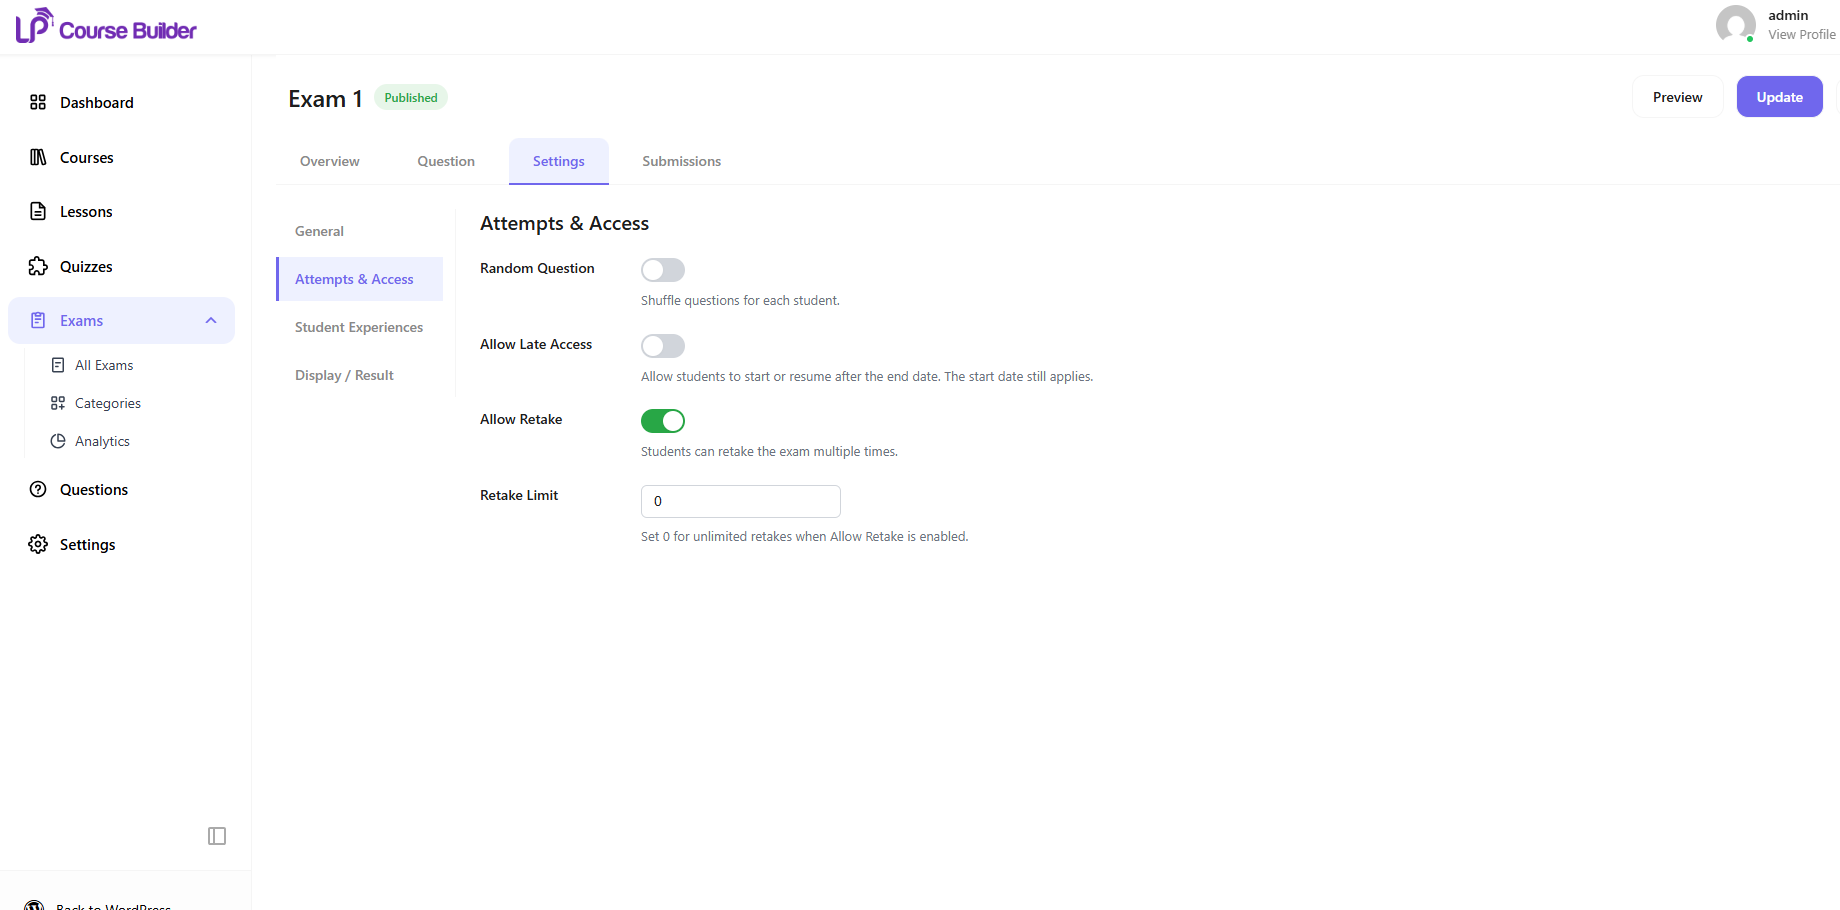
Random Question
Enable this option to shuffle the order of questions for each student.
This helps reduce the possibility of students receiving identical question sequences.
Allow Late Access
Allow students to start or resume the exam after the End Date & Time has passed.
Note: Students must still wait until the Start Date & Time before accessing the exam.
Allow Retake
Enable this option to allow students to retake the exam after completing an attempt.
Retake Limit
Specify the maximum number of retakes allowed.
Enter 0 to allow unlimited retakes when Allow Retake is enabled.
3.3. Student Experience
The Student Experience section allows you to customize how students interact with the exam during and after the assessment.
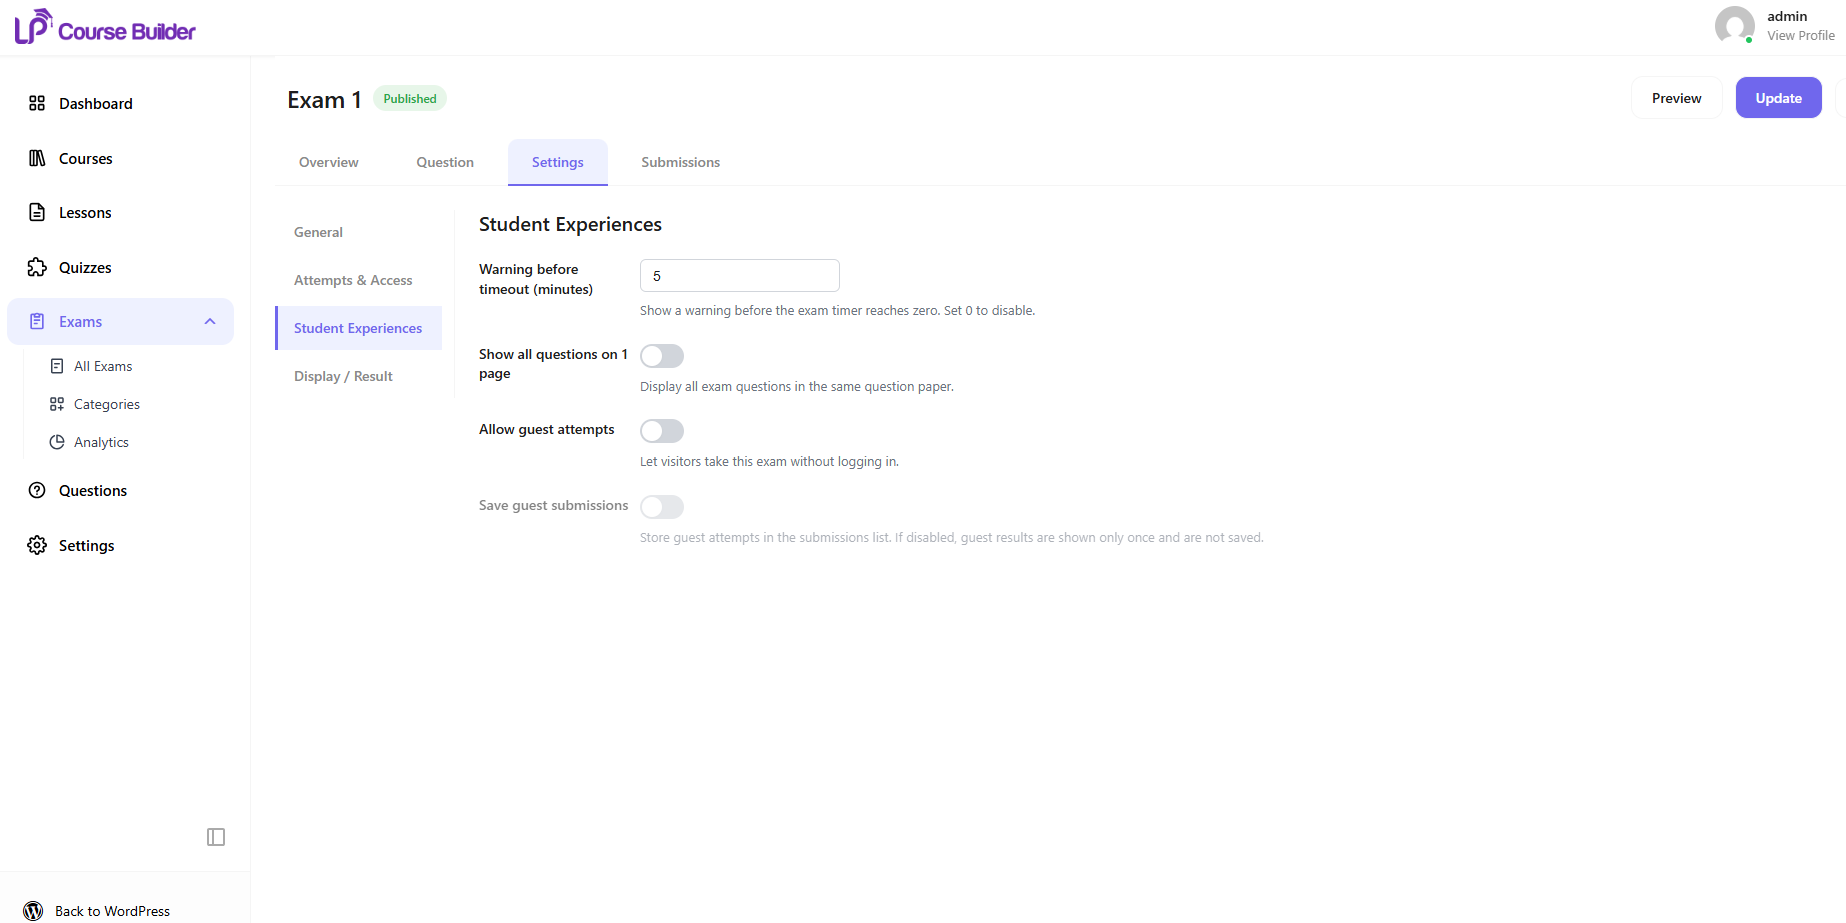
Warning Before Timeout (Minutes)
Display a warning message before the exam time expires.
Enter 0 to disable the warning.
Show All Questions on 1 Page
Enable this option to display all exam questions on a single page instead of separating them into multiple pages.
Allow Guest Attempts
Allow visitors who are not logged in to take the exam.
Save Guest Submissions
Enable this option to save guest exam attempts in the submission list.
If disabled, guest results will only be displayed once after submission and will not be stored in the system.
3.4. Display / Result
The Display / Result section controls what information students can view after submitting the exam.
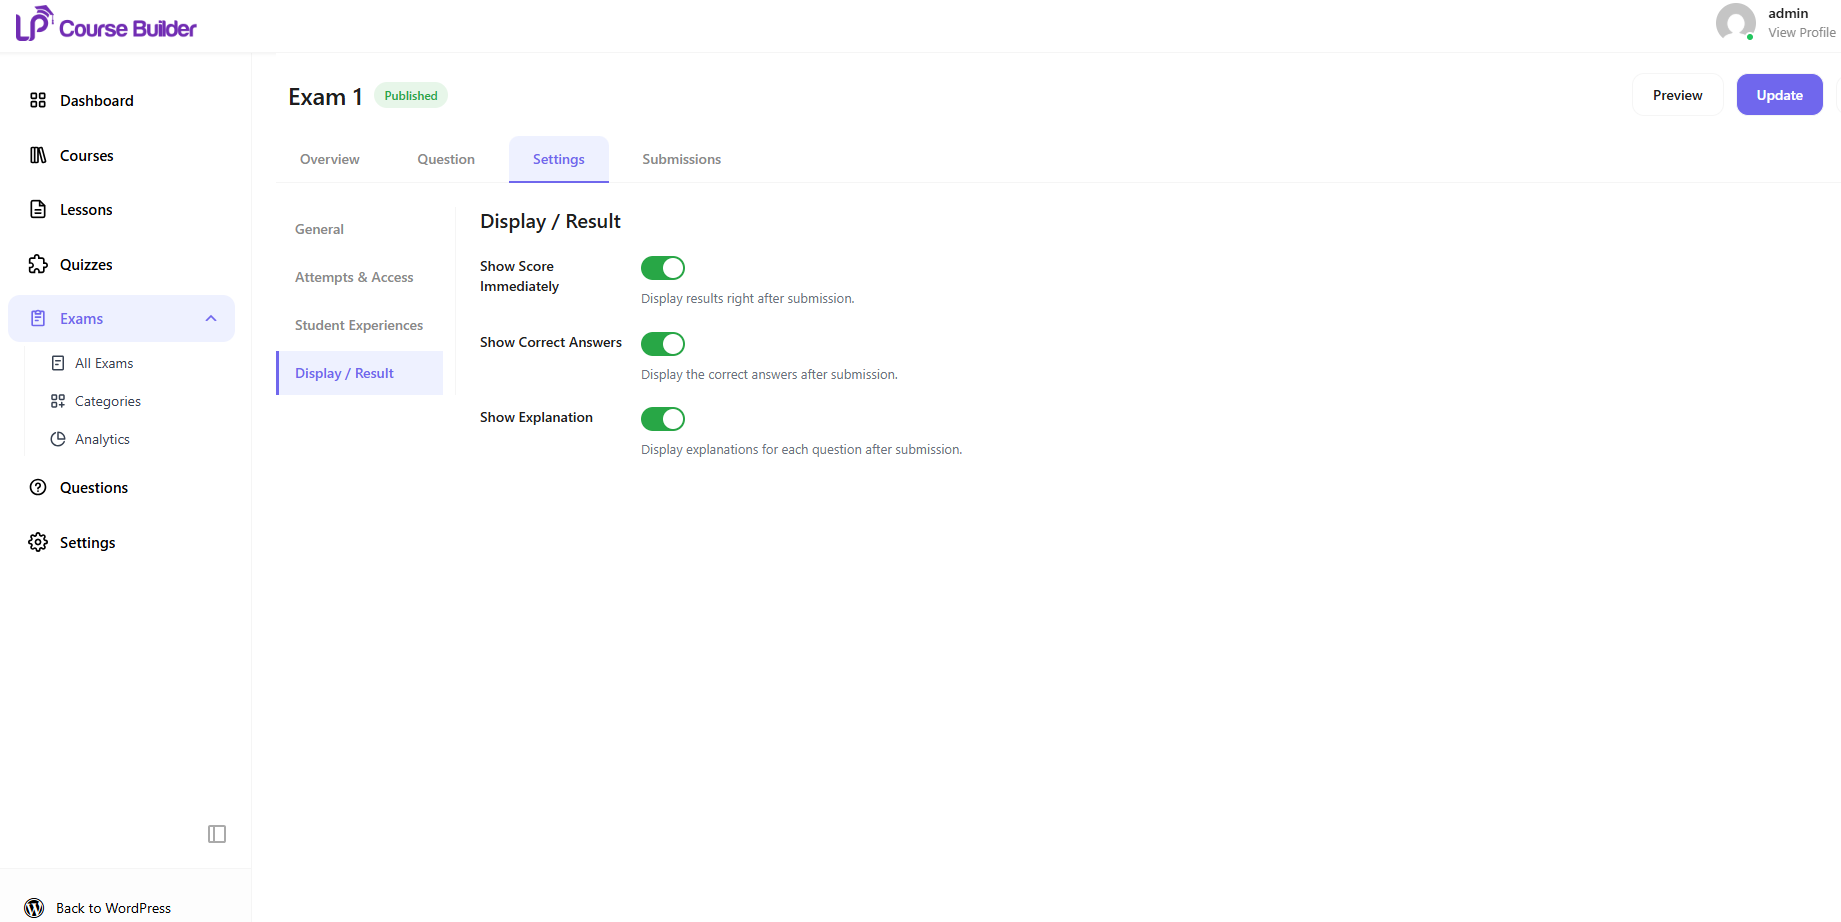
Show Score Immediately
Display the student’s score immediately after the exam is submitted.
Show Score Immediately
Display the correct answers for each question after submission.
Show Explanation
Display the explanation for each question after the exam has been submitted.
4. Submissions
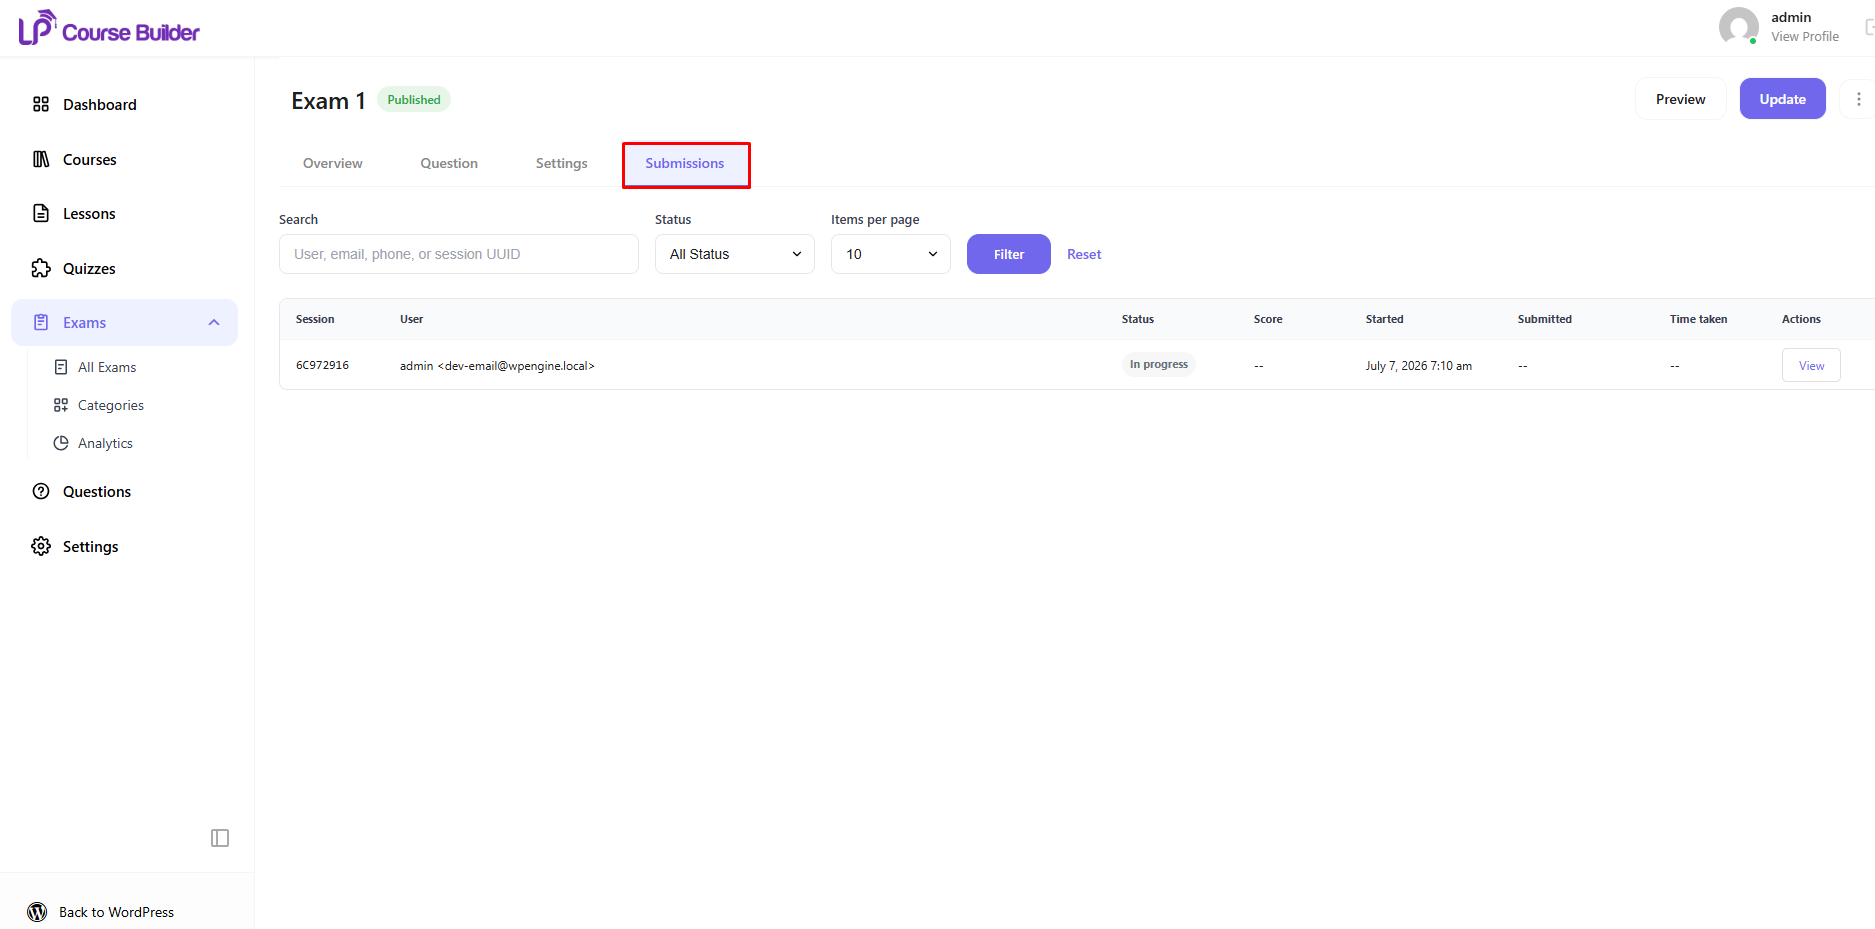
The Submissions tab allows you to monitor and manage all student submissions for the current exam.
Each submission is displayed in a table, providing key information about the student’s exam attempt and its current status. This makes it easy to track participation, review results, and manage exam records from a single location.
The submission table includes the following information:
- Session – A unique identifier for each exam attempt.
- User – The student who submitted the exam.
- Status – The current status of the submission, such as In Progress or Submitted.
- Score – The student’s score for the exam.
- Started – The date and time when the student started the exam.
- Submitted – The date and time when the exam was submitted.
- Time Taken – The total time the student spent completing the exam.
- Actions – Available actions for viewing or managing the submission.
Use the Search box to quickly find a specific submission or review a student’s exam history.
Tip: Regularly reviewing submissions helps instructors monitor student progress and identify incomplete or abnormal exam attempts.