You know your subject well enough to teach it, but turning that knowledge into an online class people actually pay for is a different skill.
Between picking a topic, recording lessons, building a curriculum, and choosing where to host it all, it’s easy to spend months planning and never hit publish.
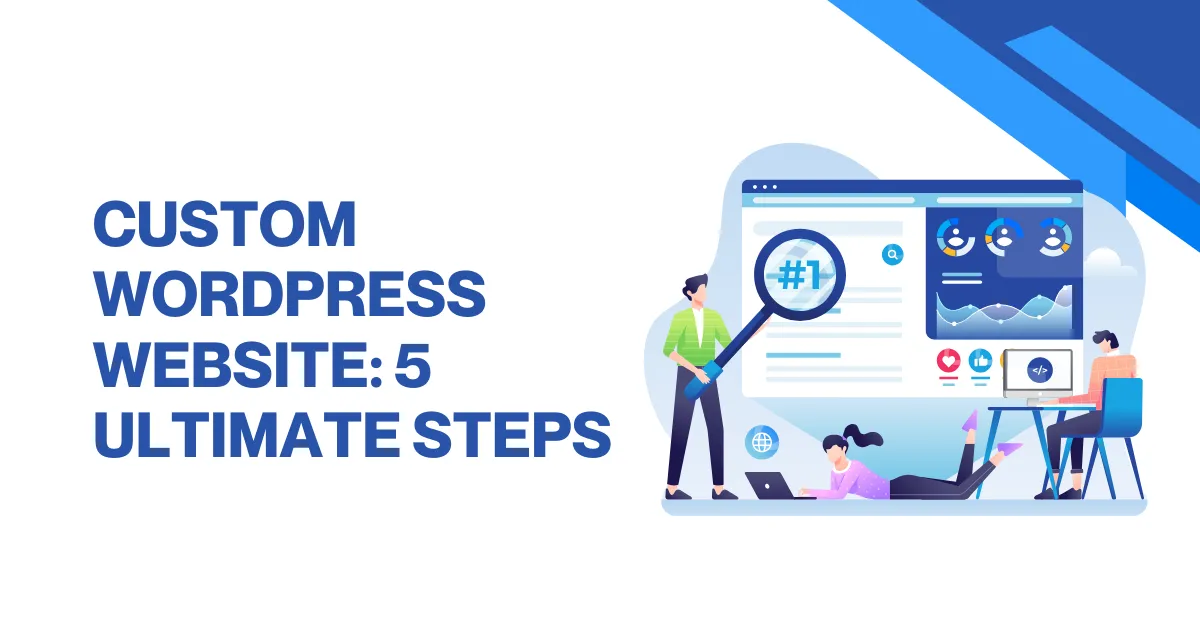
This guide walks through how to create an online course step by step, breaks down the main course platforms, and shows how LearnPress and the Eduma theme make the WordPress route realistic even if you’ve never touched a line of code.
Table of Contents
LearnPress – WordPress LMS Plugin
We provide an amazing WordPress LMS plugin to create & sell online courses. Let’s find out!
Try NowWhat to Decide Before You Create an Online Class
Three decisions made before you write your first lesson will determine most of your results. Skipping them is the fastest way to build a course nobody buys.
Define your topic and target student
Narrow beats broad, every time. “Photography tips” is a topic. “How to shoot indoor portraits using only window light and a $30 reflector” is a course with a clear outcome and a clear buyer. When your topic is specific, your curriculum writes itself, your sales page is easier to write, and your marketing channel becomes obvious.
Before moving forward, write one sentence that answers: who is this for and what will they be able to do after completing the course? If you cannot write that sentence clearly, the course is not ready to be built yet.
Validate the idea before you build it
Building a complete course before confirming demand is the most common mistake new creators make. It costs months of work and produces a product with no proven audience. Validate first.
Post a question about your topic in a relevant Facebook group, subreddit, or LinkedIn community and measure the response. Ask your existing email list or social followers directly: “Would you buy a course on X?” Send a short three-question survey covering their biggest challenge with the topic, whether they have bought a course on it before, and what would make them buy one now.
If people engage, ask follow-up questions, or sign up for a waitlist, that is signal enough to move forward. If nobody responds, treat that as valuable data before investing weeks of production time.
Choose your course format
Video is the most popular format because students respond well to an instructor they can see and hear. But it is also the most time-consuming to produce. Text-based courses are faster to create, easier to update, and work well for coding, writing, language learning, and reference-style content.
Mixed formats combining short video introductions with detailed written lessons, downloadable templates, and checklists tend to produce the best completion rates.
Pick the format that matches both your content type and your available production setup. If you have a decent microphone and a clean background, start with video. If you are a faster writer than a speaker, start with text and add video later.
How to Plan your Online Course Content
Once you have validated your idea, organizing your knowledge into a learnable sequence is the next step. Good structure is what separates a course with strong reviews from a collection of loosely related lessons that confuses buyers and tanks completion rates.
Build your curriculum from the outcome backwards
Start with what students will be able to do at the end of the course and work backwards. If a student finishes your class, what are the five to seven major things they will know or be able to do? Each of those becomes a module.
Within each module, break down the individual concepts or tasks into individual lessons. For video content, target five to fifteen minutes per lesson: short enough to maintain attention, long enough to cover the material properly.
A practical course structure for most skill-based topics looks like this:
- Module 1 covers the foundation and core concepts;
- Modules 2 and 3 cover the primary skills students came to learn;
- Module 4 covers applying everything together in a real project or scenario;
- Module 5 covers next steps, resources, and ongoing learning.
Adjust the number of modules based on your topic depth and audience level, but maintain a clear progression where each module builds on the previous one.
Produce your course materials
For video lessons, audio quality matters more than visual quality. A USB condenser microphone and decent natural light will take you further than a 4K camera with poor audio. Screen recording tools like OBS Studio (free) and Loom (free tier available) handle most tutorial and presentation formats without any complex setup. For talking-head video, a clean background and a ring light solve most production problems for under $50.
For text lessons, draft in Google Docs or Notion before uploading to your platform. Keep a consistent internal structure across every lesson: a one-sentence objective at the top, the main content in the middle, and a key takeaway or action step at the end. This format improves student retention and makes content easier to skim on a second pass.
Add at least one downloadable resource per module: a template, checklist, reference sheet, or workbook. These add perceived value and give students a tangible reason to engage with the material beyond passively watching videos.
Set a pricing model that fits your goals
Three models work for most independent course creators.
A one-time purchase gives students lifetime access in exchange for a single payment. It is the simplest model to communicate and works well for self-contained skill-based courses.
A subscription model charges monthly or annually for access to a library of courses. It takes longer to generate significant income but creates predictable recurring revenue once you have enough content to justify the ongoing fee.
A cohort-based model groups students into a time-limited intake with a defined start and end date, often at a higher price point because of the community access and live instructor involvement it includes.
For a first course in most niches, a one-time price between $97 and $297 is a solid benchmark. Price it too low and students undervalue the content. Price it too high before you have established reviews and it becomes harder to convert new buyers. You can always adjust after your first launch once you have completion data and feedback from real students.
How to Choose The Right Course Platform
Choosing the right platform is one of the most consequential decisions you will make when you create an online class. The wrong choice means fighting platform fees, restrictions, and a lack of ownership over your student data for years.
The two main options are marketplace platforms and self-hosted platforms, and the differences between them are significant.
Marketplace vs. self-hosted: what actually matters
Marketplace platforms like Udemy, Skillshare, and Coursera give you a pre-built environment and in some cases a built-in audience browsing for courses. The tradeoffs are substantial:
Udemy regularly discounts courses to $15 during promotions without requiring creator consent, you take home a reduced revenue share on each sale, and you do not own your student email list. Your course lives under their brand and their domain.
Self-hosted platforms put you in control. You own your domain, your brand, your pricing, and your student data. The responsibility to drive traffic is yours, but everything you build belongs to you permanently. For creators who are serious about building a long-term course business, self-hosted is the stronger path once you are past the first launch.
Key features to look for in course creation platforms
Regardless of which route you take, your platform should cover these core capabilities: a course builder that supports multi-module structures with lessons, quizzes, and assignments; payment gateway integration with Stripe, PayPal, and ideally local processors; a clean and mobile-responsive student dashboard with progress tracking; SEO-friendly custom URLs and metadata control on course pages; and pricing flexibility that supports coupons, bundles, free trials, and subscriptions.
LearnPress: a free WordPress LMS for self-hosted course creators
If you are building on WordPress, LearnPress is the most practical way to create an online class and keep 100 percent of your revenue. It is a free, open-source LMS plugin that runs directly on your WordPress site, giving you complete ownership of your courses, your pricing, and your student relationships.
After installing LearnPress, you build and manage everything from the same WordPress dashboard you already use.
Each course has sections and lessons, and you can add quizzes with multiple question types: multiple choice, fill in the blank, and true/false. A growing library of free and paid add-ons extends the core plugin with features like drip content scheduling, content protection, certificate generation, and co-instructor management.
For payments, LearnPress integrates with WooCommerce for full e-commerce functionality, and direct payment add-ons are available for PayPal and Stripe. The plugin also works with popular email marketing tools so you can automatically add students to sequences based on enrollment.
How to Build Your Online Class Step By Step
LearnPress makes the technical side of course creation manageable, even if you have never built a course site before. Here is the full workflow from a fresh WordPress install to a published, enrollable course.
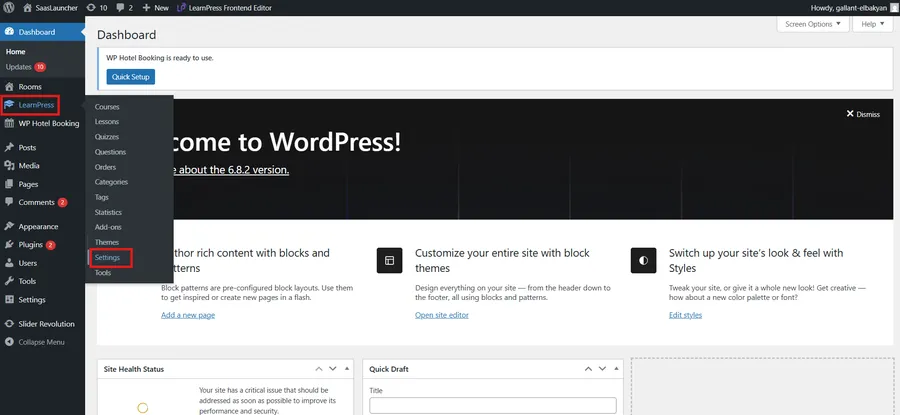
Install and configure LearnPress
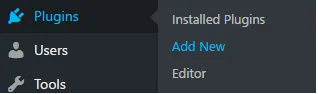
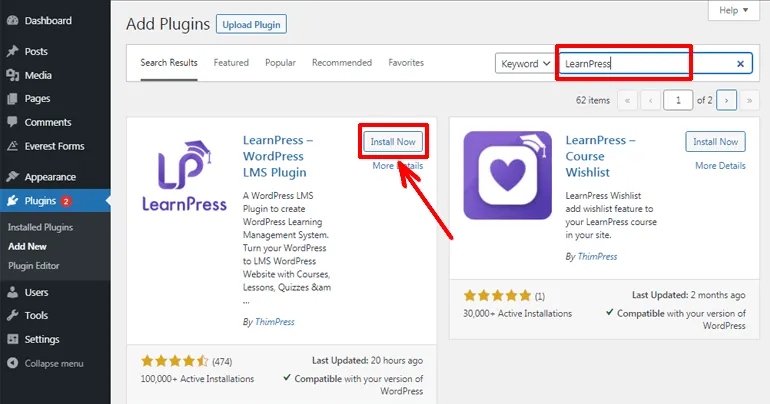
In your WordPress admin panel, go to Plugins > Add New. Search for “LearnPress,” click Install Now, then Activate. A LearnPress item appears in your admin sidebar immediately after activation, with no configuration wizard required.
Start with the settings before creating any content.
Go to LearnPress > Settings and set your currency under the General tab.
Under the Courses tab, configure your default enrollment type: manual approval or automatic enrollment after payment.
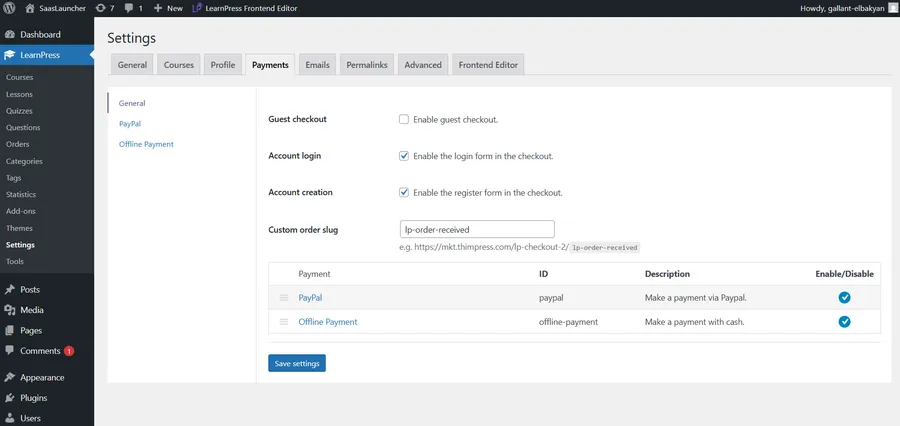
Under the Payments tab, enable your preferred payment method. For PayPal, enter your merchant email address. For Stripe, install the LearnPress Stripe add-on, then enter your Stripe API keys from the Stripe dashboard under Developers > API keys.
One step most new users miss: go to LearnPress > Settings > Pages and confirm that the plugin has created and assigned the required pages: Courses, Profile, Checkout, and Terms and Conditions. If any are blank, create WordPress pages with those names and assign them in this panel. Without this step, student enrollment and the checkout process will not function correctly.
Create your first course
Navigate to LearnPress > Courses > Add New. Add your course title and write the course description in the main editor. The description appears on your course listing page and functions as a mini sales pitch, so write it for prospective students: cover what the course includes, who it is designed for, and what outcome they can expect.
Scroll down to the Curriculum box. Click “Add Section” to create your first module and give it a name. Within that section, click “Add New Lesson” and give the lesson a title. Repeat for each lesson in the module, then add your next section. You can reorder sections and lessons at any time by dragging them.
Add lesson content, quizzes, and media
Click the title of any lesson in your curriculum to open it in the WordPress block editor. Write your lesson content directly, paste a YouTube or Vimeo embed URL to add a video block, or use the file upload block to attach PDFs, worksheets, or audio files. For large video libraries, hosting on Vimeo and embedding in LearnPress lessons is better for server performance than uploading raw video files to WordPress directly.
For quizzes, click “Add New Quiz” within a curriculum section. The quiz builder lets you add questions one at a time, set point values per question, configure the pass mark percentage, and limit the number of attempts. Under Quiz Settings, you can require students to pass before advancing to the next lesson, which increases engagement with the material and reduces skipping.
Set pricing and publish your course
Back on the course edit screen, find the Course Price panel in the right sidebar. Enter your price, or leave it at zero for a free course. You can also set a course capacity (capping enrollment at a maximum number of students), a course duration (expiring access after a set number of days), and a retake option for expired enrollments.
When everything is configured, click Publish. Your course immediately appears on your LearnPress course listing page and is live for enrollment. Students who click through will see the full course page with the curriculum preview, instructor information, and enrollment button.
How to Design Your Course Site with the Eduma Theme
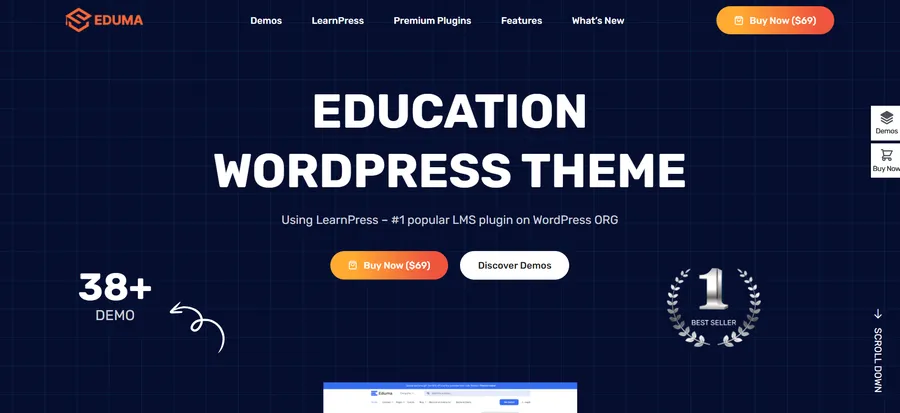
LearnPress handles all the course logic, but your site design determines whether a visitor trusts you enough to enroll. Eduma is a premium WordPress education theme built specifically to work with LearnPress. It ships with over 40 pre-built demo layouts covering a wide range of niches: language schools, fitness coaching, coding academies, corporate training portals, and university-style course directories.
After importing an Eduma demo, your homepage already includes a course search bar, featured instructor sections, course category grids, a student testimonials block, and a statistics counter, all of it pulling live data from your LearnPress courses automatically. You are not wiring up widgets or writing template code. It is all there on import.
Customize Eduma with Elementor
Eduma is built for Elementor, which means every page section is a drag-and-drop element you can edit visually without touching code. After importing your chosen demo through Appearance > Eduma > Demo Importer, open any page in Elementor and swap in your content: your instructor photo, your testimonials, your featured course titles, your brand copy.
Global design settings live under Appearance > Customize. Enter your brand colors once under Color Settings and they apply across every page instantly. For typography, Eduma supports the full Google Fonts library with a searchable dropdown, so you can match whatever font pair your brand already uses.
Individual course pages use Eduma’s built-in LearnPress-aware templates, which automatically display the course rating, instructor bio, full curriculum preview with lesson count, enrollment button, and social sharing links, in a layout students recognize from professional course sites. You do not build any of that from scratch. It is part of how the theme renders LearnPress course data.
How to Sell your Online Class And Get Your First Students
Publishing the course is the first half of the work. Getting students to buy it is the second, and it is where most creators underinvest. Marketing is not optional.
Write a sales page that converts
Your course sales page needs to do four things: establish that you understand the student’s problem, demonstrate that you are qualified to solve it, show exactly what is inside the course, and give the student a clear reason to act now rather than later.
The most important element is the outcome statement at the top of the page: what specifically will the student be able to do after completing the course? “Learn photography” is not an outcome. “By the end of this course, you will be able to shoot, edit, and deliver a full portrait session using only natural light, no studio required” is a reason to buy.
Below the outcome, include a full curriculum breakdown so students know exactly what they are getting. Add an instructor bio with a photo that establishes your credibility and experience. Include two or three student testimonials if you have them, even feedback from beta testers or early reviewers counts at this stage. A clear FAQ section covering your refund policy, time commitment, and prerequisites handles the most common objections before they stop a sale. Finish with a visible price and purchase button that does not require scrolling.
Build your audience before the launch
The most reliable way to sell lessons online is through an email list. A list of 200 subscribers who opted in specifically because of your topic will consistently outperform 10,000 passive social followers. Start building that list before your course goes live.
Create a free lead magnet directly related to your course topic: a PDF checklist, a short video tutorial, a downloadable template, or a resource guide. Add an opt-in form to your WordPress site using a plugin like Mailchimp for WordPress, Fluent Forms, or WPForms, and drive traffic to it through content: a blog post targeting a related keyword, a YouTube tutorial, LinkedIn articles, or short-form social content. Your email provider connects to your site through the opt-in plugin, and you start collecting subscribers before the course is even finished.
Send your list consistent value for two to four weeks before the launch. Teach, share behind-the-scenes content, or answer questions about the course topic. Then introduce the course with a four to five email launch sequence spread across the launch window.
Use a launch discount and a real deadline
For your first launch, offering 20 to 30 percent off your full price for the first 48 to 72 hours creates buying urgency without permanently lowering the course’s perceived value. Use a countdown timer on the sales page (Elementor Pro includes one, or install a dedicated timer plugin) and state the deadline clearly in every launch email.
Remove the discount when the deadline passes, every time, without exception. If you extend the deadline because sales were lower than expected, your audience learns that your deadlines are not real, and your next launch will be harder to convert.
How to Create An Online Course for Free
You can build and publish your first course with very little upfront cost. Here is what a near-free self-hosted setup looks like in practice.
WordPress hosting is not completely free, but shared hosting from providers like Hostinger or SiteGround starts at roughly $2 to $3 per month on introductory plans. A domain name runs $12 to $15 per year. That combination is your only mandatory ongoing cost if you want full ownership of the platform.
LearnPress is free to install and includes everything you need for a fully functional course site: a course and lesson builder, quiz creation, student progress tracking, and basic payment integration with PayPal at no cost. Paid add-ons exist for advanced features like drip content and certificates, but they are not required to launch and earn revenue from your first course.
For video hosting, Vimeo’s free plan allows limited uploads and is a clean option for early-stage creators. YouTube is completely free, and setting videos to unlisted means only people with your course link can watch them. Embedding a YouTube video in a LearnPress lesson is a one-step process: paste the video URL into a block and it renders in the student view automatically.
For site design, the WordPress theme directory includes several free education themes that are compatible with LearnPress. They are not as polished as Eduma, but they are a valid starting point for a first launch. Once your course is generating revenue, upgrading to Eduma gives you a professional course site design that matches what students expect from a paid course.
A realistic entry-level budget: WordPress hosting at $3 per month, a domain at $12 per year, LearnPress at zero cost, YouTube for video at zero cost, and PayPal for payments with no monthly fee (transaction fees apply per sale). Total investment in year one: under $50.
FAQs
How long does it take to create an online class?
Most creators spend four to eight weeks building their first course from initial planning to the published first lesson, working part-time on it. The biggest time variable is content production: recording and editing video lessons takes significantly longer than writing text-based content covering the same material. If you have your course outline ready before you start producing and focus on completing one module per week, a structured eight-module course can realistically go live within two months.
How much does it cost to start selling courses online?
A self-hosted WordPress course site using LearnPress costs as little as $40 to $60 in the first year, covering only hosting and a domain name. Adding a premium theme like Eduma and paid marketing tools increases that, but neither is required to launch. Monthly subscription platforms like Teachable and Thinkific start at around $39 per month, which totals more than $450 per year before any transaction fees. The self-hosted route is almost always more cost-effective at the two to three year mark once you account for those recurring fees compounding.
Can I create an online class without any technical skills?
No advanced technical skills are required. LearnPress is built for non-developers: installing the plugin takes under five minutes, and building your course uses the same block editor as any standard WordPress post. Embedding a video, adding quiz questions, setting a price, and connecting a PayPal account are all handled through menu-driven interfaces without writing any code. If you have set up a basic WordPress site before, you have all the technical skills the process requires.
What makes students actually complete an online course?
Completion rates improve when courses have clear per-lesson objectives, short focused lessons (under 15 minutes for video), built-in accountability through quizzes and progress milestones, and community elements like a discussion forum or a student-only group. Drip scheduling, which releases new lessons on a weekly basis rather than all at once, also improves completion by pacing the course to match how people actually learn rather than giving them an overwhelming library on day one. LearnPress supports both quiz-gated progress and drip content delivery through its add-on library.
Read more: WordPress Training: The Complete Guide