This feature allows you to create certificates for courses in LearnPress. You can either use a pre-built template or design your own certificate. Additionally, you can set pricing and a thumbnail for preview.
1. Create Certificate
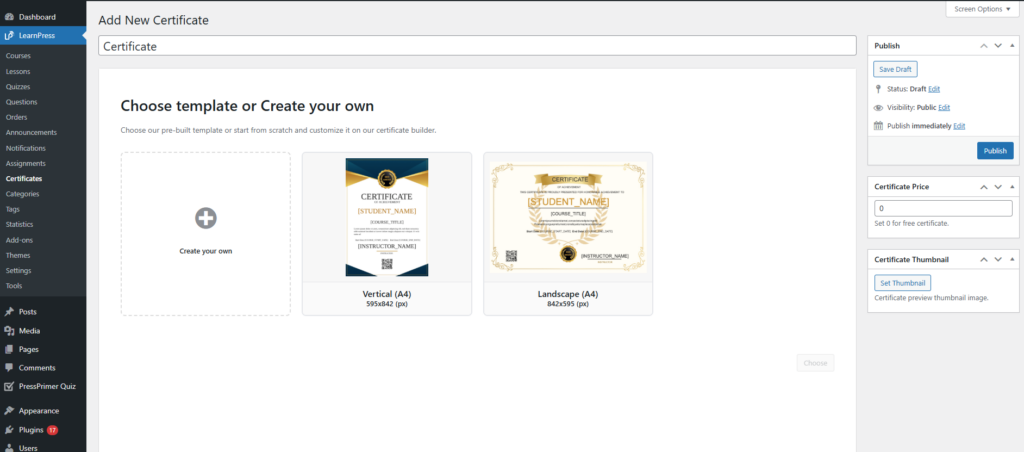
Navigate to Certificate: Go to LearnPress → Certificates → Add New. Enter the certificate title at the top of the page. This helps you identify and manage certificates easily.
You have two options:
Create your own: Start from scratch using the certificate builder.
Pre-built templates: Select from available designs such as: Vertical (A4) and Landscape (A4)
Don’t forget to click Choose after selecting a template.
Publish Settings
- Save Draft: Save without publishing
- Status: Draft or Published
- Visibility: Public or Private
- Publish: Make the certificate live
Set the price for the certificate. Enter 0 if the certificate is free.
Upload a thumbnail image to represent the certificate preview.
After completing all settings, click Publish to create the certificate.
2. Edit Certificate
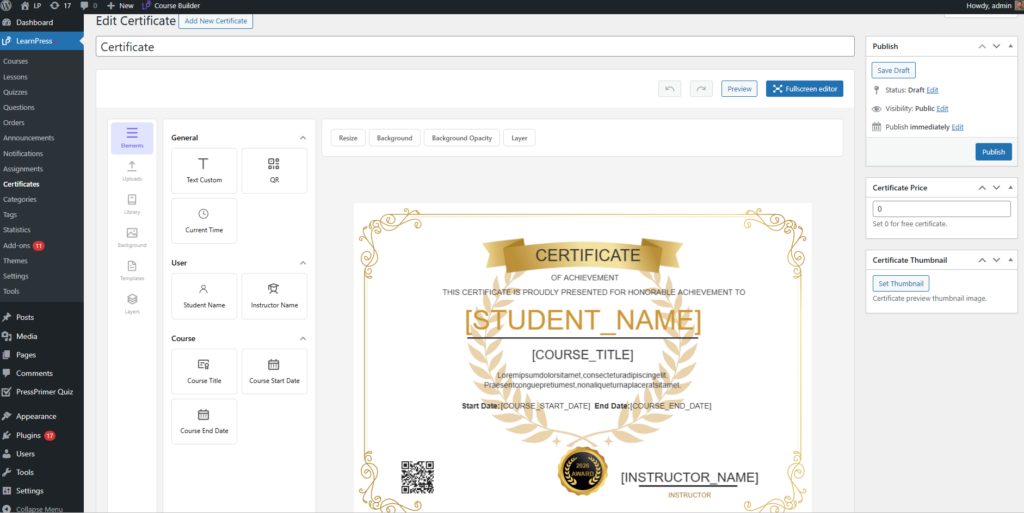
After selecting a template, you will be redirected to the certificate editor. This interface allows you to fully customize the certificate layout, content, and design.
The editor consists of 3 main sections:
Right panel: Settings and publish options
Left panel: Elements and components
Center canvas: Certificate preview and editing area
2.1. Elements and components
2.1.1. General Elements
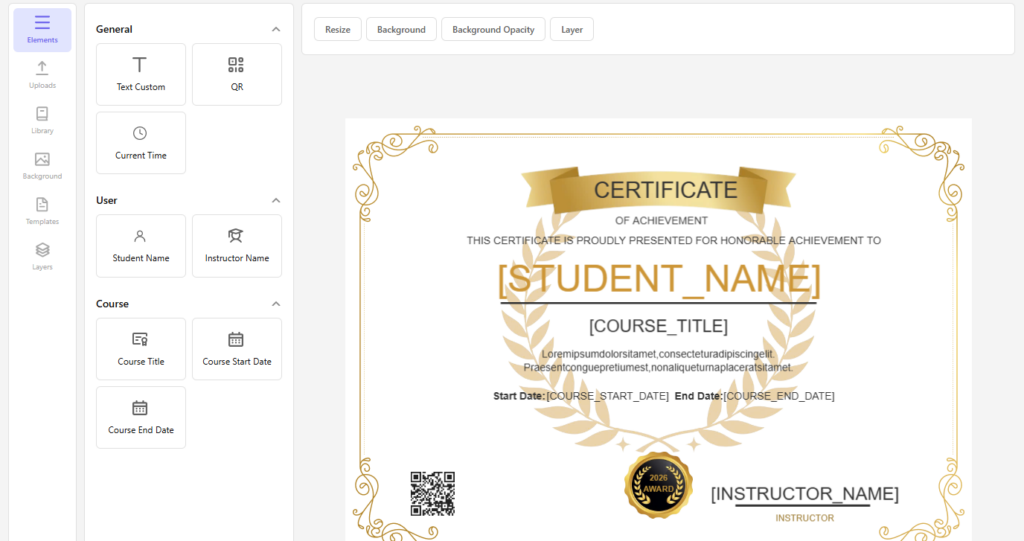
Text Custom: Add custom text
QR: Insert QR code
Current Time: Display current date/time
Student Name: Display student name
Instructor Name: Display instructor name
Course Title: Show course name
Course Start Date: Show start date
Course End Date: Show end date
2.1.2. Uploads
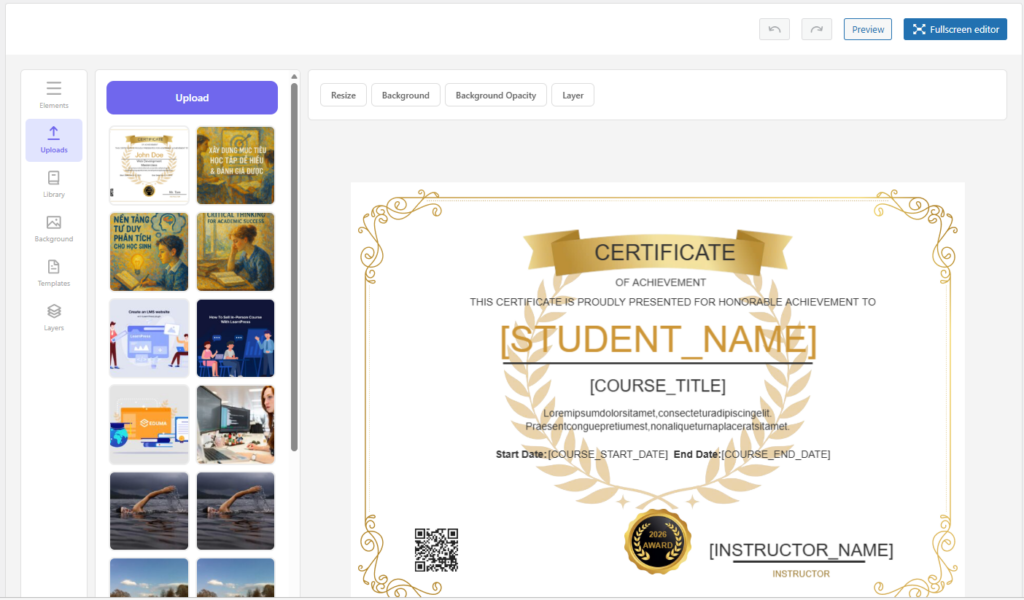
The Upload tab allows you to upload and manage custom images used in your certificate design, such as logos, signatures, stamps, or background elements.
Click the Upload button to add new images from your computer. These images will be stored and available for use in the certificate editor.
After uploading, images will appear in the gallery below. You can select an image to add it to the certificate -> View all uploaded images
Click on any image to insert it into the certificate. Then you can:
- Move (drag & drop)
- Resize
- Adjust position and layout
Common Use Cases:
- Add company logo
- Insert signature of instructor
- Add stamp/seal for authenticity
- Use decorative images for design
2.1.3. Library
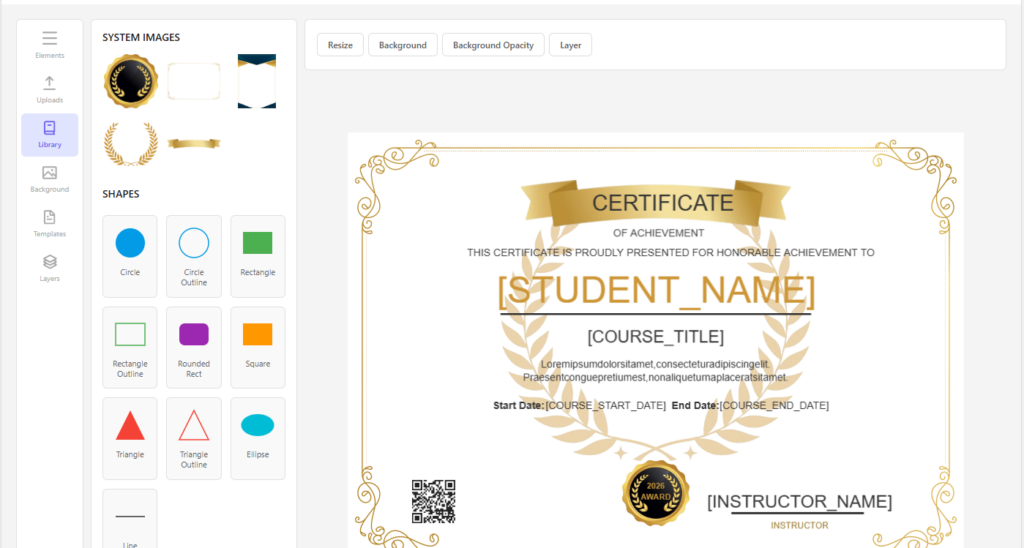
The Library tab provides a collection of built-in assets, including system images and basic shapes, that you can use to design your certificate quickly without uploading custom files.
This section includes pre-designed decorative elements such as:
- Badges / seals
- Borders / frames
- Ribbons
- Decorative graphics
You can click any image to insert it into the certificate.
The Library also provides basic shapes that can be used for layout and design:
- Circle / Circle Outline
- Rectangle / Rectangle Outline
- Rounded Rectangle / Square
- Triangle / Triangle Outline
- Ellipse
- Line
These shapes can be used as backgrounds, highlights, separators, or design elements.
To use an item:
- Click on the image or shape
- It will be added to the certificate
- Drag to reposition
- Resize and customize using the toolbar
After adding an item, you can:
- Resize the element
- Change background color
- Adjust opacity
- Arrange layers (bring forward/send backward)
2.1.4. Background
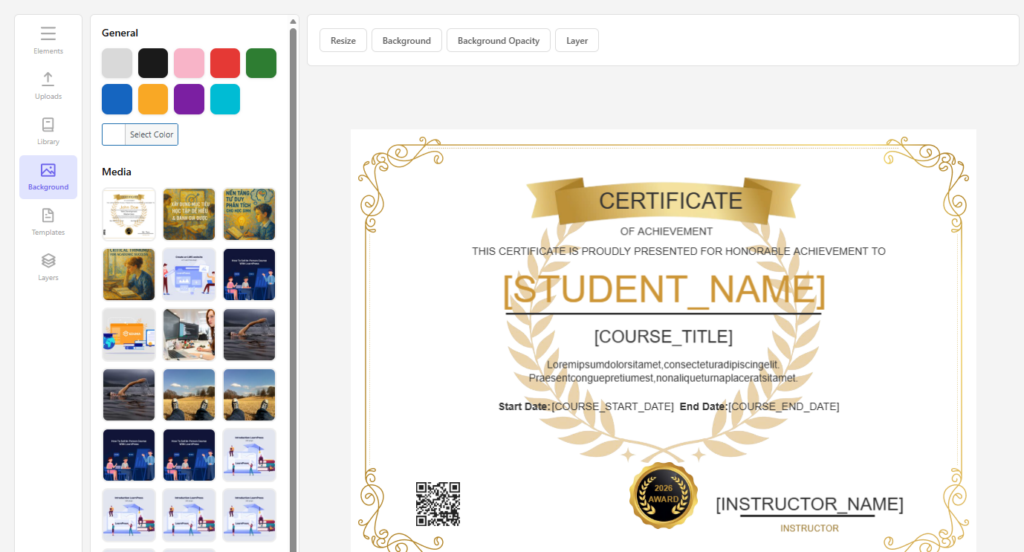
The Background tab allows you to customize the background of the certificate. You can choose a solid color or use an image to create a more visually appealing design.
You can select a solid color as the background: Choose your desired color -> Click the color picker.
You can use an image as the background:
- Select an image from the media library
- Apply the image as the certificate background
2.1.5. Template
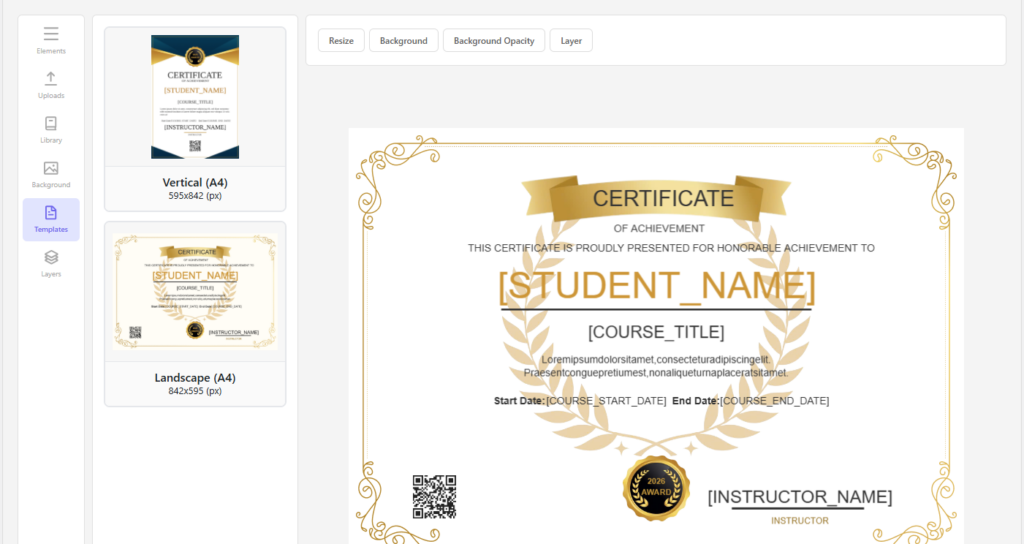
The Templates tab allows you to switch between available certificate templates. These templates provide predefined layouts to help you quickly design your certificate.
There are 2 built-in templates available:
- Vertical (A4): Portrait layout
- Landscape (A4): Horizontal layout
You can select one template depending on your design needs.
To apply a template:
- Go to the Templates tab
- Click on a template
- Confirm the action in the popup
When selecting a template, a confirmation message will appear:
“Applying this template will delete all current content on the canvas.”
2.1.6. Layers
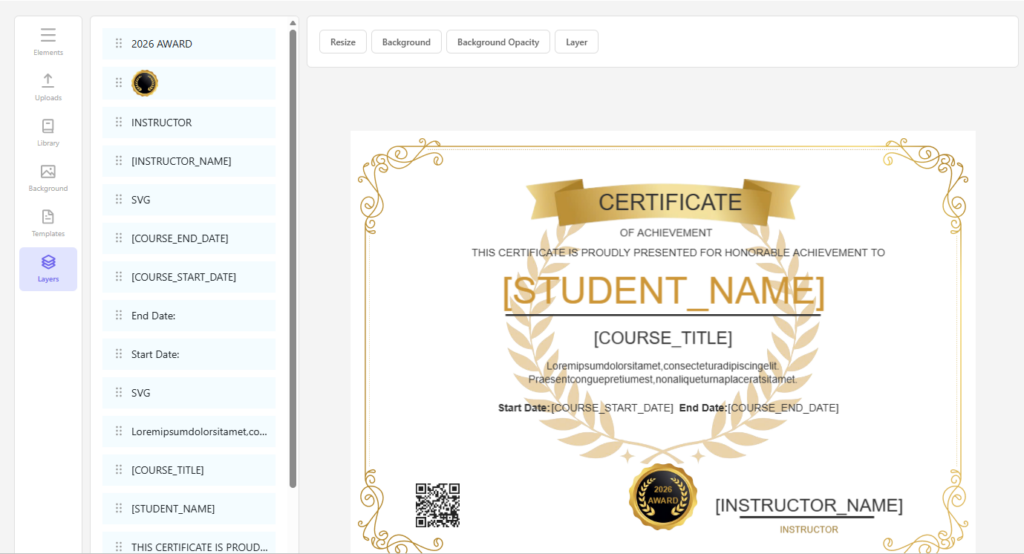
The Layers tab allows you to manage and arrange all elements on the certificate canvas. You can control the order and position of elements to ensure proper layout and visibility.
Each element added to the certificate is treated as a separate layer. These layers are listed in the Layers panel.
You can change the position of elements by:
- Dragging layers up or down in the list
- Moving an element forward (bring to front)
- Sending an element backward (send to back)
This controls which element appears on top of others.
Click any element on the left panel to add it to the certificate. Drag and drop elements to reposition. Resize elements using the resize tool.
2.2. Styling Options
You can customize selected elements using:
- Resize: Adjust size
- Background: Change background
- Background Opacity: Adjust transparency
- Layer: Manage element order (front/back)
Elements like Student Name, Course Title, etc., are dynamic. They will automatically display real data when the certificate is generated.
2.3. Preview & Fullscreen
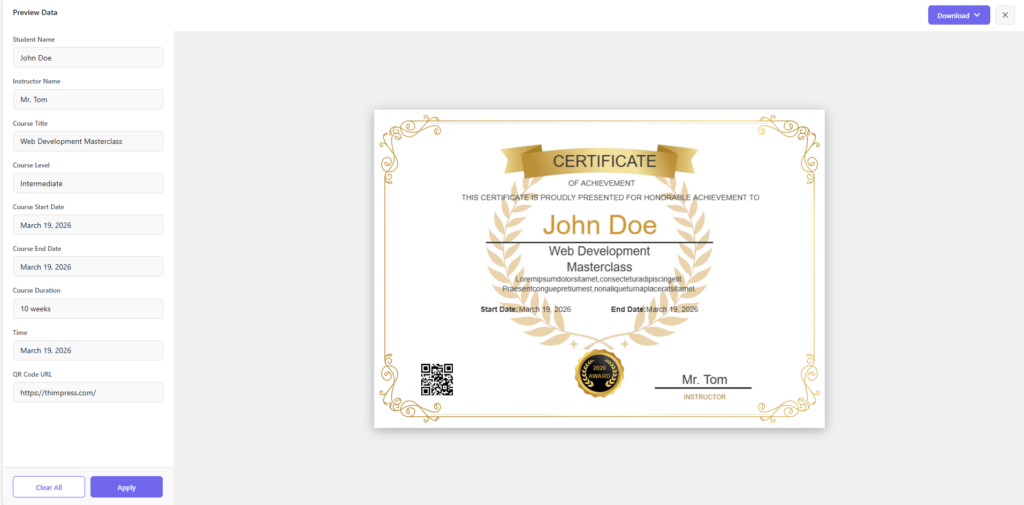
Preview: Check how the certificate looks
Fullscreen Editor: Expand workspace for easier editing
When you select Preview, you can see what the certificate will look like when the user receives it. You can download the certificate as a PNG or PDF. You can fill in the fields on the left, and the certificate will receive the information by clicking the apply button. Clear all to delete data and X to close the preview screen.