Planning Course Structure is the foundation of a successful online course. Whether you’re building a short workshop or a full academic program, having a clear plan ensures that your lessons, sections, course videos, and quizzes work together seamlessly. A good plan helps students navigate through the course logically, boosts student engagement, and supports long-term learning outcomes. Without structure, even the best content can feel disorganized and overwhelming.
In this guide, we’ll walk step-by-step through course lessons planning, course sections organization, creating course quizzes, and building an online course outline using the LearnPress dashboard (as shown in the image). By following these instructions, you can go from a blank course page to a fully structured e-learning experience—without missing any important details in your curriculum design.
Table of Contents
LearnPress – WordPress LMS Plugin
We provide an amazing WordPress LMS plugin to create & sell online courses. Let’s find out!
Try NowUnderstanding the Basics: Lessons, Sections, and Quizzes
LearnPress, a leading WordPress LMS plugin, provides intuitive tools to organize your course. The three main components are:
- Sections: Act like folders. Each course can have multiple sections.
- Lessons: These are the individual content blocks like videos, articles, PDFs.
- Quizzes: Used to assess student understanding after each section or topic.
Planning your course with these elements ensures clarity and logical progression.
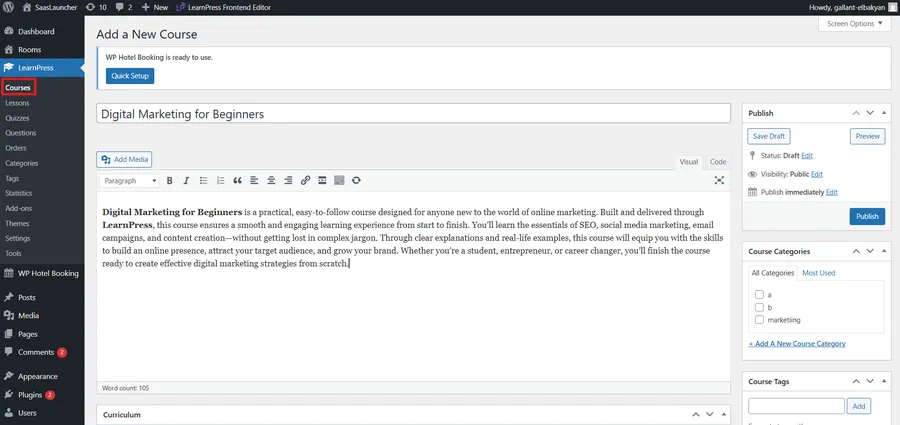
Step 1: Access the Course Editor
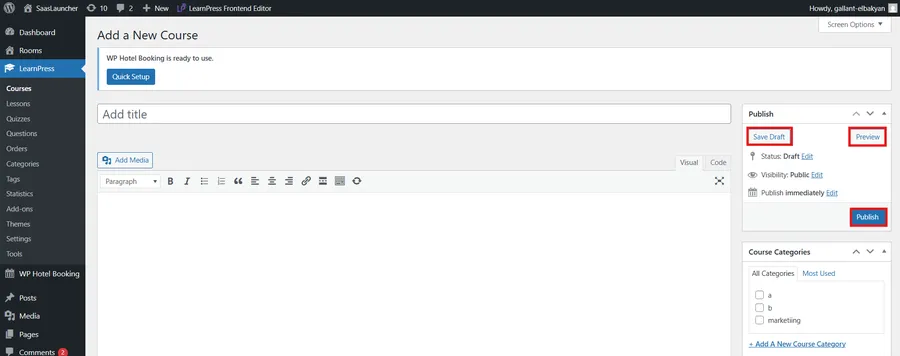
First, log in to your WordPress dashboard and navigate to LearnPress → Courses → Add a New Course. This is where all course organization begins.
- At the top, you’ll find the course title field. Type your course name here—for example, “Digital Marketing for Beginners.”
- Below the title is the content editor where you can write a short course introduction. Keep this concise but informative. Mention what students will learn and the skills they’ll gain. This is an important step in online education, as it sets the tone for learners.
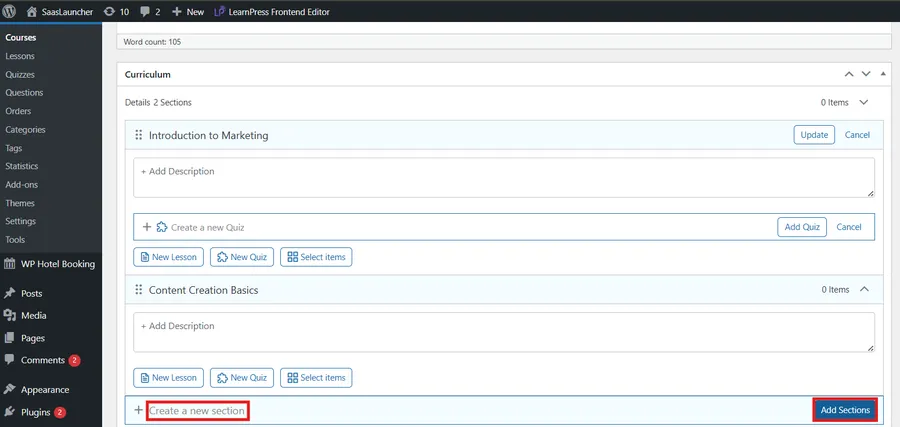
Step 2: Add Sections to Your Course
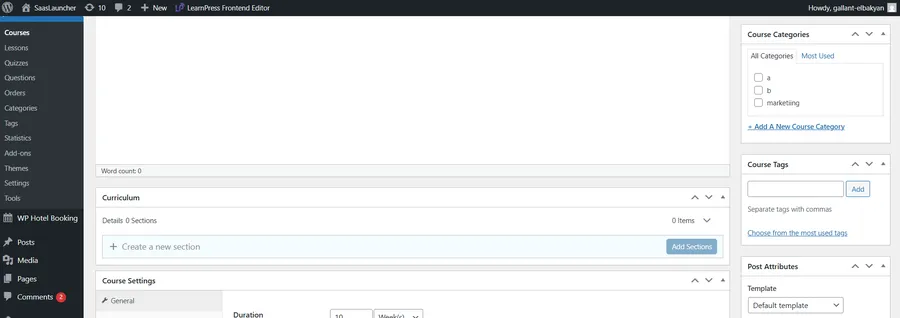
Scroll down to the Curriculum area. This is where course section organization happens.
- Click “Add New Section” to create the first section of your course.
- Give it a clear, descriptive name—e.g., “Introduction to Marketing.”
- Each section acts as a container for lessons and quizzes, helping to maintain a clean e-learning structure.
Tips for better section planning:
- Group related lessons under the same section.
- Keep sections balanced—avoid making one too long compared to others.
- Align sections with your learning objectives for better curriculum design.
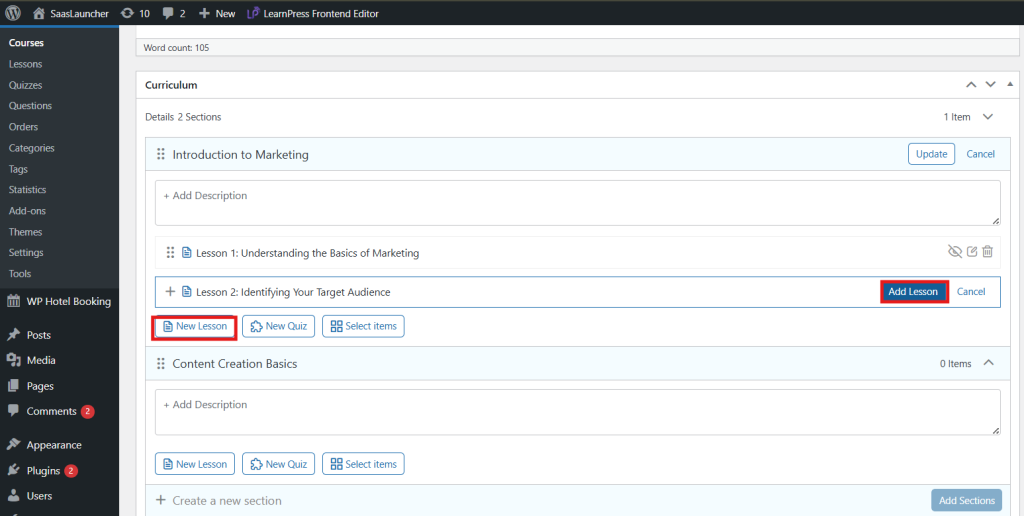
Step 3: Add Lessons Inside Sections
Within each section, you can start course lessons planning:
- Click “Add Lesson” under the section title.
- Give the lesson a name (e.g., “Lesson 1: Basics of Marketing” or Lesson 1: How to create a course in LearnPress).
- After adding lessons, click Update to save them.
For effective student engagement, keep lessons focused on one main topic. If a lesson feels too long, break it into two shorter lessons instead. This keeps the e-learning structure manageable and prevents information overload.
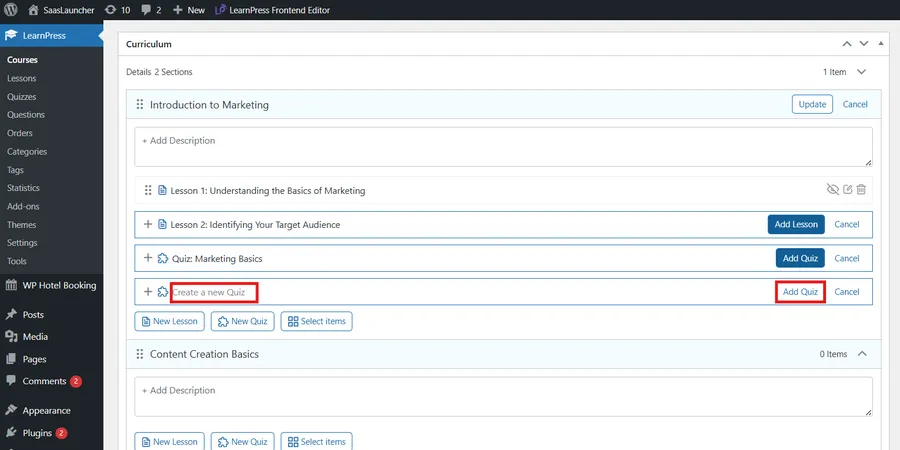
Step 4: Create Quizzes to Test Knowledge
Assessment is key in online education. After adding a few lessons, you can start creating course quizzes:
- Click “New Quiz” under the relevant section.
- Give it a descriptive title like “Quiz: Marketing Basics” then click “Add Quiz“
- Later, you can edit this quiz to add multiple-choice, true/false, or fill-in-the-blank questions.
Quizzes should reinforce what students just learned. When creating course quizzes, keep these tips in mind:
- Match questions to the lesson’s objectives.
- Include a mix of question types to make it more engaging.
- Provide instant feedback so students can learn from mistakes.
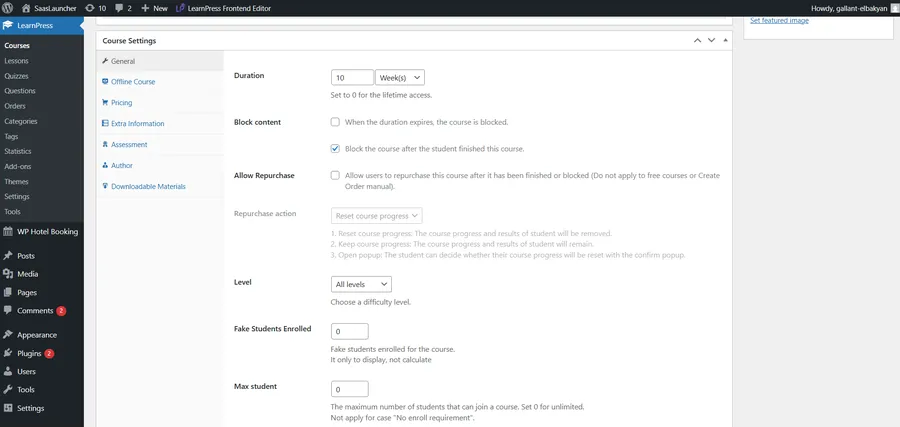
Step 5: Set Course Duration and Access Options
In the Course Settings section (below the curriculum), you’ll configure important details for your online course outline:
- Duration: Choose how long students have access (e.g., 10 weeks). Set “0” for lifetime access.
- Block Content: Enable this to restrict access after the duration expires.
- Allow Repurchase: Useful if you want students to retake the course in the future.
These settings are part of course organization that ensures both flexibility and control over the learning process.
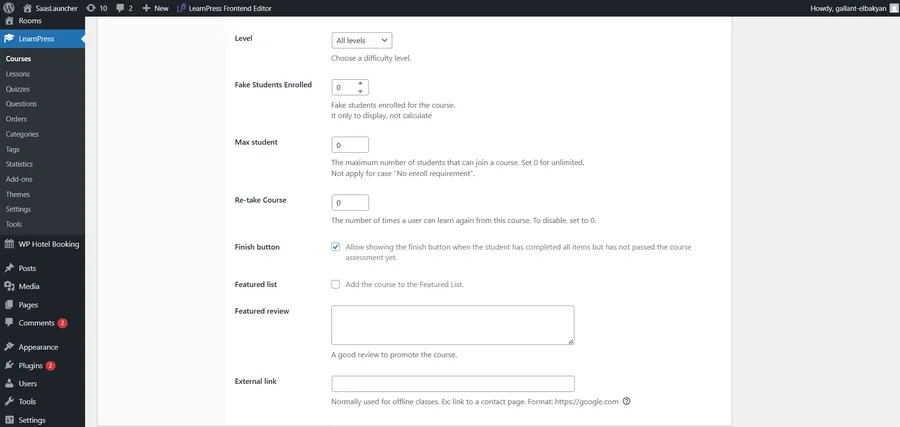
Step 6: Define the Difficulty Level and Student Limits
Still in Course Settings:
- Level: Choose “All levels” if the course suits beginners and advanced learners, or specify Beginner, Intermediate, or Advanced.
- Max Students: Set a limit to maintain personalized attention.
- Re-take Course: Decide how many times students can retake it.
This is important for curriculum design because it determines the pace and target audience for your online education offering.
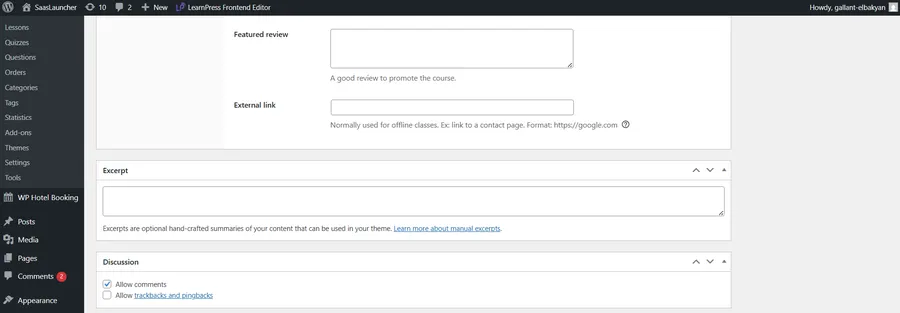
Step 7: Add Featured Information
To make your course more appealing:
- Finish Button: Allow students to mark the course as complete when all items are done.
- Featured List: Highlight the course on your site.
- Featured Review: Write a short, persuasive review about your course.
- External Link: Add a link if your course is delivered elsewhere.
These elements contribute to a more polished e-learning structure and can improve student engagement by making your course look professional and inviting.
Step 8: Add an Excerpt and Media
In the Excerpt box, write a short summary of your course. This will often appear in course listings. Keep it clear and benefit-focused.
You can also upload a featured image in the right-hand sidebar. Use a high-quality, relevant image—tools like the GPT image 2.0 model can help you create polished and contextually aligned visuals—it’s a small detail, but it improves the visual course organization and attracts more clicks.
Step 9: Organize Categories and Tags
On the right panel, you’ll see options for Course Categories and Course Tags:
- Categories help group your courses into broad topics.
- Tags highlight specific themes or skills covered.
Proper tagging helps students discover your course more easily within your online education platform.
Step 10: Save and Preview Your Course
Once you’ve completed course lessons planning, course sections organization, and creating course quizzes, click Save Draft to store your progress. Use Preview to see how your course looks to students.
Check:
- Are lessons in the right order?
- Are quizzes placed where they make sense?
- Does the online course outline feel logical and easy to follow?
Extra Tips for Effective Planning Course Structure
Once your main course structure is in place, these extra tips will help you refine and optimize it for better learning results and stronger student engagement.
- Start with Learning Outcomes – Define what students should be able to do after each section.
- Keep Lessons Short and Focused – Aim for 5–10 minutes per lesson video or a single concept per text lesson.
- Use Quizzes as Checkpoints – Place them at the end of each section to reinforce learning.
- Encourage Interaction – Use discussion boards or assignments to increase student engagement.
- Review and Refine – Even after publishing, revisit your course organization regularly to keep it relevant.
If you’re still unsure about any of the steps, don’t worry—you can watch the detailed, step-by-step guide in the video “Create Course & Introduce Options – Create an LMS Website with LearnPress“ to create your own course with ease.
Conclusion
Planning course structure isn’t just about filling in titles and clicking “Publish.” It’s about creating a clear, logical path for your students—one that balances course lessons planning, course sections organization, and creating course quizzes into a cohesive online course outline.
By following the steps above and using the LearnPress interface effectively, you’ll be able to build a course that reflects strong curriculum design, supports online education best practices, maintains a clean e-learning structure, and maximizes student engagement. With thoughtful course organization, you’re not just creating content—you’re shaping a learning journey that your students will value and remember.
Read more: 10+ Common LearnPress Setup Issues & How to Fix Them
Contact US | LearnPress:
Website: https://learnpresslms.com/
Fanpage: https://www.facebook.com/learnpresslms
Email: [email protected]