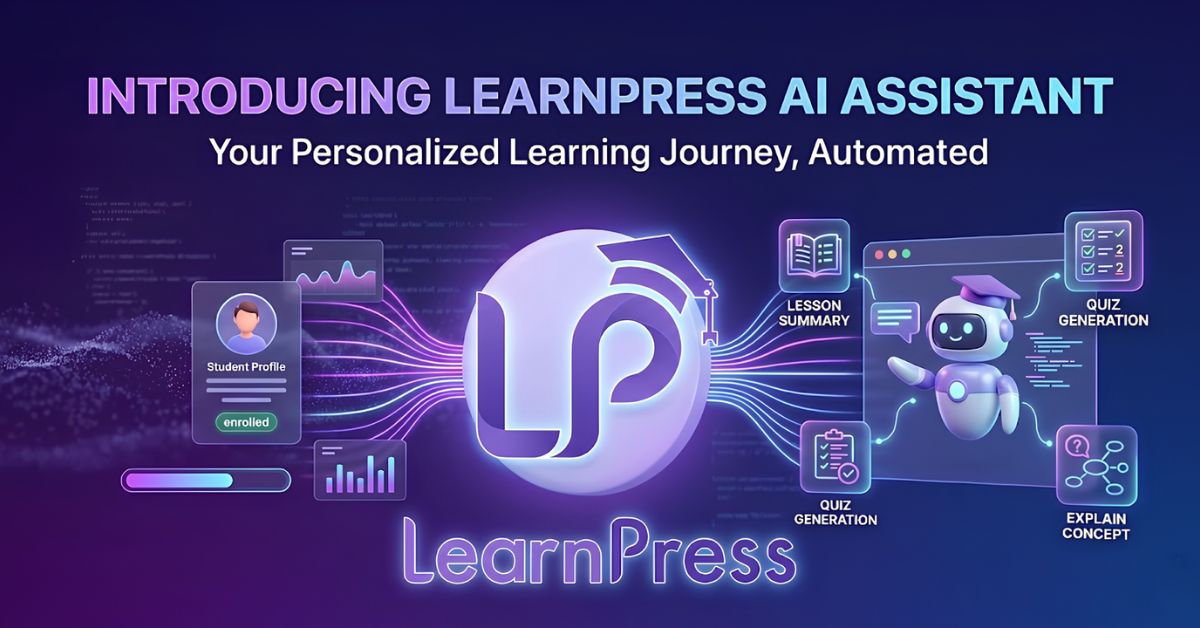
Creating an eLearning platform with WordPress? Installing LearnPress is one of the smartest choices for anyone who wants to build a professional and scalable Learning Management System (LMS) from scratch. LearnPress is a free yet powerful plugin that allows you to create, manage, and sell online courses without needing to code.
Once the plugin is installed, however, many beginners wonder what to do next. How do you configure your course pages, enable payments, and make your site ready for students? That’s where this guide comes in. In this LearnPress beginner tutorial, we’ll walk you through all the essential first steps after installing LearnPress.
Table of Contents
LearnPress – WordPress LMS Plugin
We provide an amazing WordPress LMS plugin to create & sell online courses. Let’s find out!
Try NowComplete the LearnPress Setup Wizard
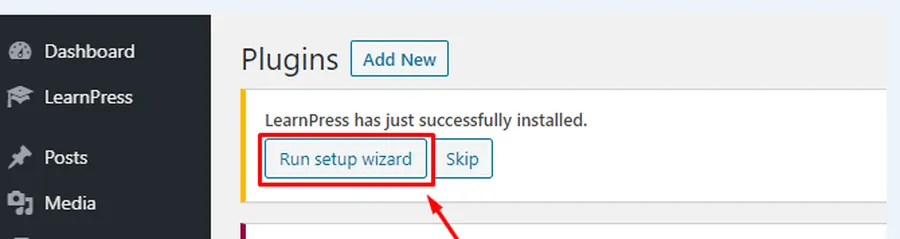
Once you install LearnPress, the plugin will prompt you to run the Setup Wizard. This LearnPress setup guide simplifies your onboarding and ensures your platform is ready in minutes. Here’s what it covers:
- Create essential pages: LearnPress automatically sets up important pages such as Courses, Profile, Checkout, Cart, and Become a Teacher.
- Configure currency settings: Define your preferred currency and symbol placement for your course payments.
- Select default payment methods: You can enable free courses, bank transfer, or integrate with PayPal or Stripe later.
The LearnPress setup guide ensures you won’t miss any important steps in preparing your LMS for students and instructors.
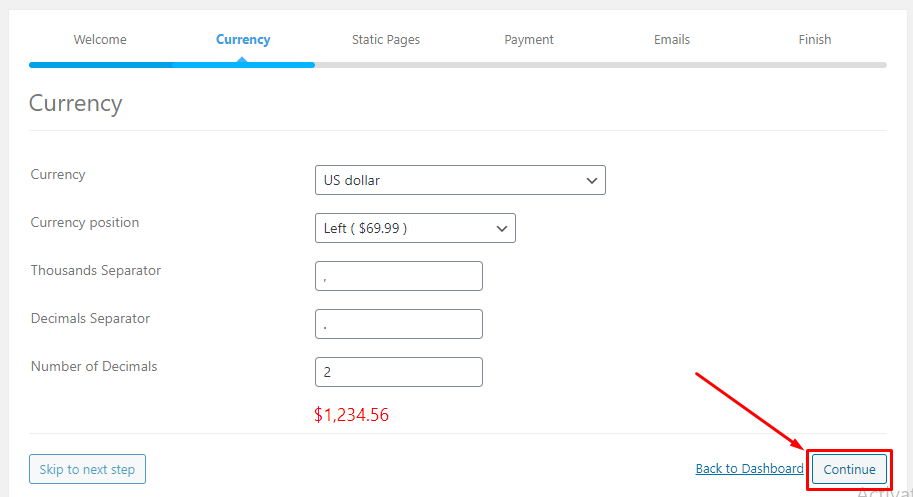
Step 1: Currency
Setting up the currency will help you display course prices suitable for your students’ regions while maintaining a professional website. Accurate currency formatting makes payments clear and prevents confusion.
Detailed Setup Guide:
- Currency: Choose the currency for your LMS, for example: US dollar.
- Currency position:
- Left ($69.99) – symbol before the number.
- Right (69.99$) – symbol after the number.
- Left ($69.99) – symbol before the number.
- Thousands Separator: Choose , for 1,000.
- Decimals Separator: Choose . for 1,234.56.
- Number of Decimals: Example: 2 for 1,234.56.
- Preview: Confirm the sample display $1,234.56.
- Continue: Click Continue or Skip to next step to move on.
Step 2: Static Pages
Setting up static pages ensures that your website displays essential LearnPress content like Courses, Profile, Checkout, and Become a Teacher. These are core to LearnPress course creation, letting students browse courses and instructors manage their profiles smoothly.
Detailed Setup Guide:
- Courses Page: Select an existing page or click Create to generate one automatically.
- Profile Page: Assign a page for users to view accounts and progress, or click Create.
- Checkout Page: Assign a page for enrollments and payments.
- Become a Teacher Page: Allow instructors to apply to teach.
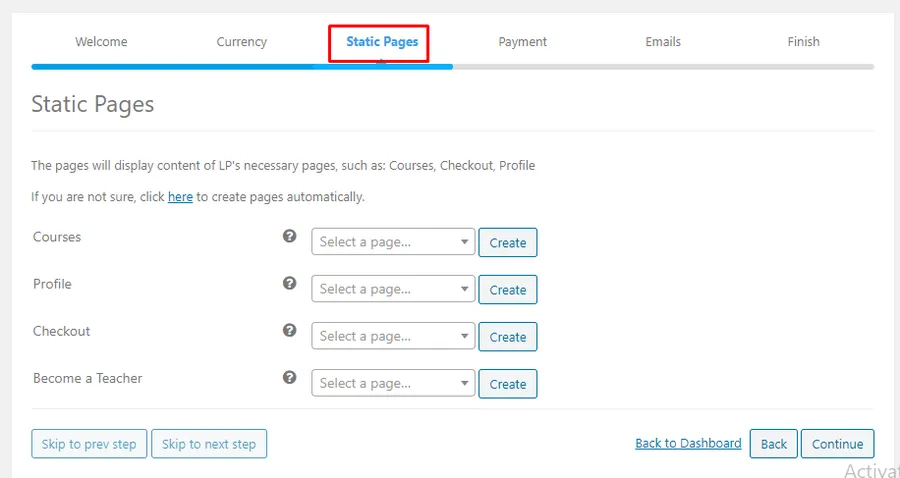
Once all pages are configured, click Continue or Skip to the next step.
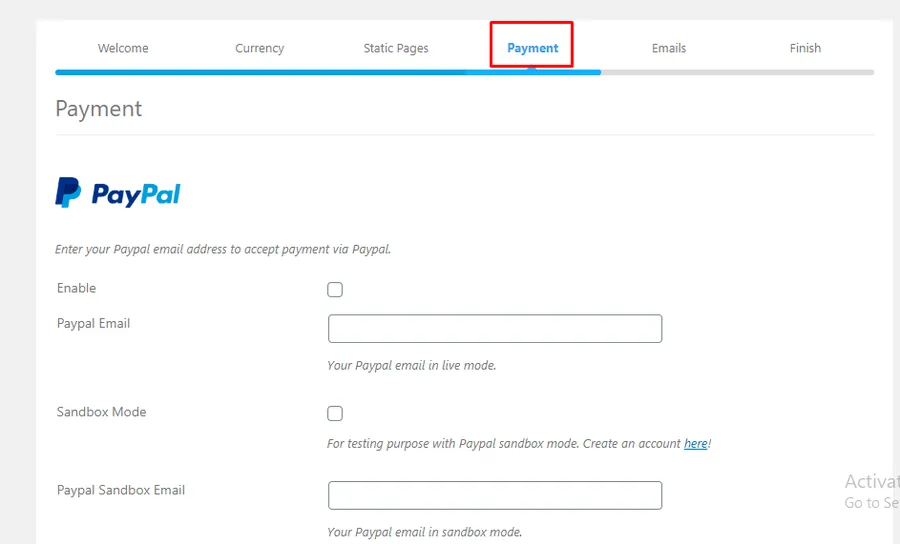
Step 3: Payment
Setting up the payment method will help your LMS accept secure and automatic transactions. This is a key step in LearnPress payment settings, allowing students to pay for courses directly via PayPal. Sandbox Mode is also available for safe testing before launching live payments.
Detailed Setup Guide:
- Enable Payment: Tick the checkbox to activate PayPal.
- PayPal Email: Enter your live PayPal email to receive real payments.
- Sandbox Mode (Optional): Tick this box to test transactions without real payments.
- PayPal Sandbox Email: Enter the sandbox account email for testing.
- Continue: Once finished, click Continue or Skip to next step.
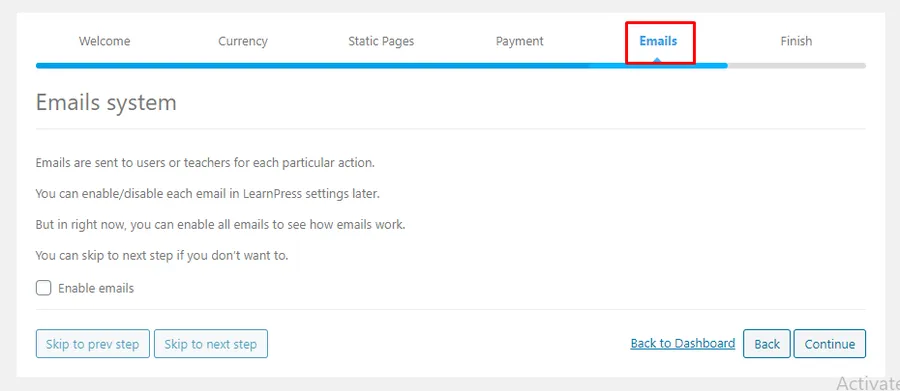
Step 4: Email
Enabling emails will help your LMS automatically send notifications for student and instructor actions like registration, course enrollment, and approvals. This feature in the LearnPress beginner tutorial keeps your users informed and engaged.
Detailed Setup Guide:
- Enable Emails: Tick the checkbox to activate email notifications.
- Understand Email Notifications: LearnPress will handle all enrollment, registration, and progress emails automatically.
- Skip or Continue: If you’re not ready, skip this step; otherwise, click Continue.
Step 5: Finish
Completing the setup finalizes your LearnPress setup guide and lets you start working on your eLearning site. This step provides multiple options to move forward:
- Install Sample Course: Add demo content to test your LMS layout.
- Create New Course: Begin LearnPress course creation immediately.
- Visit Your Site: Preview your LMS from a student’s perspective.
- Back to Dashboard: Return to WordPress admin to manage settings.

Once completed, your LearnPress installation is ready, and your LMS can start accepting students!
Choose a Compatible Theme
The visual design and user experience of your LMS are just as important as its functionality. After installing LearnPress, choosing a LearnPress-compatible theme ensures your website not only works perfectly with the plugin but also looks professional, responsive, and engaging for your learners.
Here are some top recommendations:
- Eduma – A powerful, multipurpose LMS theme packed with beautiful demos for schools, universities, and online academies.
- Course Builder – Tailored for instructors and training institutions that need a modern, flexible design for professional course delivery.
- Coaching – Perfect for personal coaches, consultants, mentors, or online trainers who want to showcase expertise, sell courses, and manage coaching programs in one place.
- IvyPrep – Designed specifically for schools, academies, and educational centers that want a clean, structured look for offering multiple programs and learning tracks.
These themes are fully optimized for LearnPress, come with ready-to-import demos, and are mobile-friendly, ensuring a smooth learning experience on any device. Choosing the right theme early on will save you time, make your platform visually appealing, and create a professional impression for both students and instructors.
Final Tips
Before you launch your eLearning platform, take a few extra moments to ensure everything runs smoothly. First, double-check your LearnPress payment settings to confirm that PayPal or any other method you set up is functioning correctly. If possible, run a test transaction to avoid surprises.
Next, use sample courses to walk through the entire learning experience—from enrollment to course completion and email notifications. This lets you identify and fix any issues before students arrive.
Finally, follow this LearnPress beginner tutorial carefully to avoid missing critical steps. With this LearnPress setup guide, your LMS will be polished, functional, and ready to welcome students and instructors confidently right after installing LearnPress.
FAQs About After Installing LearnPress
Q1. Do I have to use LearnPress-compatible themes?
While not mandatory, using a compatible theme ensures your layout, styling, and LMS features work flawlessly.
Q2. Can I add instructors later?
Yes! You can allow users to register as instructors or manually assign them via the WordPress dashboard.
Q3. How can I offer free courses?
Set the course price to 0 when creating or editing a course, and it will automatically appear as free to users.
Read more: LearnPress Free vs Pro: Which version is better?
Contact US | LearnPress:
Website: https://learnpresslms.com/
Fanpage: https://www.facebook.com/learnpresslms
Email: [email protected]