Running a successful eLearning site with LearnPress means providing a smooth experience, especially when it comes to payments. If you’re looking for a reliable and direct way for students to purchase your courses, integrating a trusted payment gateway is essential. Authorize.net is a popular and secure choice for many online businesses.
This comprehensive guide, updated for 2025, will walk you step-by-step through the LearnPress Authorize.net Integration. We’ll make it easy for you to understand and implement, even if you’re new to payment gateways. Let’s streamline your checkout process!
Table of Contents
What is LearnPress?

LearnPress is a powerful and popular Learning Management System (LMS) plugin for WordPress. It allows educators, coaches, and businesses to easily create, manage, and sell online courses directly from their own websites.
Why Choose Authorize.net as Your LearnPress Payment Gateway?
While LearnPress supports several payment options, Authorize.net offers distinct advantages, making the LearnPress Authorize.net Integration a smart move:
- Direct & Streamlined Payments: Unlike some setups, this integration allows you to process payments directly on your site without needing complex eCommerce plugins like WooCommerce. This keeps your site lighter and the checkout process simpler.
- Enhanced Security: Authorize.net is a leader in payment security. They employ advanced fraud detection suites and ensure sensitive customer data is handled according to strict industry standards (PCI DSS compliant). This builds trust with your students.
- Reliability & Scalability: Authorize.net is built to handle high transaction volumes reliably. As your eLearning platform grows, you can trust it to keep processing payments smoothly.
- Merchant Account Control: You work directly with your Authorize.net merchant account, giving you more control over your funds and reporting compared to some aggregated platforms.
Prerequisites
Before you begin the integration, make sure you have the following:
- A WordPress website with the LearnPress plugin installed and activated.
- An active Authorize.net merchant account. You’ll need your API Login ID and Transaction Key.
- The LearnPress Authorize.net Add-on purchased from ThimPress.
Step-by-Step Guide to LearnPress Authorize.net Integration
Follow these steps carefully to set up the payment gateway:
Step 1: Download the LearnPress Authorize.net Add-on
- After purchasing the add-on, log in to your account on the ThimPress website.
- Navigate to My Account > Orders.
- Locate your order containing the Authorize.net add-on.
- Click Download or Select Version to save the add-on’s
.zipfile to your computer. Tip: Always download the latest compatible version for best performance and security.
Step 2: Install and Activate the Add-on in WordPress
- Log in to your WordPress Admin Dashboard.
- Go to Plugins > Add New.
- Click the Upload Plugin button at the top.
- Click Choose File, select the
.zipfile you downloaded in Step 1, and click Install Now. - Wait for the installation process to complete.
- Once installed, click the Activate Plugin button.
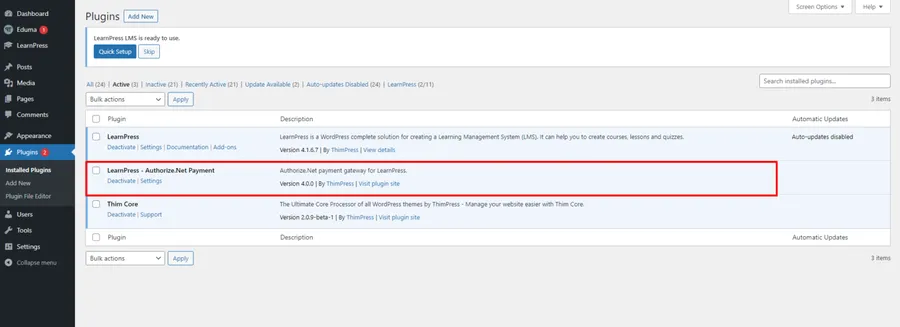
You should now see the LearnPress Authorize.net add-on listed among your active plugins.
Step 3: Configure Authorize.net Settings in LearnPress
Now, let’s tell LearnPress to use Authorize.net:
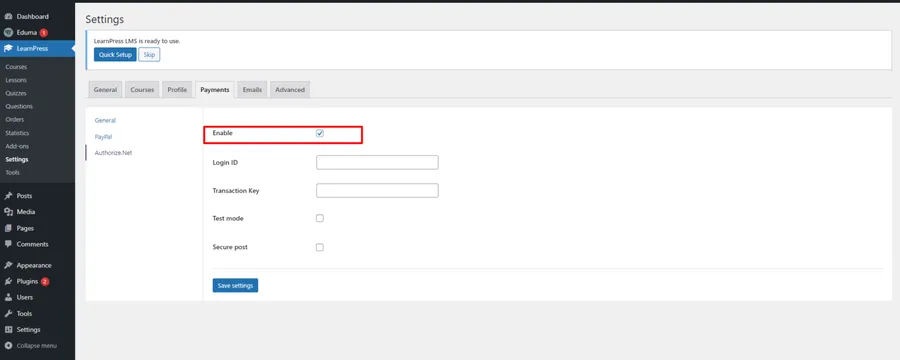
- In your WordPress Dashboard, navigate to LearnPress > Settings.
- Click on the Payments tab.
- Select the Authorize.net sub-tab (it should appear after activating the add-on).
- Check the Enable box to activate this payment gateway.
Step 4: Enter Your Authorize.net API Credentials
This step securely connects your LearnPress site to your Authorize.net account:
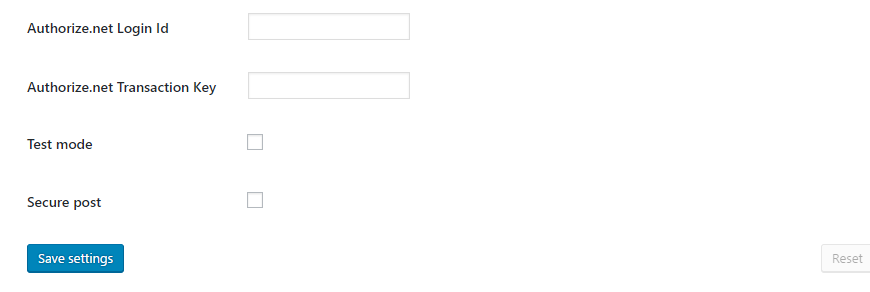
- While still in the LearnPress > Settings > Payments > Authorize.net section, locate the fields for API Login ID and Transaction Key.
- Carefully copy these credentials from your Authorize.net merchant account interface. Security Tip: Treat these keys like passwords; keep them confidential.
- Paste the Login ID and Transaction Key into the respective fields in LearnPress.
- Choose the Transaction Mode (Live or Sandbox/Test). Use Sandbox for testing purposes before going live.
- Click the Save settings button at the bottom.
Step 5: Verify Checkout Experience
Your LearnPress Authorize.net integration is now configured! The final step is to ensure it appears as an option for your students:
- (Optional, but recommended) Use a test student account or temporarily set a course price low for testing.
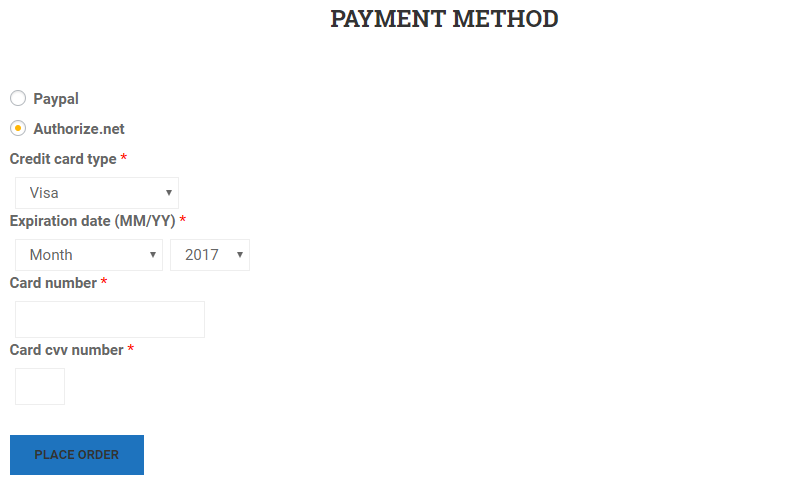
- Go through the course enrollment process as a student.
- On the checkout page, you should now see Authorize.net listed as a payment option.
- If using Sandbox mode, perform a test transaction using Authorize.net’s test card numbers. If Live, ensure the option appears correctly before making real courses available.
Unlock More Power with the LearnPress PRO Bundle
Want to take your eLearning site to the next level? The Authorize.net add-on is also included in the LearnPress PRO Bundle. This bundle packages our most powerful premium add-ons together at a significant value, including features like:
- Assignments Add-on
- Certificates Add-on
- Content Drip Add-on
- And many more!
Enhance your course delivery, student management, and monetization capabilities with the full suite of tools.
Frequently Asked Questions (FAQs)
Q1: Do I need WooCommerce to use the LearnPress Authorize.net Integration?
A: No! This integration works directly with LearnPress, allowing you to process payments without installing WooCommerce, keeping your site lean.
Q2: Is the Authorize.net integration secure?
A: Yes. Authorize.net is a highly secure payment gateway. The integration ensures data is handled securely, and sensitive card details are processed on Authorize.net’s secure servers, not stored on your WordPress site.
Q3: Can I test the integration before accepting real payments?
A: Absolutely. Authorize.net provides a Sandbox environment, and you can select “Sandbox Mode” in the LearnPress settings (Step 4) to run test transactions using test card details provided by Authorize.net. Remember to switch to “Live Mode” when you’re ready.
Conclusion
Setting up the LearnPress Authorize.net Integration provides a secure, reliable, and direct payment solution for your online courses. By following the steps outlined in this guide, you can offer a seamless checkout experience for your students, building trust and simplifying your operations. Focus on creating great content, knowing your payment processing is in good hands.
Read More: How To Migrate From Tutor LMS To LearnPress